background image


1.


In the case of a flue pan in the fire, make sure to leave enough space to the drain the pan. 

2.


Allow the cement to dry for 24 hours. 


3.


After at least 24 hours, check the condition of the joints in the brick. Fill all cracks and 

crevices with brick cement. 


4.


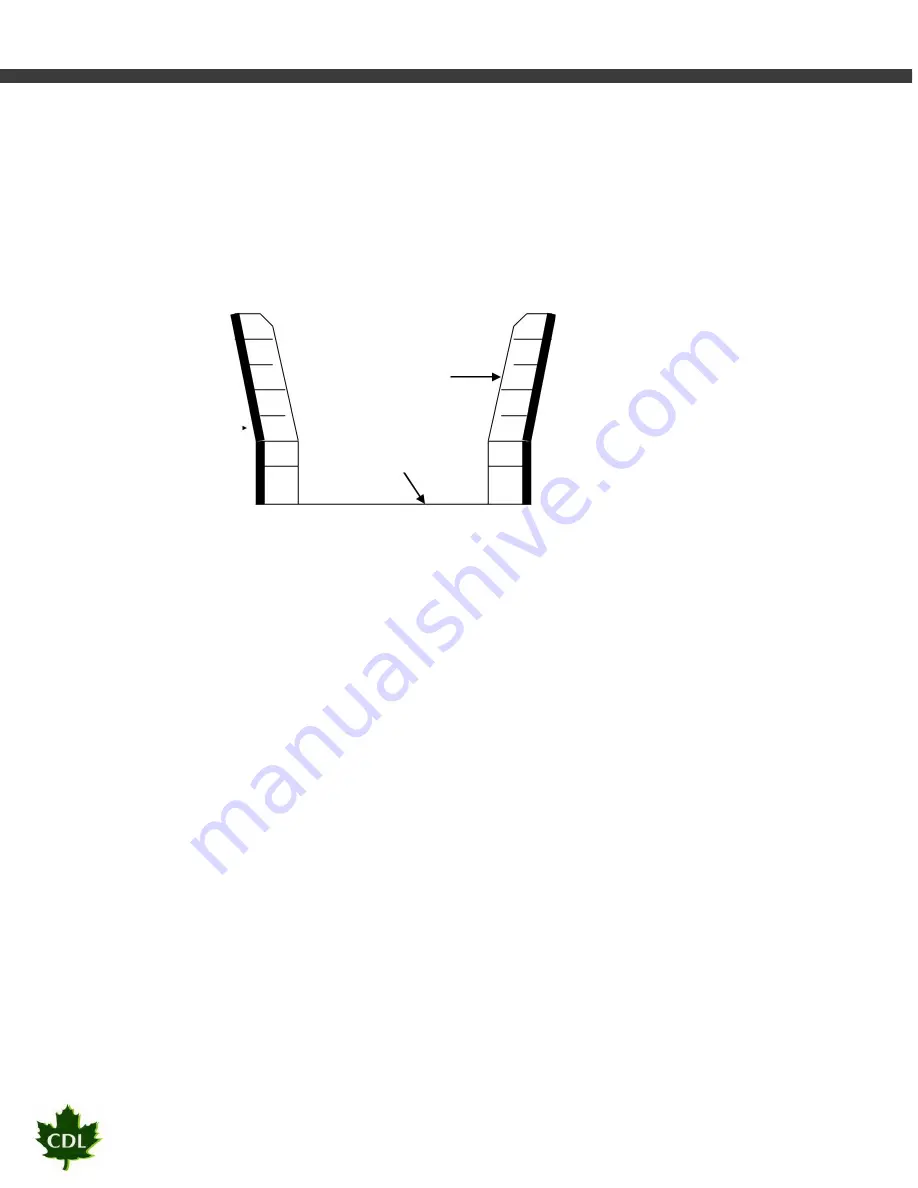
Fill to equality the rear sides of the evaporator with sand, insulating wool or granular 

insulation  (Zenolite).  Leave  an  air  space  under  the  smoke  chimney  to  allow  sufficient 

room for the smoke to escape (see photos on the next page). 


5. 


Bricks 

Insulating 

Image B 

panel or 

Grilles 

ceramic 


wool. 


6.


Place the pans on the evaporator, starting with the rear water pan (the largest). Place it 

against the collar at the rear. Then install the syrup pans at the front. Make sure that the 

pans are leveled and finally, install the stack. 


7.


Install it or the flashings on the roof. Make sure to seal the gasket to prevent leakage. Next, 

install the steam pipes (if applicable), and the smoke pipe. Put the collars and finally install 
the Chinese hats and/or hinge covers. Make sure that the prevailing wind will shut the lid. 
The  last  step  is  to  attach  steel  cables  to  the  pipes  in  order  to  keep  them  in  place.  It  is 
important not to over tighten the cables because the chimney expands as it gets hot. 


8.


If you have a water flue pan in the fire, raise the front of the pan 3/16" to facilitate 

drainage. 


9.


Install the fleet boxes and connections. Put Teflon tape on each of the threads to avoid 

leaks. 

10.


Install it at water level. 

11.


Install the dispensing valve on the last syrup pan. 


12.


Use only dry wood, without paint or other chemicals. Never use plastic pipes, plastic bags, 

tires, coal or any other fuel. The use of non-authorized products will void the warranty. 


Note: The quality of wood you use is an important factor in the  performance  of your 

evaporator.  Poor  quality  wood  will  cause  a  reduction  in  the  evaporation  level,  more 

frequent timber loading equals darker syrup. For example: the oak gives 29 million BTUs 

per cord vs 16 million BTU for the pine. (See table 1) 


Les Équipements d’Érablière CDL Inc. 

Summary of Contents for The Traditional

Page 1: ...USER MANUAL Wood Evaporator The Traditional Les Équipements d Érablière CDL Inc 10 16 ...

Page 2: ...e note of these details for future reference Brand __________________________________________ Purchase date ____________________________________ Model Number ___________________________________ Serial Number ____________________________________ Position of the serial number The serial number is located behind the evaporator on the piece of black iron Serial Les Équipements d Érablière CDL Inc 2 ...

Page 3: ...neys When the time comes to position your evaporator make sure the floor is made of cement or ceramic that is hard enough to support the weight of the evaporator and its contents In addition you must have a minimal distance of 24 between the walls and the evaporator If you need to be closer to a wall a heat resistant coating should be installed on the wall Make sure that each chimney is not obstru...

Page 4: ...ate an air chamber by pressing a metal roof sheet against the stainless steel sheet before installing the panels or the wool 4 2 With heat resistant bricks start by covering the bottom of the evaporator Subsequently cover the walls Start at the front bottom and gradually go up and toward the rear Brick cement must be applied in a thin layer behind and on each side of the bricks to ensure the solid...

Page 5: ...e smoke pipe Put the collars and finally install the Chinese hats and or hinge covers Make sure that the prevailing wind will shut the lid The last step is to attach steel cables to the pipes in order to keep them in place It is important not to over tighten the cables because the chimney expands as it gets hot 8 If you have a water flue pan in the fire raise the front of the pan 3 16 to facilitat...

Page 6: ...rature cement is used to hold the bricks together and seal the leaks Table 1 Heat from different woods Millions BTUs per cord Oak 29 Red Maple 24 Spruce 16 Maple 29 Larch 24 Fir 16 Beech 28 White Birch 23 Yellow Birch 26 Poplar 18 Ash 25 White pine 17 Orme 25 Lime 17 Les Équipements d Érablière CDL Inc 6 ...

Page 7: ... 1 160 4 x 8 2 thick 40 sq ft 2 x 10 1 170 4 x 8 2 thick 50 sq ft 2 x 12 1 180 4 x 8 2 thick 60 sq ft 3 x 8 1 170 4 x 8 2 thick 48 sq ft 3 x 10 1 180 4 x 8 2 thick 60 sq ft 3 x 12 1 190 4 x 8 2 thick 72 sq ft 3 x 12 2 190 4 x 8 2 thick 70 sq ft 3 x 14 2 200 4 x 8 2 thick 84 sq ft 4 x 12 2 235 4 x 8 2 thick 96 sq ft 4 x 14 3 250 4 x 8 2 thick 112 sq ft 4 x 16 3 265 4 x 8 2 thick 128 sq ft 5 x 12 3 ...

Page 8: ...Image C Installation of an evaporator Les Équipements d Érablière CDL Inc 8 ...

Page 9: ...ng split hardwood measuring 2 to 3 in diameter and 20 long for smaller evaporators and about 4 to 6 by 36 for bigger evaporators Completely fill the fire box up to 4 from the syrup pans Be sure to keep a distance of at least 6 between the doors and the wood Light the fire 7 The use of an anti foaming agent is needed for proper operation of the evaporator If the syrup generates too much foam operat...

Page 10: ...the evaporator at the rear More this space is narrow weaker the draw will be A smoke return inside the shack is a good indicator of a lack of draw if this happens it is necessary to increase the size of the passage This passage should be cleaned periodically to ensure that it is not obstructed Have a minimum of 3 of pipe above the top of the roof and a minimum of one and a half times the length of...

Page 11: ...at on the first syrup pan Intense heat in the front the doors become red The evaporator lacks draw Adjust the draw The wood is too close to the doors It must be at least 6 from the door If you installed a fan reduce the speed Ideally protect the doors and the font front with insulation Intense heat in the chimney the stack becomes red or the evaporator isn t boiling enough The evaporator has too m...

Page 12: ...eave for 15 minutes Drain and rinse one last time 5 Never use abrasive products wire brushes steel wool or products containing chlorine or muriatic acid 6 If there is burnt syrup on the exterior of the pans you can use a commercial oven cleaner cold oven The cleanser will dissolve the syrup without damaging the pans To return the shine of the pans use an industrial foam cleaner for glass IMPORTANT...

Page 13: ... too much stone in the water pan it could burn or crack at the bottom of the grooves It should be checked each day Storing in between seasons 1 Install the pans on wooden blocks to allow air circulation all around the pans Too much moisture may damage the pans 2 Make sure that the pans are clean Remove any stone by doing a good acid wash If necessary brush the rays inside and outside of the water ...

Page 14: ...32 2 29 29 2 24 24 1 18 24 Evaporator Diameter Smoke Dimensions Pipe Length of Grids 5 x 16 22 42 5 x 14 22 42 4 x 16 20 42 4 x 14 20 42 4 x 12 18 36 3 x 14 16 42 3 x 12 16 36 3 x 12 15 36 3 x 10 15 36 2 x 10 13 36 2 x 8 11 30 2 x 8 10 30 2 x 6 9 24 1 x 5 7 20 Les Équipements d Érablière CDL Inc 14 ...

Page 15: ...8 31 117 5 x 12 7 83 100 376 31 37 5 141 6 x 10 7 103 123 7 467 31 37 5 141 6 x 12 7 112 134 5 508 37 2 45 169 PERFORMANCE Evaporation in gallons of water hour Dimensions Imperial Litres U S Gallons Gallons 1 x 5 15 68 18 1 x 6 18 82 21 2 x 6 24 109 29 2 x 8 32 145 39 2 x 8 50 227 60 2 x 10 62 281 75 3 x 10 75 340 90 3 x 12 90 409 108 3 x 12 105 477 126 3 x 14 123 558 147 4 x 12 120 545 144 4 x 14...

Page 16: ...the installation of your evaporator or for instructions regarding the use of the evaporator 7 Expenses incurred for making the appliance accessible for servicing and travel costs 8 Service calls to repair the insulation or the brickwork of the evaporator 9 Breakage of iron pieces if a fan has been installed 10 Service calls after 2 years 11 Damages caused by repairs performed by unauthorized servi...

Page 17: ...egal rights According to the state or province it is possible that you have other rights If you need to call for repair Keep your receipt delivery slip or any other appropriate payment record to establish the warranty period in case you ever need to call for repair If a repair is performed it is in your best interest to obtain and keep all receipts The service you are entitled to under this warran...

Reviews: