


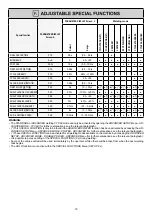
5
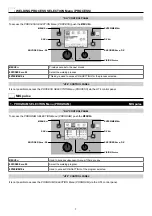
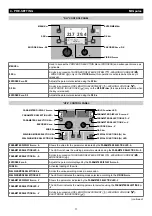
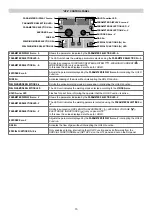
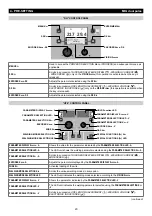
WELDING MODE SELECTION Key
Each time this is pushed the following welding modes can be selected (only for pulsed and double pulsed MIG, synergic and
manual welding processes) on the feeder (on the welding machine the welding mode is selected using a specific menu - see the
appropriate paragraphs) according to a specific sequence:
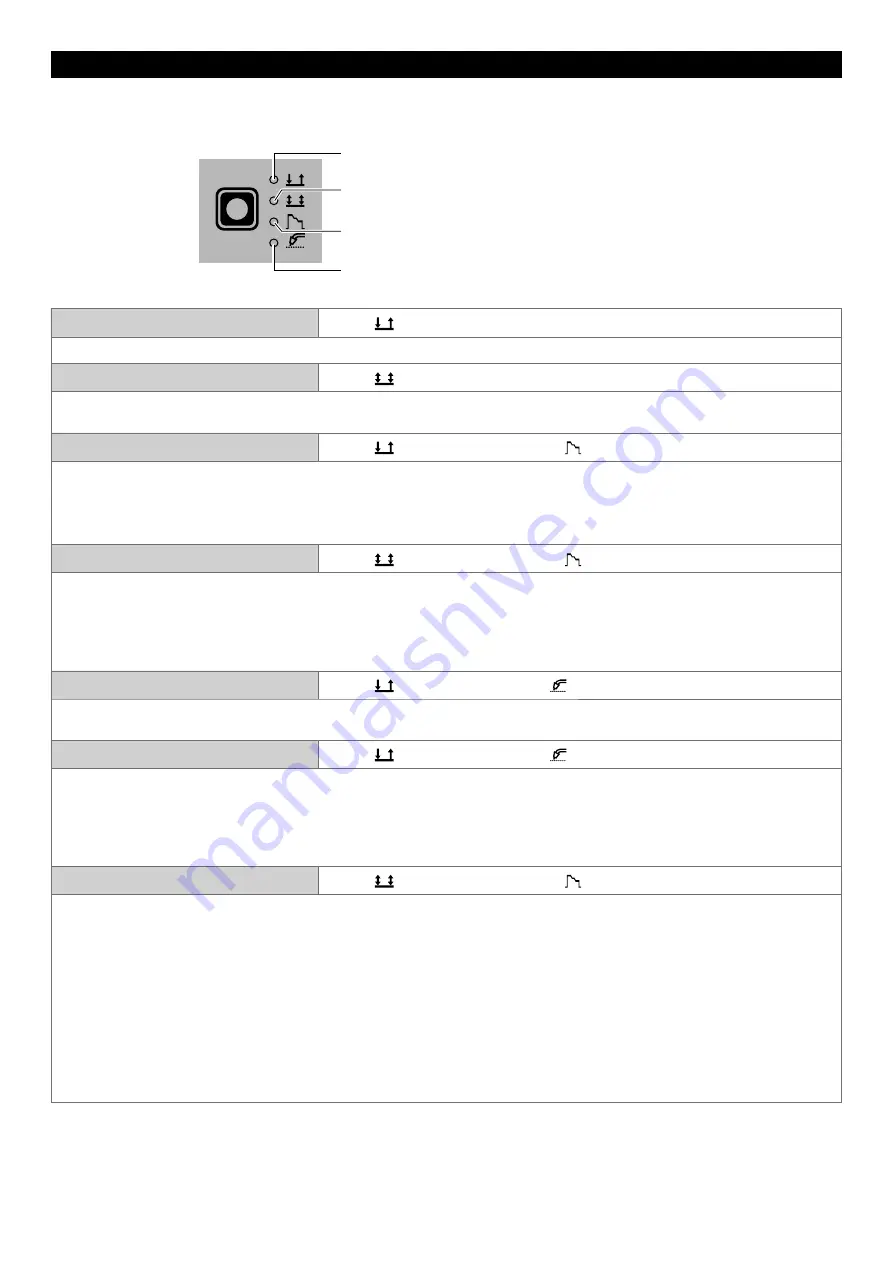
SPOT LED
CRATER LED
4T LED
2T LED
WELDING MODE SELECTION LED
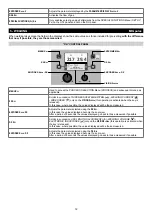
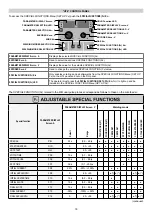
TWO STROKE (2T)
2T LED
(
) switched on
Pressing the TORCH TRIGGER starts the welding cycle, which will stop when it is released.
FOUR STROKE (4T)
4T LED
(
) switched on
1) Pressing and releasing the TORCH TRIGGER will start the welding cycle.
2) Pressing and releasing the TORCH TRIGGER will stop the welding cycle.
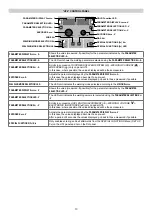
CRATER 2T
2T LED
(
) switched on -
CRATER LED
( ) switched on
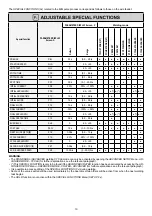
1) When the TORCH TRIGGER is pushed the arc ignites and the parameters assume the values for the “initial crater” for a time
set by means of the INITIAL CRATER DURATION (F10) function.
After that the parameter values become those for “welding” for a time defined by the INITIAL SLOPE (F11) function.
2) When the TORCH TRIGGER is released the parameters take on the “final crater” values for a time set by means of the FINAL
CRATER TIME (F15) function, for a period of time set using the FINAL SLOPE (F12) function..
CRATER 4T
4T LED
(
) switched on -
CRATER LED
( ) switched on
1) When the TORCH TRIGGER is pushed the arc ignites and the parameters assume the values for the “initial crater”.
2) When the TORCH TRIGGER is released the parameters take on the “welding” values for a time set using the INITIAL SLOPE
(F11) function.
3) When the TORCH TRIGGER is pushed again the parameters take on the “final crater” values for a time defined using the
FINAL SLOPE (F12) function.
4) Releasing the TORCH TRIGGER will end the welding cycle.
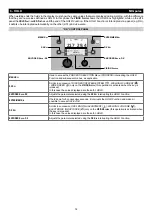
SPOT WELDING
2T LED
(
) switched on -
SPOT LED
( ) switched on
This is used so that on pressing the TORCH TRIGGER spot welding is done for a time period set beforehand (in seconds), after
which the arc switches off automatically.
STITCH WELDING
2T LED
(
) switched on -
SPOT LED
( ) flashing
To begin stitch welding:
1) Press the TORCH TRIGGER to start the welding current and wire feed.
At this point the welding machine automatically carries out a succession of welded portions followed by a pause, according to
the times entered previously.
This procedure stops automatically only when the TORCH TRIGGER is released.
2) When the TORCH TRIGGER is pushed again the torch begins a new interval welding cycle.
CYCLE
4T LED
(
) switched on -
CRATER LED
( ) flashing
■
STANDARD
1) When the TORCH TRIGGER is pushed the arc ignites and the parameters assume the values for the “initial crater”.
2) When the TORCH TRIGGER is released the parameters take on the “welding” values for a time set using the INITIAL SLOPE
(F11) function.
3) When the TORCH TRIGGER is pushed and released within
1
second, the parameters activated are those set for the “cycle”
functions. The operation can be repeated by switching between the “cycle” level and the “welding” level an infinite number of
times.
4) When the TORCH TRIGGER is pushed and held down for a period of time of
more than 1
second, the parameters activated
are those with the values for the “final crater” for a period of time defined using the FINAL SLOPE (F12) function.
Releasing the TORCH TRIGGER will end the welding cycle.
■
ADVANCED
In ADVANCED operating mode, in addition to the settings described above, the welder is able to set the up “slope” (FIRST SLOPE
(F18)) and down “slope” (SECOND SLOPE (F21)) for the “cycle” level.


