C-9877
CAUTION: Disconnect the modules.
We will use:
(
1
)
Control board
Arduino type
1
(
2
)
Shield Module
1
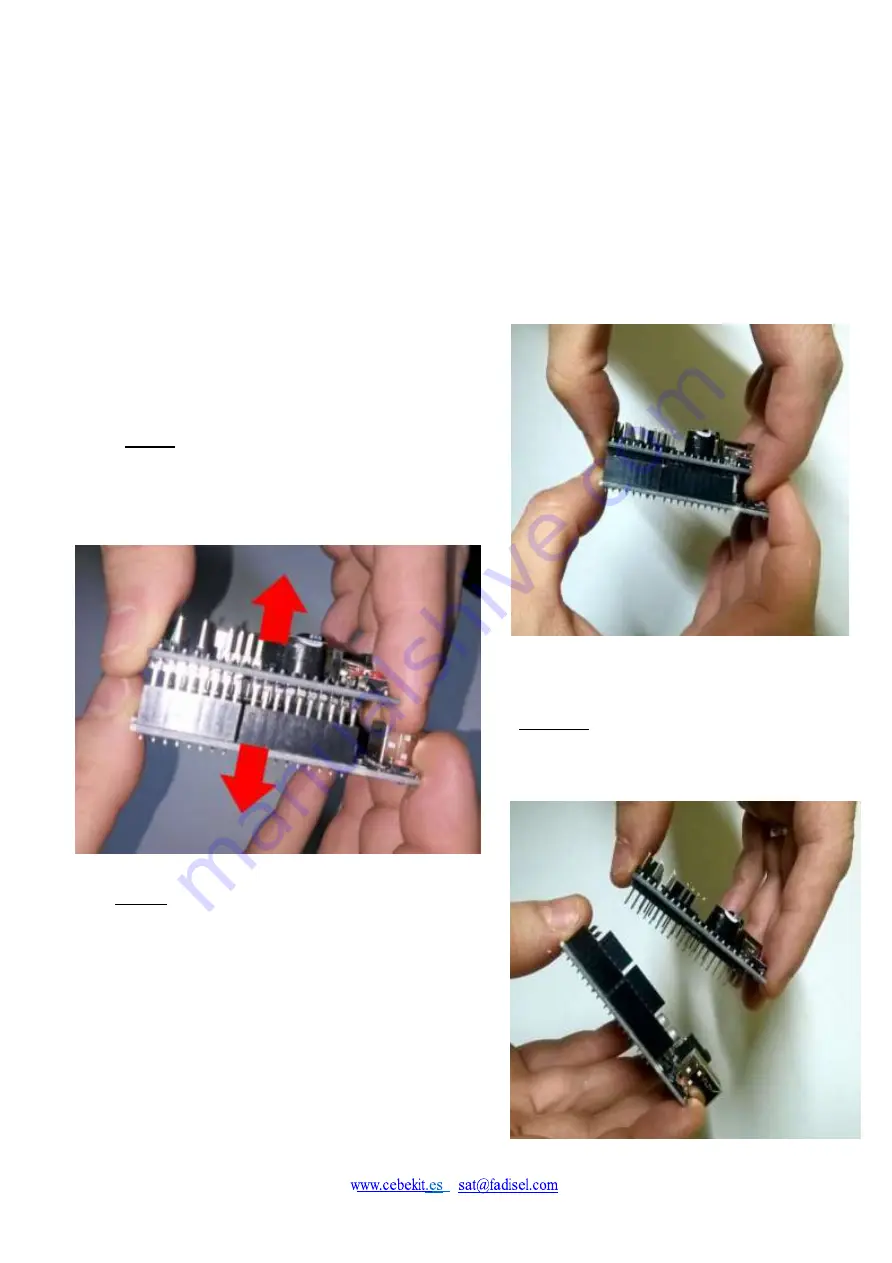
The Arduino main board is supplied already assembled with the Shield module in order to not damage
connectors.
It will be necessary to unplug them according to the following instructions:
Firstly :
First: Strongly grasp the
two circuit boards as shown in the
picture.
Secondly :
Carefully separate the two plates
by pulling on both circuits.
Thirdly:
Be careful not to damage or bend the
connector contacts. Check one by one that all pins
are correctly aligned with the connector’s holes in
the main board.
These two points must be checked very carefully,
to avoid that a short circuit instantly destroyed it,
when the robot will be supplied.
Summary of Contents for C-9877
Page 2: ...C 9877 www cebekit es sat fadisel com ...
Page 13: ...C 9877 Figure 2 4 Main control circuit fixed with screws ...
Page 16: ...C 9877 Figure 4 2 Spacers location Figure 4 3 Acrylic board fixing ...
Page 19: ...C 9877 Figure 5 2 Spacers positions Figure 5 3 Control Circuit once fixed ...
Page 36: ...C 9877 Diagram of the control board ...


