background image

ENGLISH

14

3D FORCEANODIZED 750 SMART

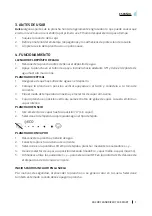
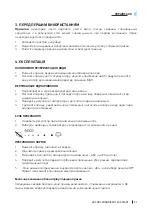
3. BEFORE USE

Note: 

some parts of the steam iron have been slightly greased and as a result, the iron may 

slightly smoke when switched on for the first time. After a short time, this will cease.

1. 

Take the product out of the box.

2. 

Remove any packaging materials, stickers or protective foil from the soleplate.

3. 

Clean the soleplate with a soft cloth.

4. OPERATION

WATER TANK FILLING

1. 

Unplug the iron before filling the water tank.

2. 

Rest the iron on its heel rest, tilt forward approximately 45º and pour water into the water-
filling opening up to the MAX mark.

VERTICAL STEAMING

1. 

Make sure there is enough water in the water tank.

2. 

Stand the steam iron vertically, rest it on its heel and connect it to the power supply.

3. 

Turn the temperature and steam knob to maximum.

4. 

Hold the iron vertically and press the steam burst button, an intense steam will be ejected
from the soleplate. 

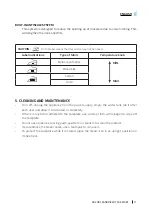
DRY IRONING

1. 

Turn the steam knob to the “0” position.

2. 

Select the appropriate temperature according to the type of fabric.

STEAM IRONING

1. 

Unplug the de iron and fill the iron with water.

2. 

Connect the iron to the power supply.

3. 

Use the + and – buttons to select on the LCD display the type of fabric to be ironed.

4. 

Set the steam knob to the desired position (eco mode, medium steam or maximum steam).

5. 

When finished, use the + and – buttons to select OFF on the LCD display and unplug the
device from the power supply. 

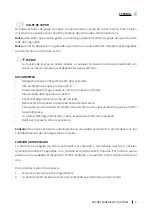
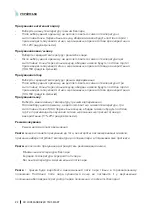
SAFE START UP WITHOUT HEAT IN THE SOLEPLATE

As a safety measure, when the iron is turned on, the soleplate does not generate heat. Select this 
mode also to turn the iron off.

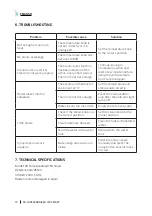
SYNTHETIC-CLOTHES IRONING

• 

Low-temperature and no-steam operation.

• 

When this function is selected, the display will show the temperature symbol and a dot

ECO

Summary of Contents for 3D ForceAnodized 750 Smart

Page 1: ...Manual de instrucciones Instruction manual 3D ForceAnodized 750 Smart Plancha de vapor Steam iron...

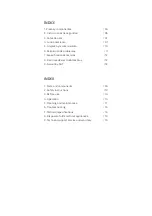
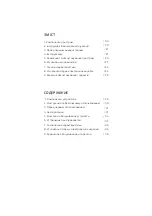
Page 2: ...problemas 7 Especificaciones t cnicas 8 Reciclaje de electrodom sticos 9 Garant a y SAT 12 INDEX 04 13 14 14 17 16 18 18 1 Parts and components 2 Safety instructions 3 Before use 4 Operation 5 Cleanin...

Page 3: ...04 20 21 21 24 25 26 26 1 2 3 4 5 6 7 8 9 26 29 30 31 31 34 35 36 36 1 2 3 4 5 6 7 8 9 36...

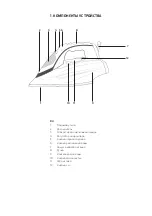
Page 4: ...1 PIEZAS Y COMPONENTES Parts and components 750 smart 1 10 11 9 12 8 6 5 4 3 2 7...

Page 5: ...Cable pivotante 8 Asa 9 Dep sito de agua 10 Bot n de autolimpieza 11 Pantalla LCD de control 12 Pulsadores y EN 1 Soleplate 2 Water spray nozzle 3 Water filling opening cover 4 Steam knob 5 Steam bur...

Page 6: ...el ctricas al agua Aseg rese de que tiene las ma nos completamente secas antes de tocar el enchufe o encender el producto Inspeccione el cable de alimentaci n regularmente en busca de da os visibles S...

Page 7: ...tal n y con ctela a la toma de corriente 3 Elija el modo de temperatura m xima y el selector de vapor al m ximo 4 Coja la plancha en posici n vertical y pulse el bot n de golpe de vapor la suela emit...

Page 8: ...ista para usarse 140 C 200 C PLANCHADO DE LINO Funcionamiento a temperatura m xima y con vapor Cuando seleccione esta funci n la pantalla mostrar el s mbolo de temperatura tres puntos y M X parpadeand...

Page 9: ...ximo y ci rrelo Elija el modo de temperatura m xima Conecte el dispositivo a la toma de corriente Desconecte el dispositivo cuando alcance la temperatura Coja la plancha en posici n horizontal lleve...

Page 10: ...bolo en la etiqueta significa que este art culo no se puede planchar Indicaciones en la etiqueta Tipo de tejido Selector de temperatura Nailon sint tico Lana seda Algod n Lino 5 LIMPIEZA Y MANTENIMIEN...

Page 11: ...n vertical de golpe de vapor de nuevo Gotea agua de la suela El selector de vapor y el termostato est n en posici n 0 Coloque el selector de temperatura y de vapor en la posici n correcta La plancha...

Page 12: ...o las correspondientes bater as el consumidor deber contactar con las autoridades locales 9 GARANT A Y SAT Este producto tiene una garant a de 2 a os desde la fecha de compra siempre y cuando se con...

Page 13: ...ns to water Make sure your hands are dry before handling the plug or switching on the appliance Check the power cord regularly for visible damage If the cord is damaged it must be replaced by the offi...

Page 14: ...and steam knob to maximum 4 Hold the iron vertically and press the steam burst button an intense steam will be ejected from the soleplate DRY IRONING 1 Turn the steam knob to the 0 position 2 Select...

Page 15: ...d the iron will produce a beep indicating that is ready to be used 175 C 215 C STANDBY MODE Auto off function WARNING ifthe iron is operated before above mentioned symbolsturns steady the ironwillnot...

Page 16: ...out all impurities Repeat this process if considered necessary Tip carry out the self cleaning cycle once every 2 weeks When excessive limescale is observed carry it out more frequently AUTO OFF FUNC...

Page 17: ...lk Cotton Linen 5 CLEANING AND MAINTENANCE Turn off unplug the appliance from the power supply empty the water tank do it after each use and allow it to cool down completely If there is any fabric adh...

Page 18: ...r leaks from the soleplate The steam and thermostat knob is set at 0 Set the temperature and steam knob correctly The iron is not hot enough Press the steam button only after the indicator light turns...

Page 19: ...PORT SERVICE AND WARRANTY This product is under warranty for 2 years from the date of purchase as long as the proof of purchase is submitted the product is in perfect physical condition and it has bee...

Page 20: ...20 3D FORCEANODIZED 750 SMART 2 Cecotec 8 8 8...

Page 21: ...21 3D FORCEANODIZED 750 SMART 3 1 2 3 4 1 2 45 1 2 3 4 1 0 2 1 2 3 4 5 OFF ECO...

Page 22: ...22 3D FORCEANODIZED 750 SMART 70 120 100 160 100 160 175 215 no steam...

Page 23: ...23 3D FORCEANODIZED 750 SMART 5 0 2 25 8 6 1...

Page 24: ...24 3D FORCEANODIZED 750 SMART 2 5 MIN MAX...

Page 25: ...25 3D FORCEANODIZED 750 SMART 6 0...

Page 26: ...26 3D FORCEANODIZED 750 SMART 7 3D ForceAnodized 750 Smart 05103 3100 230 50 8 2012 19 EU WEEE 9 2 Cecotec 2...

Page 27: ...27 3D FORCEANODIZED 750 SMART Smart Group https service smartgroup ua 0 800 300 245 Cecotec...

Page 28: ...1 750 smart 1 10 11 9 12 8 6 5 4 3 2 7 RU 1 2 3 4 5 6 7 8 9 10 11 12...

Page 29: ...30 3D FORCEANODIZED 750 SMART 2 Cecotec 8 8 8...

Page 30: ...31 3D FORCEANODIZED 750 SMART 3 1 2 4 4 1 2 45o 1 2 3 4 1 0 2 1 2 3 4 5 OFF ECO...

Page 31: ...32 3D FORCEANODIZED 750 SMART 70 120 oC 100 160 oC 100 160 oC 175 215 oC no steam...

Page 32: ...33 3D FORCEANODIZED 750 SMART 5 0 2 25 8 6 1...

Page 33: ...34 3D FORCEANODIZED 750 SMART 2 5 MIN MAX...

Page 34: ...35 3D FORCEANODIZED 750 SMART 6 0...

Page 35: ...36 3D FORCEANODIZED 750 SMART 7 3D ForceAnodized 750 Smart 05103 3100 230 50 8 2012 19 EU WEEE 9 2 Cecotec 2...

Page 36: ...37 3D FORCEANODIZED 750 SMART Smart Group https service smartgroup ua 0 800 300 245 Cecotec...


Page 37: ...www cecotec es Grupo Cecotec Innovaciones S L C de la Pinadeta s n 46930 Quart de Poblet Valencia Spain...
Reviews: