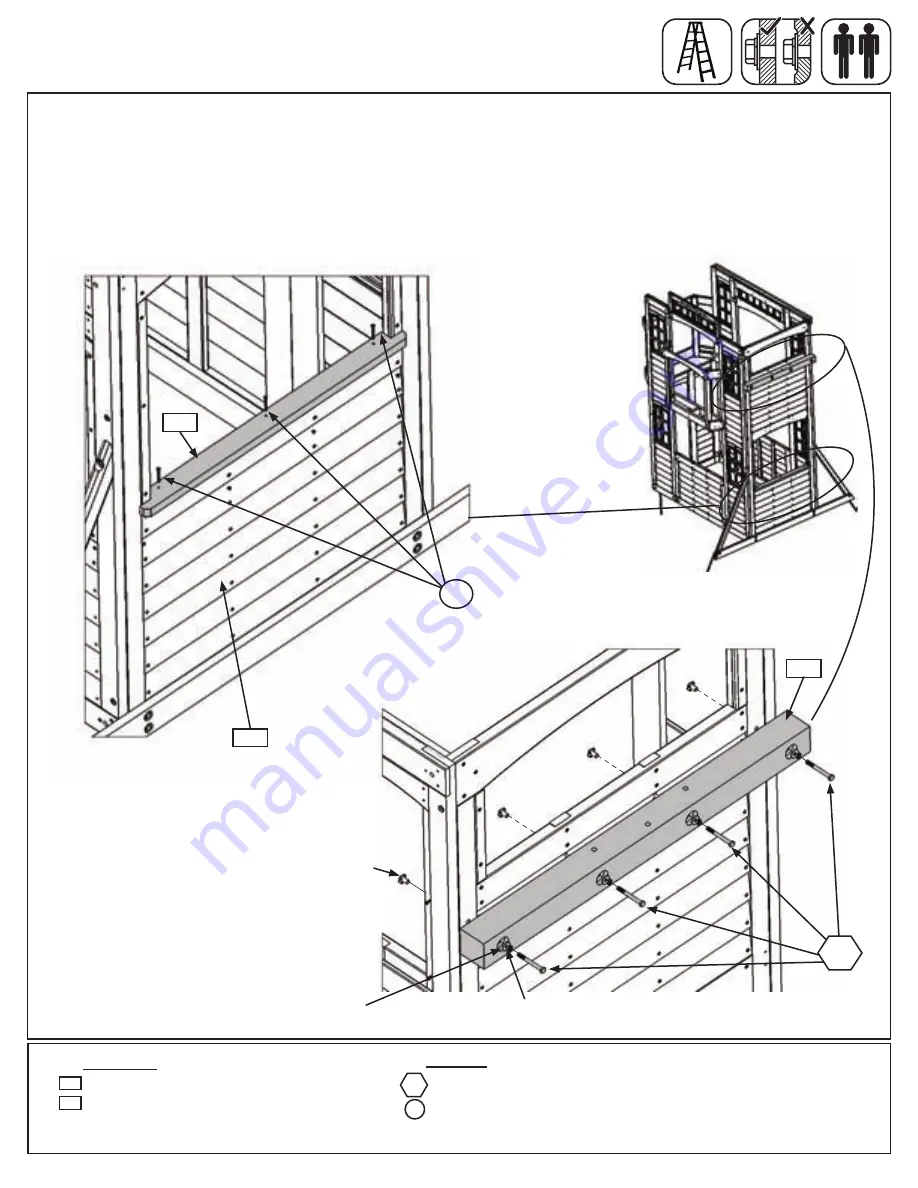
Step 11: Swing Wall Assembly
Part 3
E:
In the opening of (040) SW Side Panel attach (112) SW Table Top, tight to the corner of the panels, with 3
(S15) #8 x 1-3/4” Wood Screws as shown in fig. 11.5 and 11.6.
F:
Attach (113) SW Wall to (040) SW Side Panel in the location shown in fig. 11.5, using the bolt holes as a
guide, with 4 (G21) 5/16 x 3-3/4” Hex Bolts (with lock washer, flat washer and t-nut). Make sure bolts are tight.
(fig. 11.7)
Wood Parts
Hardware
Fig. 11.6
112
1 x
SW Table Top FSC 5/4 x 3 x 34-1/4”
1 x
SW Wall FSC 4 x 4 x 41”
112
4 x
5/16 x 3-3/4” Hex Bolt (5/16” lock washer, 5/16” flat washer, 5/16” t-nut)
3 x
#8 x 1-3/4” Wood Screw
G21
5/16” Flat
Washer
5/16” Lock
Washer
5/16” T-nut
Fig. 11.7
Fig. 11.5
G21
113
113
S15
S15
040
65
support@cedarsummitplay.com


