Hardware
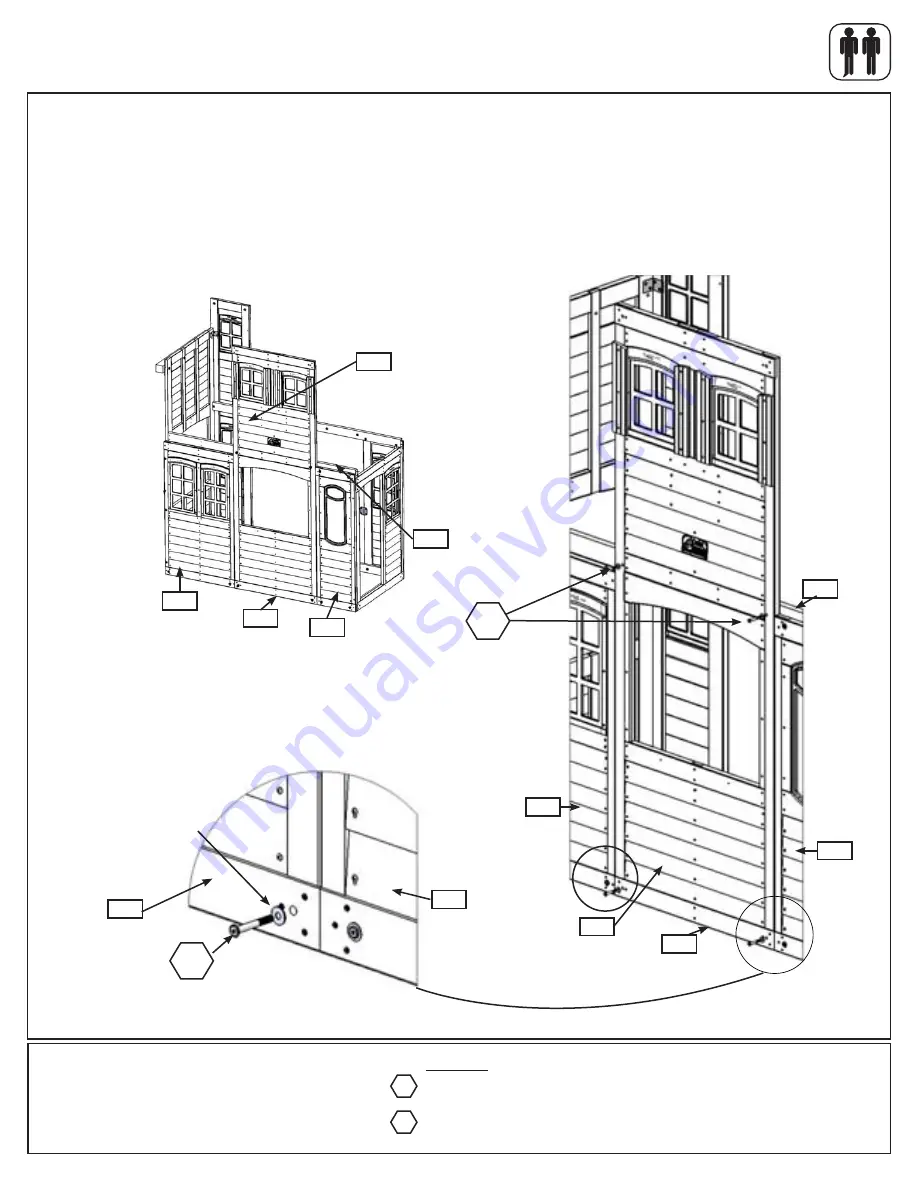
Step 8: Front Wall Assembly
Part 1
Fig. 8.3
Fig. 8.1
A:
Fit (040) Cafe Wall Window Panel, from Step 4, in between (051) SL Side Window Panel and (042) Chalkwall
Panel. Make sure the panels are tight together. Loosely fasten (040) Cafe Wall Window Panel to (063) Front
Ground with 2 (WB9) 5/16 x 2-1/8” Wafer Bolts (with 5/16” flat washer - t-nuts previously installed). (fig. 8.1, 8.2
and 8.3)
B:
Loosely fasten (040) Cafe Wall Window Panel to (062) Front Floor with 2 (WB8) 5/16 x 2-3/8” Wafer Bolts
(with 5/16” flat washer - t-nuts previously installed). (fig. 8.1 and 8.2 )
5/16” Flat
Washer
Door Wall
Fig. 8.2
WB9
062
040
Swing Wall
051
042
062
WB8
with 5/16”
Flat Washer
051
042
063
(hidden)
063
(hidden)
040
2 x
5/16 x 2-1/8” Wafer Bolt
(5/16” flat washer)
2 x
5/16 x 2-3/8” Wafer Bolt
(5/16” flat washer)
WB9
WB8
042
040
48
support@cedarsummitplay.com


