Wood Parts
Hardware
2 x
Roof Support Left 5/4 x 4 x 31”
2 x
Roof Support 5/4 x 4 x 31”
2 x
Gable Bottom 2 x 4 x 41”
222
220
221
2 x
#8 x 3” Wood Screw
4 x
5/16 x 2” Hex Bolt
(5/16” lock washer, 5/16” flat washer, 5/16”t-nut)
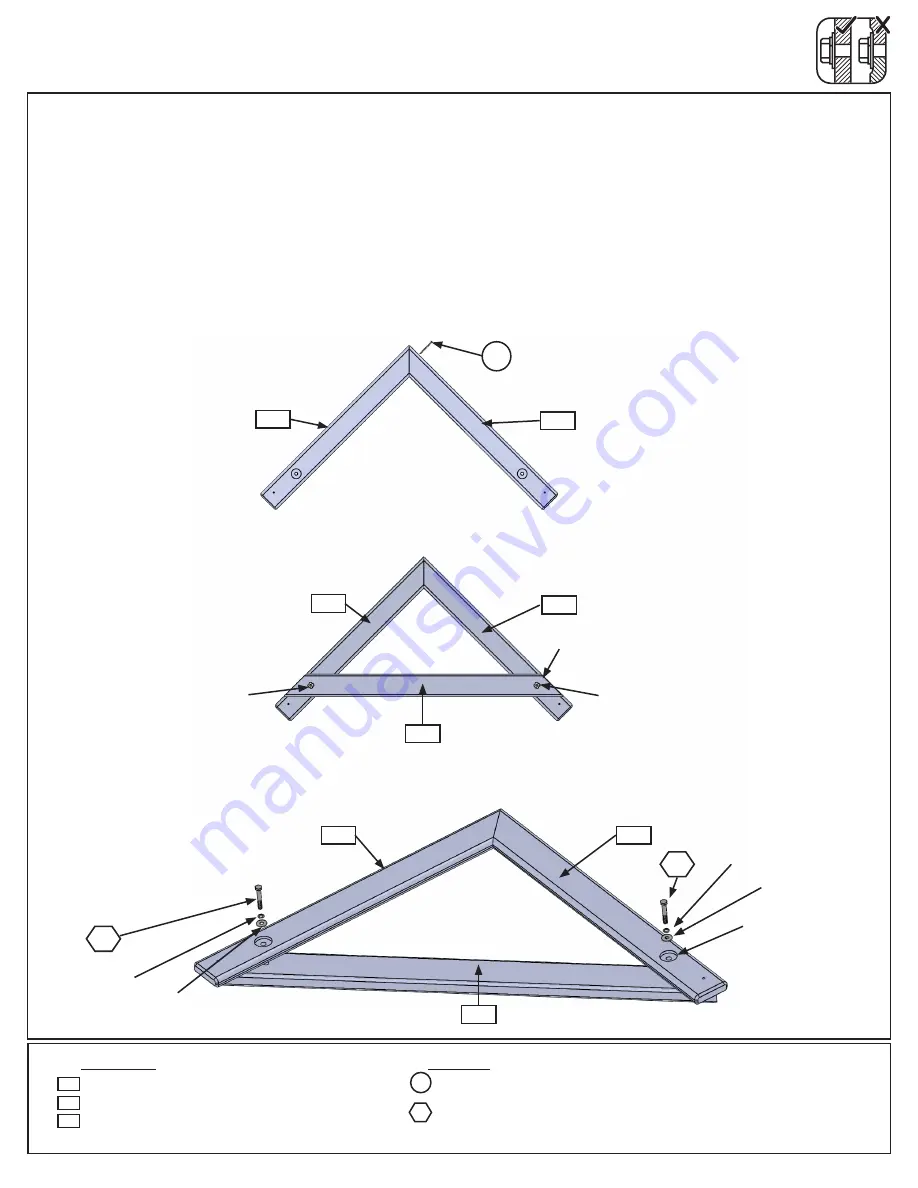
Step 18: Roof Support Assembly
Part 1
A:
Attach 1 (220) Roof Support to 1 (221) Roof Support Left at peak using 1 (S4) #8 x 3” Wood Screw. (fig.
18.1)
B:
Place (222) Gable Bottom on (220) Roof Support and (221) Roof Support Left so it is flush to the outside
edges of the supports. In the bolt holes tap in 2 - 5/16” t-nuts. (fig. 18.2)
C:
Flip the assembly over so the large counter sunk holes are facing up. Attach (222) Gable Bottom to (220)
Roof Support and (221) Roof Support Left with 2 (G8) 5/16 x 2” Hex Bolts (with lock washer and flat washer).
(fig. 18.3)
Repeat to make 2 assemblies.
G8
S4
221
Fig. 18.1
Fig. 18.2
Fig. 18.3
220
221
220
220
221
222
Notice large holes
facing out.
5/16” Flat
Washer
G8
222
5/16” Lock
Washer
5/16” Flat
Washer
G8
5/16” Lock
Washer
5/16” T-Nut
5/16” T-Nut
S4
Flush
72
support@cedarsummitplay.com


