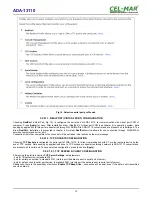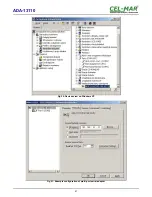
5.2.2.1.3.3. SERIAL PORT TRANSMISSION PARAMETERS CONFIGURATION
For proper operation of ADA-13110 with device connected to his serial port, should be set the same transmission parameters for both
devices.
Select
Basic Serial Settings
and enter
Baud Rate
,
Data Bits
,
Parity
,
Stop Bits,
the same parameter like has device connected to
the serial port of the converter.
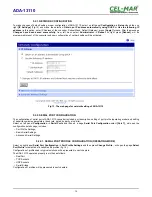
5.2.2.1.4. SERIAL BRIDGE PROFILE CONFIGURATION
Choosing the
Serial Bridge profile
enable direct communication between two devices connected to two ADA-13110 converters over
the network as if they were connected with a serial cable. A properly configured ADA-13110 will start automatically communication
with each other. Press [
Apply
] for save the configuration
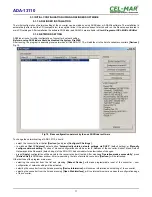
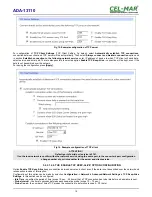
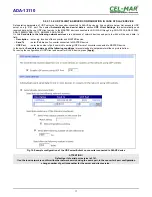
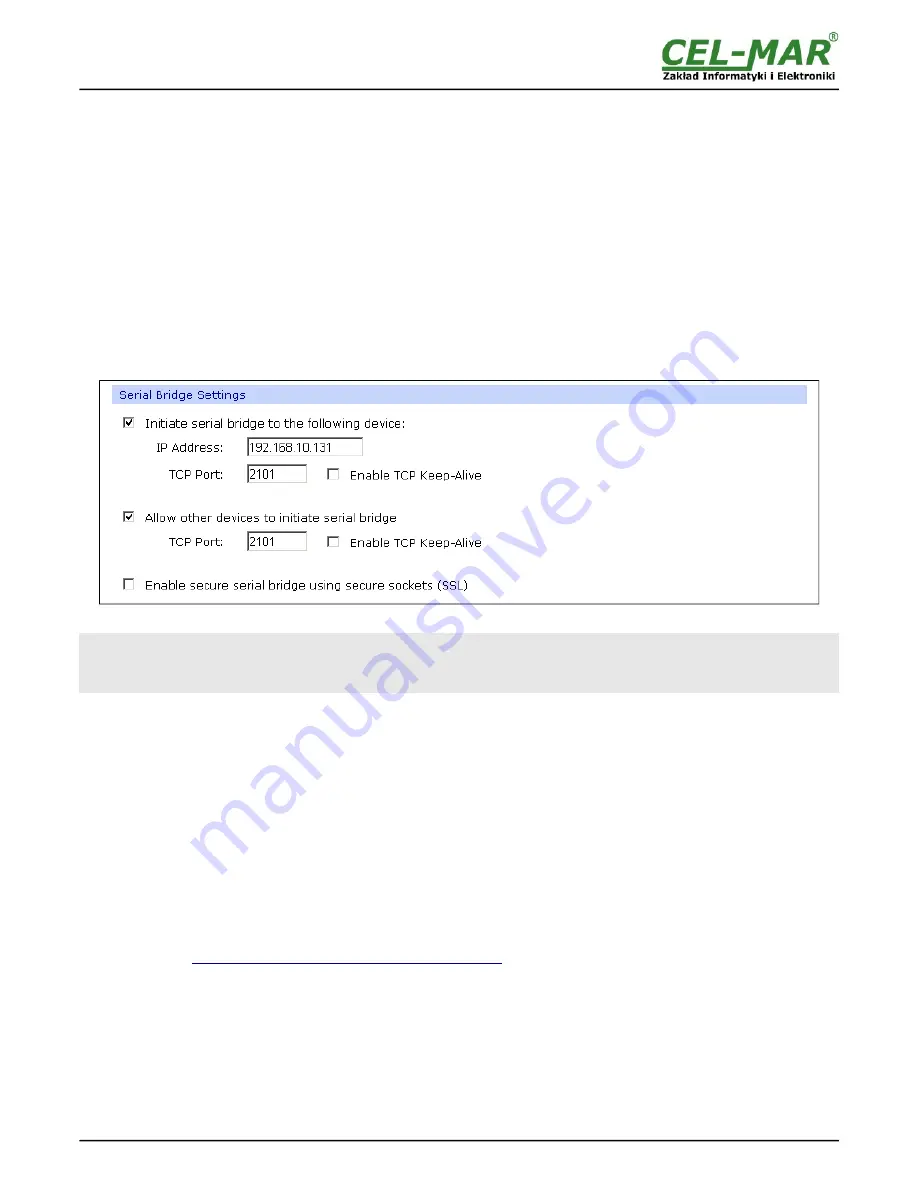
After saving the Serial Bridge profile, will open section
Serial Bridge Settings
(fig. below) with operating parameters like on picture
below. Select
Initiate serial bridge to the following device
option and enter IP address and 2101 port of the converter with which to
create the serial bridge over the network. Additionally, can be selected [
Enable TCP Keep-Alive
] option which keeps connection even
if the data is not transmitted. Select
Allow other devices to initiate serial bridge
and enter 2101 port on which other the converter
will automatically start communication and can be set also [
Enable TCP Keep-Alive
] option which keeps connection even if the data
is not transmitted.
Fig 19. Example configuration of TCP Serial Bridge
ATTENTION !
Default port of serial port service is 2101.
If on the local network is conflict with other network service using the same port, in the converter's port configuration
change number of port into another for the server and client service .
5.2.2.1.4.1. SERIAL PORT TRANSMISSION PARAMETERS CONFIGURATION
For proper operation of ADA-13110 with device connected to his serial port, should be set the same transmission parameters for both
devices.
Select
Basic Serial Settings
and enter
Baud Rate
,
Data Bits
,
Parity
,
Stop Bits,
the same parameter like has device connected to
the serial port of the converter.
5.2.3. SYSTEM SETTINGS
Select on left panel menu
Configuration -> System
and then on right will be selections as follows:
–
Device Identity Settings
– allows adding name of converter, describe the location and add identification number,
–
Simple Network Management Protocol Settings (SNMP)
– allows making the configuration of management protocol SNMP.
5.2.4. USERS CONFIGURATION
On the configuration page
Users
are two sections:
–
Users
–
Configure Users
The section
Users
allows configuring the method of login to ADA-13110. Selecting the option
Enable user logins
means that after
enter the address
http://<ip-
c on
v erter-
address
>/admin/administration.htm
to internet browser, will open login window and will be
necessary to enter user name and password.
The section
Configure Users
allows adding additional user, change password, configure access and permissions for each defined
users.
5.2.4.1. CHANGING USER MANE AND PASSWORD
Changing the default user root and password, can be done as follows :
1. press user mane
root
in section
Users Configuration->Configure Users,
2. enter new user name and password.
3. press [
Apply
] for saving.
18
ADA-13110


