5
THE STAR DIAGONAL AND EYEPIECES
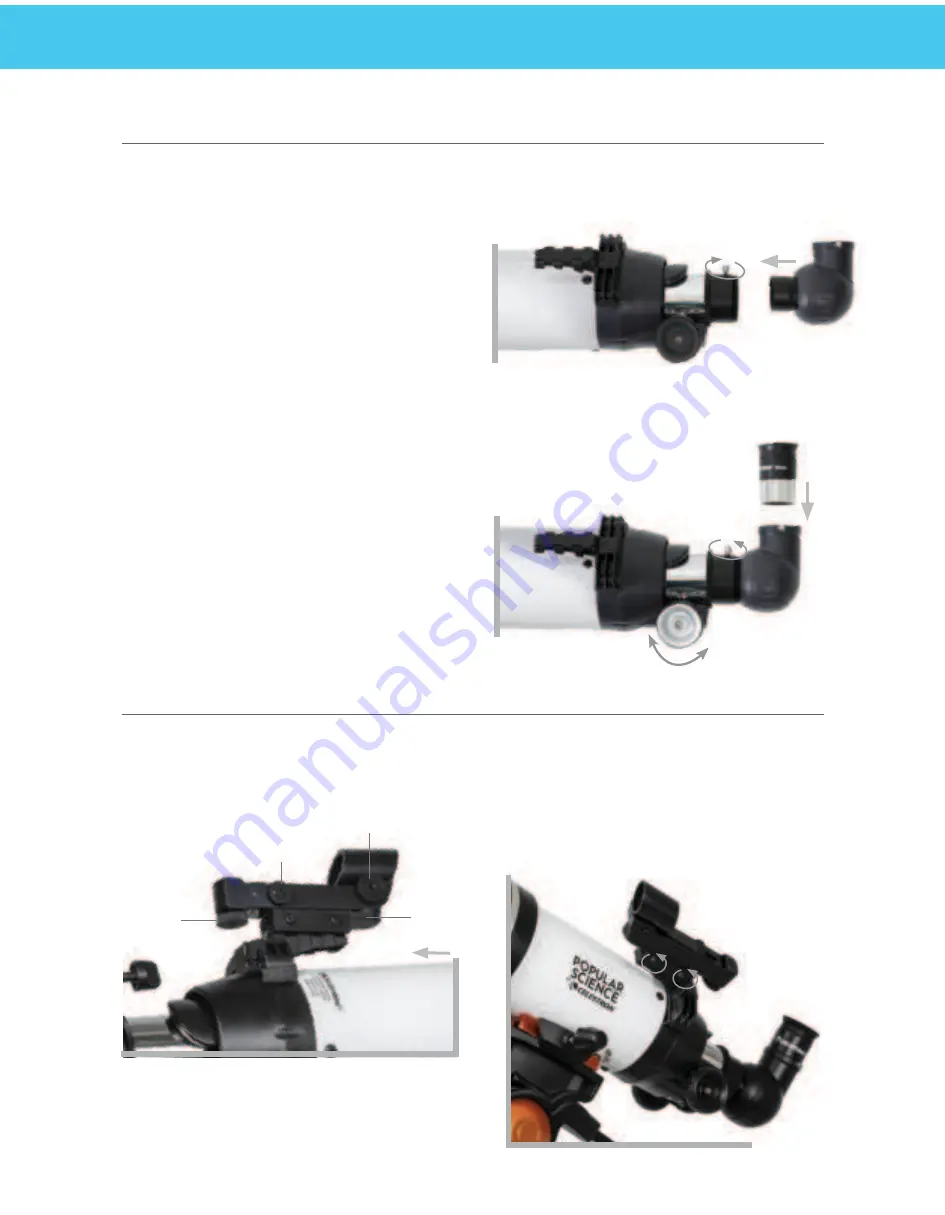
The erect image star diagonal attaches to the focus tube of a refracting telescope and contains a small prism that reflects
light at a 90° angle, providing a more comfortable viewing position. Because a star diagonal gives you a 100% correctly
oriented image, you can easily use the telescope for daytime terrestrial observing.
To insert the diagonal:
1.
Remove the caps from both sides of the diagonal.
2.
Loosen the setscrews on the back of the focuser and
pull out the small dust cap.
3.
I
nsert the smaller tube on the diagonal into the back of
the focuser and secure it by tightening the setscrews.
You can adjust the angle of the star diagonal to any
desired direction before tightening the screws.
To install the eyepiece:
1.
Loosen the setscrews on the open end of the star
diagonal.
2.
Insert the silver barrel of the 20mm eyepiece into the
star diagonal.
3.
Tighten the setscrews to secure the eyepiece in place.
4.
To see the sharpest image possible, focus by looking
through the eyepiece and slowly turning the focusing
knobs until the image comes into sharp focus.
Your telescope comes with two eyepieces. The 20mm which will give low magnification with a moderately wide field of
view. The 10mm will give you higher magnification, but a narrower field of view. Additional eyepieces can be purchased
to increase or decrease the magnification to your desired level. When first locating an object, it is best to use the 20mm
eyepiece, then, once the object is centered, change to the 10mm eyepiece to “zoom in” on it.
THE STARPOINTER FINDERSCOPE
Your telescope comes with a StarPointer red-dot
finderscope that you will use as a sighting tool when
aiming the telescope at a target.
On/Off Switch
Battery
Compartment
Left/Right
Adjustment
Knob
Up/Down
Adjustment
Knob
To install the finderscope:
1.
Loosen the (2) phillips head screws on the base of the
FinderScope.
2.
Slide the dovetail slider on the bottom of the finder
bracket into the dovetail mount on the focuser.
3.
Tighten the screws back down to secure it in place.
Summary of Contents for 21182
Page 1: ... 21182 INSTRUCTION MANUAL ...


