background image

8

Two Star Align

 uses the entered time/location information and 

allows the user to select which two alignment stars the telescope 

will automatically slew to . 

One Star Align

 uses the same time/

location information but only uses one star for alignment . 

Solar 

System Align

 will display a list of visible daytime objects (planets 

and the moon) available to align the telescope . 

Quick-Align


will ask you to input all the same information as you would for 

the Auto Align procedure . However, instead of slewing to the 

alignment stars for centering and alignment, the telescope 

bypasses this step and simply models the sky based on the 

information given . Finally, Last Alignment restores your last saved 

star alignment and switch position . 

Last Alignment

 also serves 

as a good safeguard in case the telescope should lose power . 

S

tartup

 p

roCEDurE

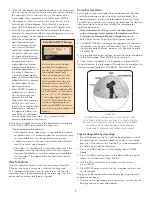
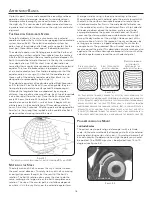
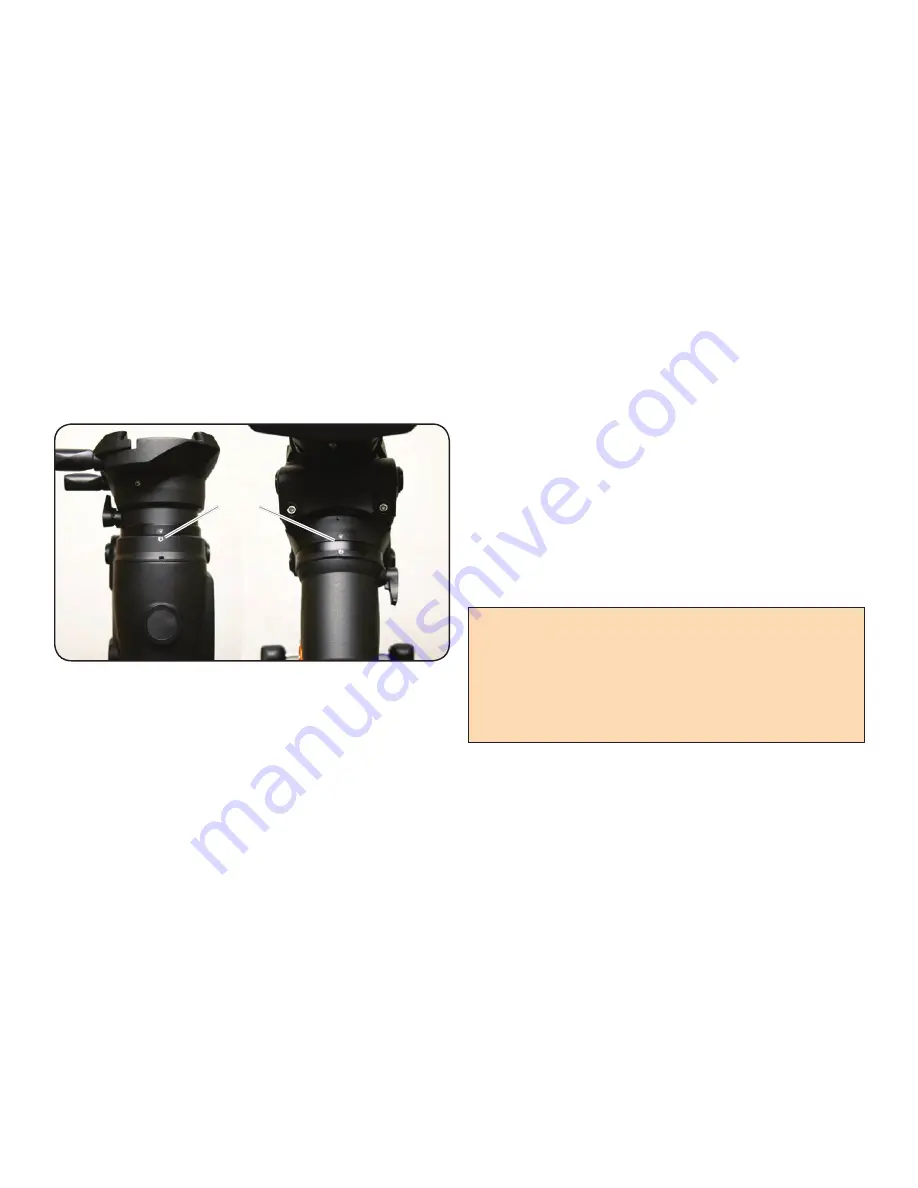
Before any of the described alignments are performed, the 

telescope mount needs to be positioned so that the index 

marks are aligned on both the right ascension and declination 

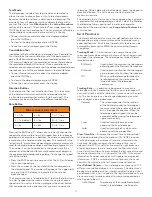
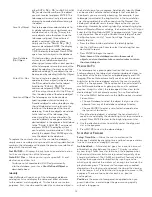
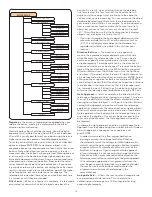
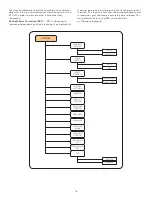
axes . (see Fig 3-2) .
Once the index position has been set, the hand control will 

display the last entered date and time information stored in the 

hand control . 

1 . Press ENTER to begin the alignment process .
2 . The hand control will ask the user to set the mount to its 

index position . Move the telescope mount, either manually or 

with the hand control, so that the index marked in both R .A . 

and Dec are aligned (see Fig 3-2) . Press 

Enter

 to continue .

•  The hand control will then display the last entered local 

time, time zone and date .

•  Use the Up/Down keys (10) to view the current 

parameters .

•  Press ENTER to accept the current parameters.
•  Press UNDO to enter current date, time and location 

information into the hand control . The following 

information will be displayed:

Location


— The hand control will display a list of cities to 

choose from . Choose the city from the database that is closest 

to your current observing site . The city you choose will be 

remembered in the hand controls memory so that it will be 

automatically displayed the next time an alignment is done . 

Alternatively, if you know the exact longitude and latitude of 

your observing site, it can be entered directly into the hand 

control and remembered for future use as well . To choose a 

location city:

•  Use the Up and Down scroll keys to choose between 

City Database

 and 

Custom Site

 . 

City Database

 will 

allow you to select the closest city to your observing 

site from a list of either international or U .S . location . 

Custom Site

 allows you to enter the exact longitude 

and latitude of your observing site . Select 

City 

Database

 and press ENTER .

•   The hand control will allow you to choose from either 

U .S . or international locations . For a listing of U .S . 

locations by state and then by city, press ENTER while 

United States

 is displayed . For international 

locations, use the Up or Down scroll key to select 

International

 and press ENTER . 

•  Use the Up and Down Scroll buttons to choose your 

current state (or country if International locations was 

selected) from the alphabetical listing and press ENTER .

•  Use the Up and Down Scroll buttons to choose the 

closest city to your location from the displayed list and 

press ENTER .

Time


— Enter the current local time for your area . You can 

enter either the local time (i .e . 

08:00

), or you can enter 

military time (i .e . 

20:00

 ) . 

•  Select PM or AM. If military time was entered, the hand 

control will bypass this step .

•  Choose between Standard time or Daylight Savings 

time . Use the Up and Down scroll buttons (10) to toggle 

between options .

•  Select the time zone that you are observing from. 

Again, use the Up and Down buttons (10) to scroll 

through the choices . Refer to Time Zone map in 

Appendix for more information .

Date


— Enter the month, day and year of your  

observing session .

Updating Your Location 

— Since you may not need to 

update your observing location as often as the date and 

time, it is not displayed each time you update the date 

and time. To update your city, press UNDO at any time 

when updating your date and time. Continue to press 

UNDO to change the state, country or to add longitude/

latitude coordinates.

Select one of the alignment methods as described below . 

Note: If incorrect information is entered into the hand 

control, the UNDO button acts like a back space button 

allowing the user to re-enter the correct data.

t

Wo

 S

tar

 a

liGn

Two-Star Align allows the user to select two stars on which to 

align the telescope . To align your telescope using the Two-Star 

Align method:
1 . Select Two-Star Align from the alignment choices given . 

Based on the date and time information entered, the hand 

control will automatically select and display a bright star that 

is above the horizon . 
•  Press ENTER to select this star as your first  

alignment star .

•  If for some reason the chosen star is not visible (perhaps 

behind a tree or building) press UNDO to have the hand 

control automatically select the next brightest star . 

•  Or you can use the Up/Down keys to browse the entire 

Named Star list and select any one of over two hundred 

alignment stars .

F

igure

 3-2 - D

eClination

 i

nDeX

 M

arks


anD

 r

ight

 a

sCension

 (ra) i

nDeX

 M

arks

Index  

Marks

Summary of Contents for CGEM DX

Page 1: ...INSTRUCTION MANUAL CGEM DX Computerized Mount ENGLISH...

Page 2: ...n Tour 11 Direction Buttons 11 Rate Button 11 Setup Procedures 11 Tracking Mode 11 Tracking Rate 11 Date Time 11 User Defined Objects 11 Get RA DEC 12 Goto R A Dec 12 Identify 12 Precise GoTo 12 Scope...

Page 3: ...to become familiar with your mount so you should keep this manual handy until you have fully mastered your telescope s operation The hand control has built in instructions to guide you through all the...

Page 4: ...stment Knob 3 Tripod 4 Hand Control 5 Tripod Center Leg Brace Accessory Tray 6 Counterweight s 7 Counterweight Bar 8 Telescope Mounting Platform Control Panel A On Off Switch B 12v Input Jack C Hand C...

Page 5: ...y tray far enough to rotate it until the three recesses line up with each leg Collapse the legs so that each leg falls into one of the recesses Secure the legs together with the nylon strap attached t...

Page 6: ...hten the counterweight bar lock nut fully for added support Once the bar is securely in place you are ready to attach the counterweight Since the fully assembled telescope can be quite heavy position...

Page 7: ...R A and DEC clutch knobs slightly and move the telescope in the desired direction Both the R A and DEC axis have lock levers to clutch down each axis of the telescope To loosen the clutches on the te...

Page 8: ...r latitude adjustment knob and tighten the front screw if necessary The latitude adjustment on the mount has a range from approximately 15 to 70 It is best to always make final adjustments in latitude...

Page 9: ...e database 6 Tour Activates the tour mode which seeks out all the best objects for the current date and time and automatically slews the telescope to those objects 7 Enter Pressing Enter allows you to...

Page 10: ...nternational or U S location Custom Site allows you to enter the exact longitude and latitude of your observing site Select City Database and press ENTER The hand control will allow you to choose from...

Page 11: ...em Align Solar System Align is designed to provide excellent tracking and GoTo performance by using solar system objects Sun Moon and planets to align the telescope with the sky Solar System Align is...

Page 12: ...control to select Alignment Stars from the list of options 5 The display will then ask you which alignment star you want to replace Use the UP and Down scroll keys to select the alignment star to be...

Page 13: ...ase the slew rate to the maximum slew rate The direction that a star moves in the eyepiece when a direction is pressed will change depending on which side of the Meridian the telescope tube is positio...

Page 14: ...bjects you are currently observing For example if your telescope is pointed at the brightest star in the constellation Lyra choosing Identify and then searching the Named Star catalog will no doubt re...

Page 15: ...reverse the button logic of the hand control press the MENU button and select Direction Buttons from the Utilities menu Use the Up Down arrow keys 10 to select either the azimuth right ascension or al...

Page 16: ...s section below the values are stored and displayed in the hand control It is not recommended that the calibration values be changed however each setting can be changed if necessary to improve the per...

Page 17: ...lescope Goto Axis Position Allows you to enter a specific altitude and azimuth position and slew to it Hibernate Hibernate allows the telescope to be completely powered down and still retain its align...

Page 18: ...errors and improving the tracking accuracy of the drive This feature is for advanced astrophotography and is used when your telescope is accurately polar aligned For more information on using PEC see...

Page 19: ...NT POSITION TURN ON OFF GPS PEC USER OBJECTS IDENTIFY GOTO RA DEC GET RA DEC PRECISE GOTO GOTO SKY OBJECT SAVE SKY OBJECT SAVE DB OBJECT ENTER RA DEC GOTO LAND OBJECT SAVE LAND OBJECT TURN ON OFF RTC...

Page 20: ...h s rotation The Earth s rotation also causes the stars to do the same scribing out a large circle as the Earth completes one rotation The size of the circular path a star follows depends on where it...

Page 21: ...Up Down buttons on the hand controller to select Polar Align from the list The Polar Align feature has two options Align Mount After performing a two star alignment and slewing your telescope to any b...

Page 22: ...s pointed at the celestial pole it is parallel to the Earth s rotational axis Many methods of polar alignment require that you know how to find the celestial pole by identifying stars in the area For...

Page 23: ...nderscope has an easy to use laser etched reticle PowerTank 18774 12v 7Amp hour rechargeable power supply Comes with two 12v output cigarette outlets built in red flash light Halogen emergency spotlig...

Page 24: ...magingObjects 25 SelectedSAOStars 29 500 Userdefined SkyObjects 99 Userdefined LandObjects 9 TotalObjectDatabase 45 492 Appendix A Technical Specifications Appendix B Glossary Of Terms A Absolute The...

Page 25: ...ial An imaginary sphere surrounding the Earth Sphere concentric with the Earth s center Collimation The act of putting a telescope s optics into perfect alignment D Declination The angular distance of...

Page 26: ...resolved into an image because it to too far away or too small is considered a point source A planet is far away but it can be resolved as a disk Most stars cannot be resolved as disks they are too f...

Page 27: ...o Is Alignment Complete J 0 or 1 0 No 1 Yes Commands below available on version 1 6 or later HC version V 22 Two bytes representing V2 2 Stop Start Tracking Tx x 0 Tracking off x 1 Alt Az on x 2 EQ N...

Page 28: ...note Only valid for motorcontrol version 4 1 or greater 1 Convert the angle position to a 24bit number Example if the desired position is 220 then POSITION_24BIT 220 360 x 224 10 252 743 2 Separate P...

Page 29: ...27 Appendix D Maps Of Time Zones...

Page 30: ...28...

Page 31: ...29 Sky Maps...

Page 32: ...30...

Page 33: ...31...

Page 34: ...32...

Page 35: ...33...

Page 36: ...34...

Page 37: ...ng or unauthorized repair Further product malfunction or deterioration due to normal wear is not covered by this warranty CELESTRON DISCLAIMS ANY WARRANTIES EXPRESS OR IMPLIED WHETHER OF MERCHANTABILI...

Page 38: ...CA 90503 U S A Telephone 310 328 9560 Fax 310 212 5835 2011 Celestron All rights reserved Printed in China 01 11 Product design and specifications are 91528 INST 10 00 subject to change without prior...

Reviews: