background image

ENGLISH | 

1

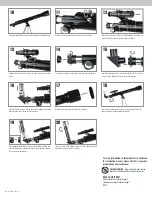
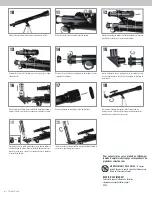
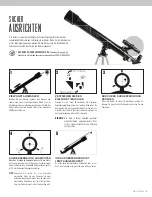
Unpack your telescope and verify that all parts are present.
Your PowerSeeker 50AZ includes: optical tube w/ lens shade 
attached; tripod with center support bracket and accessory tray; 
three eyepieces; a 3x Barlow lens, star diagonal, finderscope with 
bracket, and a 1.5x image erecting eyepiece.

Check to ensure that all three legs are the same height once 
extended to provide a level platform for the telescope.

Remove the threaded bolt from the underside of the telescope tube.

To set up the tripod, spread the legs outward until they are fully 
extended and push down center leg brace.

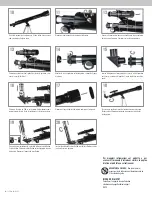
To mount the accessory tray, remove the fastener from the lower 
support bracket.

Line up the hole in the mount with the holes on the underside of the 
optical tube as shown above.

Extend the center portion of each of the three tripod legs down about 
6 to 12 inches. Flip the tightening lever inward on each leg to secure 
the extended leg in place.

Place accessory tray on lower support bracket and then tighten 
fastener.

Replace the threaded bolt to secure the optical tube to the mount.

1

4

7

2

5

8

3

6

9

#21039

Q U I C K   S E T U P   G U I D E

E NG LISH

50AZ

1

5

Summary of Contents for PowerSeeker 50AZ

Page 1: ...cope tube To set up the tripod spread the legs outward until they are fully extended and push down center leg brace To mount the accessory tray remove the fastener from the lower support bracket Line...

Page 2: ...fication you can use the included 3x Barlow lens Place the Barlow lens in the focuser in place of the eyepiece Remove the cap from the Barlow lens Remove the knurled finderscope nuts from the optical...

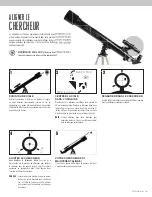
Page 3: ...same amount to ensure the finderscope is securely held in place YOUR FINDERSCOPE IS NOW ALIGNED It should not require realignment unless it is bumped or dropped 4 The finder is one of the most import...

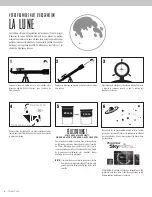
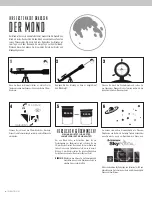
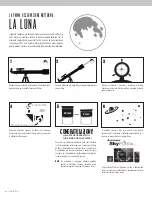
Page 4: ...oon up to a few days before a Full Moon During this period you will be able to see the most detail in the craters and lunar mountain ranges YOUR FIRST NIGHT OUT THE MOON 4 To get a closer view of the...

Page 5: ...pied cartez les pieds vers l ext rieur jusqu ce qu ils soient compl tement tendus et abaissez l entretoise centrale Pour installer le plateau accessoires retirez la molette de fixation du centre de l...

Page 6: ...rlow x3 incluse Placez la lentille de Barlow dans le sys t me de mise au point la place de l oculaire Retirez le capuchon de la lentille de Barlow Retirez les crous stri s du chercheur du tube optique...

Page 7: ...un des composants les importants de votre t lescope Il vous aide localiser des objets et les centrer dans votre oculaire La premi re fois que vous assemblez votre t lescope vous devez aligner le cher...

Page 8: ...vant la pleine Lune Pendant cette p riode vous pourrez distinguer la plus grande quantit de d tails dans les crat res et les cha nes de montagnes lunaires VOTRE PREMI RE NUIT D OBSERVATION LA LUNE 4 P...

Page 9: ...ativs die Beine nach au en ziehen bis sie vollst n dig ausgezogen sind Dr cken Sie die mittlere Beinstrebe nach unten Entfernen Sie zur Montage der Zubeh rablage das Befestigungsele ment von der unter...

Page 10: ...Barlowlinse f r eine zus tzliche Vergr erung verwenden Stecken Sie die Barlowlinse anstelle des Okulars in den Fokussierer Entfernen Sie die Kappe von der Barlow linse Entfernen Sie die R ndelmuttern...

Page 11: ...sein es sei denn das Teleskop wird gesto en oder fallen gelassen Der Sucher ist einer der wichtigsten Teile Ihres Teleskops Mit dem Sucher lokalisieren Sie Objekte und zentrieren sie im Okular Wenn Si...

Page 12: ...um es zu sichern Mit dem 4 mm Okular erhalten Sie eine deutlich h here Vergr erung sodass der Mond viel gr er erscheint HINWEIS M glicherweise m ssen Sie die Fokussierkn pfe nachstellen wenn Sie die...

Page 13: ...largare le gambe verso l esterno fino a quando non saranno completamente estese e spingere verso il basso il supporto centrale delle gambe Per montare il vassoio porta accessori rimuovere il blocco da...

Page 14: ...ssibile utilizzare la lente Barlow 3x in dotazione Sistemare la lente Barlow nel focheggiatore al posto dell oculare Rimuovere il tappo dalla lente Barlow Rimuovere i dadi zigrinati del cercatore dal...

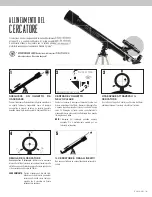
Page 15: ...re un nuovo allineamento salvo colpi o cadute Il cercatore uno dei componenti pi importanti del telescopio Aiuta a localizzare gli oggetti e a centrarli nell oculare Al primo assemblaggio del telescop...

Page 16: ...no a un paio di giorni prima della Luna piena Durante questo periodo crateri e catene montuose sono osservabili nel dettaglio LA PRIMA OSSERVAZIONE NOTTURNA LA LUNA 4 Per avere una visione pi ravvicin...

Page 17: ...e separe las patas hacia fuera hasta que est n totalmente extendidas y presione hacia abajo el soporte de las patas central Para montar la bandeja de accesorios saque el fijador del soporte inferior A...

Page 18: ...posici n Para un aumento adicional puede usar la lente Barlow 3x incluida Ponga la lente Barlow en el enfoque en lugar del ocular Saque la tapa de la lente Barlow Saque las roscas del localizador del...

Page 19: ...ST ALINEADO No deber a realinarse a menos que reciba golpes o caiga El localizador es una de las piezas m s importantes de su telescopio Le ayuda a localizar objetos y centrarlos en el ocular La prime...

Page 20: ...var la Luna es desde dos d as despu s de Luna nueva hasta unos d as antes de Luna llena Durante este periodo podr ver el m ximo detalle de los cr teres y riscos lunares SU PRIMERA NOCHE EN EL EXTERIOR...

Reviews: