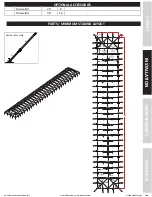
40’ x 280’ Classic Series Frame Tent
www.GetTent.com / www.CelinaTent.com
PG.10
© 2013 Celina Tent Inc.
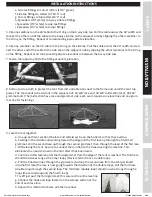
14. Step on the base plate to free both hands and lift one side of the tent frame. Do not lift one corner at a time;
lift the entire side of the tent. Insert corner fittings into the top of the leg, securing with a pin. Insert all pins from
the outside in; this keeps the protruding section of the pin from puncturing the tent fabric.
SAFETY
MAINTENANCE
INS
TALLA
TION
CONT
AC
TS
INSTALLATION INSTRUCTIONS
13. In windy conditions, locate the downwind side of the tent to lift first; this keeps the wind from catching the tent.
12. Attach the base plates to the legs (6’8” brown, or 7’8” black), securing with a pin.
11. Loosely fasten 2 alligator straps at each corner around the perimeter tubing to secure the tent top.
10. Pull the tent top over the frame, lifting up on the fabric or “flapping” it to create a cushion of air.
15. While the tent is still low to the ground fasten the rest of the alligator straps around the perimeter tubing.
16. Repeat with the other side of the tent. When finished with the corner legs, install all other legs at side tee
fitting locations.
17. Center the tent top on the frame by hiding the seams behind the hip rafters and tightening the straps. Guide
excess strap through the metal slide on the alligator clip.
18. Place stakes 5’ out from each leg; drive stakes into the ground so that approximately 6” or less of the stake
is showing.


