40’ x 280’ Classic Series Frame Tent
www.GetTent.com / www.CelinaTent.com
PG.12
© 2013 Celina Tent Inc.
SAFETY
MAINTENANCE
INS
TALLA
TION
CONT
AC
TS
INSTALLATION INSTRUCTIONS
Striking Instructions
1. Loosen all ratchet strap assemblies.
2. Remove the side legs.
3. Unfasten all anchoring devices and alligator straps from the perimeter tubing (with the exception of 2 at each
corner).
4. Remove 2 corner legs from one side and carefully set the tent frame on the ground.
5. Repeat with opposite side.
6. Unfasten the rest of the straps, completely disconnecting the tent top from the frame and stakes.
7. Roll out a drop cloth next to the frame.
8. Carefully remove the tent top from the frame, lifting up on the fabric or “flapping” it to create a cushion of air.
9. Unlace the tent top:
a. Separate the valance hook and loop that connects the tents together. Unclip the rain flap until the
lace line tie-off is accessed.
b. Untie knot and unlace the tent top section while disconnecting the rain flap.
10. Fold and roll the tent top pieces as tight as possible. Remember not to stand or walk on the tent top fabric.
11. Bagging (always use a drop cloth to protect the tent top from dirt and abrasions while bagging):
a. For Wrap-Around Tent Bag:
i. Lay the bag next to the tent top with the side-release buckles facing down. Roll the tent top
onto the center of the bag.
ii. Connect the two short male and female side-release buckles; pull tight.
iii. Connect the remaining side-release buckle and pull tight.
b. For Round-Bottom Bag:
i. Place the folded tent top into the upright vertical position.
ii. Pull the round bottom tent bag over the upright tent top.
iii. Turn the tent top and bag over, pull the draw string tight and tie off.
12. Fold and roll up the drop cloth.
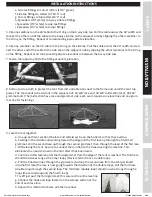
13. Disassemble all of the corner, side tee, and center crown fittings by removing the pins and sliding the tubing
off of the fittings. Work from the perimeter of the frame inward.
14. Remove all stakes.


