20’ x 40’ Pinnacle Series High Peak Frame Tent/Cross Cable Marquee
GetTent.com/CelinaTent.com/GetTent.co.uk
PG.9
© 2018 Celina Tent Inc.
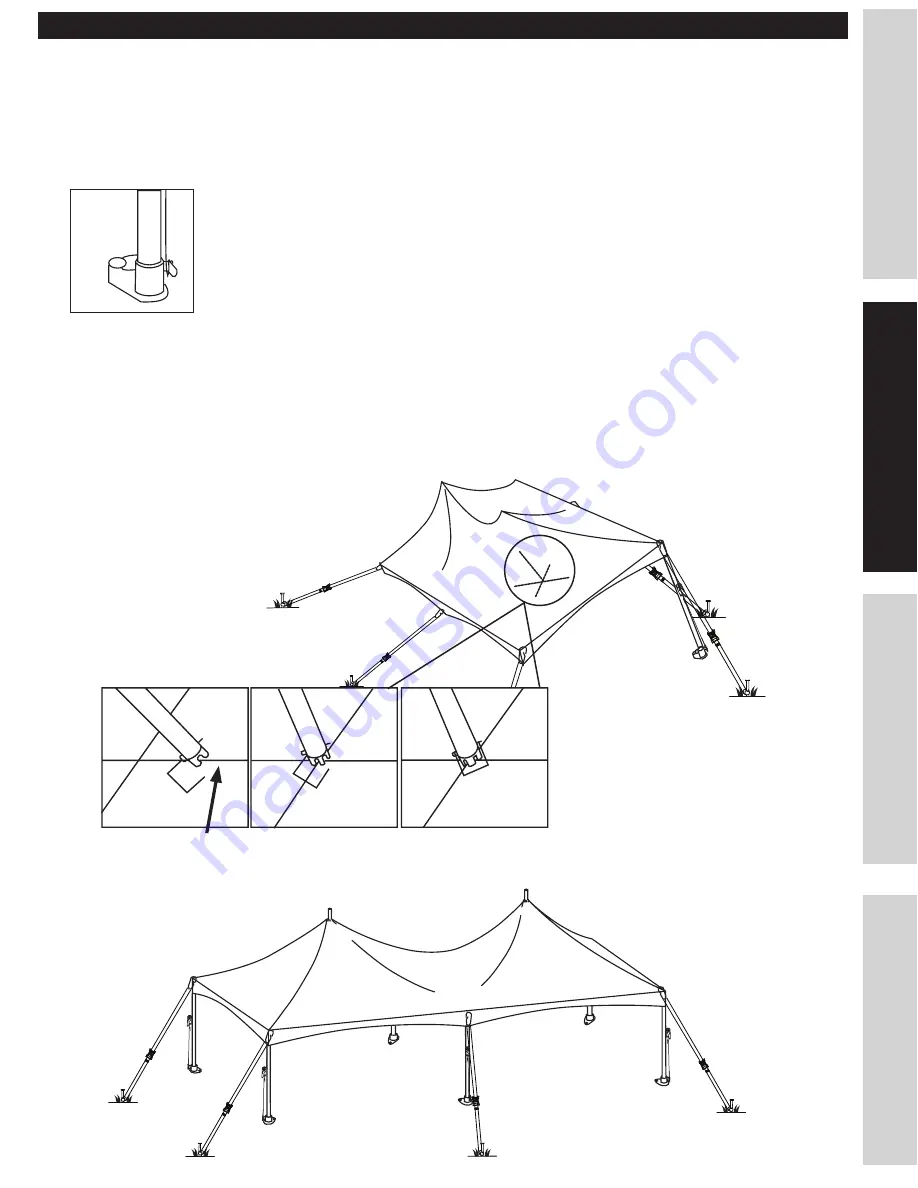
13. Place the O Ring of the ratchet buckles loop strap w/ O ring (C)
on the hook in the base plate and take the
loop strap (D) attached to the tent top O rings and pull it through the reel bars slot of the 1” ratchet (ratchet
buckle needs to have handle facing upward at all times) and pull the loop strap (D) back towards the tent
approximately 1 ½ feet. Hold the strap at this point with one hand and begin to crank the ratchet handle back
and forth. This will keep the legs secure when installing the center mast.
14. Now you need to install both center masts through the tent top. Place the center mast pin at the top of
the center mast pole. Unhook the clip at the bottom of the center mast pole and position the bottom of the
center mast pole onto the
top cable
. Making sure the mast pin at the top is through the hole and is visible
from the outside of the tent top, slide the center mast pole up the cable toward the intersection of the
cables. Move the center mast pole to the center of the tent making sure it rests on both cross cables. Once in
place, put the clip back on the bottom of the center mast pole making sure it is under both cables to keep it
in place.
SAFETY
MAINTENANCE
INS
TALLA
TION
CONT
AC
TS
INSTALLATION INSTRUCTIONS
15. Install the remaining three legs (8’) and ratchet assemblies; be sure the smaller holes of the base plate are
facing the interior of the tent.
Top Cable


