


6
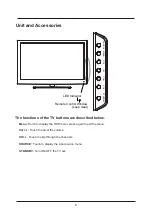
Unit and Accessories
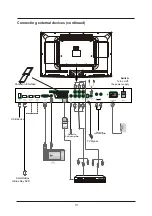
The functions of the TV buttons are described below.
Menu
:Touch to display the OSD menu, press again to exit the menu.
Vol +/-
: Touch to adjust the volume.
CH+/-
: Touch to skip through the channels.
SOURCE
: Touch to display the input source menu.
STANDBY :
Turn ON/OFF the TV set.
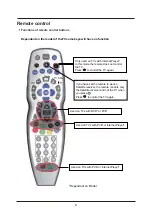
Remote Control Window
(keep clear)
LED Indicator
SOURCE MENU CH+ CH- VOL+ VOL
- ST
ANDBY
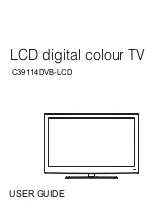
Summary of Contents for C39114DVB-LCD
Page 1: ...LCD digital colour TV USER GUIDE C39114DVB LCD ...
Page 39: ......


