background image

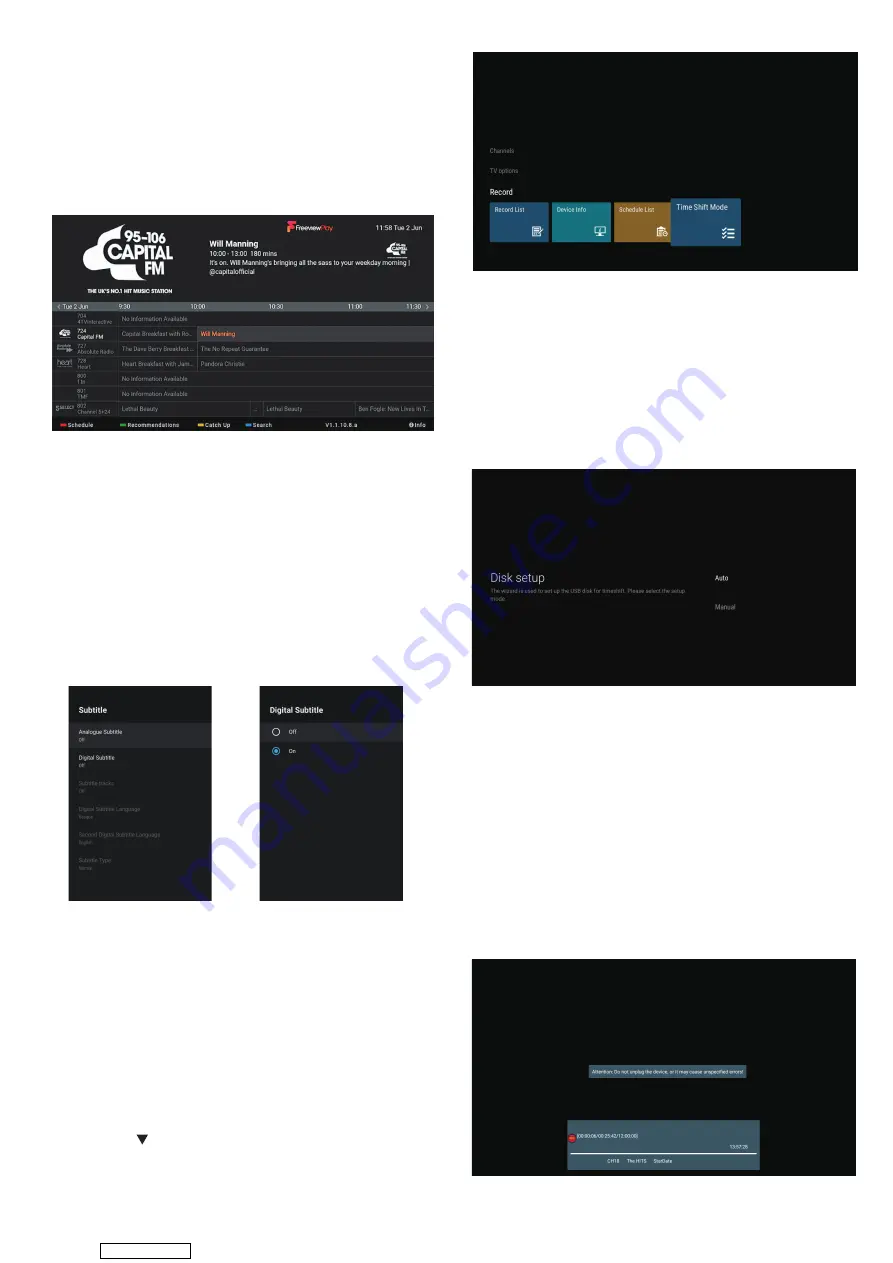
You can listen to radio stations through your Live TV or 

by asking Google Assistant to play a radio station.

While watching Live TV Press the GUIDE button. Navigate 

to a radio station, they are usually towards the end of the 

Guide in channel numbers 700+.

Ask Google Assistant, press the GOOGLE ASSISTANT 

button and ask for a radio station.

While you are watching live TV you can select subtitles by 

pressing the SUBT button.

1. Press the SUBT button, the SUBTITLE menu will be 

displayed.

2. Press the  button to highlight DIGITAL SUBTITLE and 

press OK.

3. Press the  button to highlight ON and press OK.

4. In a few seconds the subtitles will appear on the 

screen.

5. To switch Subtitles off repeat the process but select 

OFF.

This function allows you to pause live TV. The picture will 

pause and the programme will begin recording so you 

don't miss any of the programme. You will have to have a 

USB storage device attached to the USB socket for Time 

Shift Recording to work.

1. Time shift mode is not switched on as default. While 

watching live TV press the MENU button.

2. Press the       button to scroll down to the RECORD 

menu, then press  button to highlight TIME SHIFT MODE. 

Then Press OK.

3. Press OK to activate TIME SHIFT MODE.

Your USB storage device will need to be setup for time 

shifting.

1. Press the PAUSE button on your remote control and 

the DISK SETUP screen will appear.

2. Highlight AUTO and press OK. Your TV will now check 

and setup your USB device. Once done press EXIT.

3. Your USB device is now setup and you can now pause 

live TV by pressing the PAUSE button.

Use this function to record the TV programmes you are 

watching on the main screen and save it for future 

viewing. The recording from timer programme or direct 

recording may have a little bit of delay when it starts to 

record the broadcast programme. Please make sure the 

USB device is inserted. If not, a warning message will pop 

up. You can only record the programme that you are 

currently watching.

1. Press the RECORD button to record the programme 

that you are currently watching.

2. To stop a recording press the STOP button.

Listening to the Radio

Viewing Channels with Subtitles

Pausing Live TV (Time Shift Recording onto a USB 

Storage Device)

Activating Time Shift

Disk Setup for Time Shifting

Recording a TV Programme onto a USB Storage 

Device

Downloaded from 

ManualsNet.com

 search engine

Summary of Contents for C4020G

Page 1: ...USER MANUAL C4020G Downloaded from ManualsNet com search engine ...

Page 2: ...TIONS AND REMINDERS IMPORTANT SAFETY INSTRUCTIONS BUTTON CONTROL AND PERIPHERAL CONNECTION OPERATING INSTRUCTIONS SPECIFICATIONS TROUBLESHOOTING TABLE OF CONTENTS Downloaded from ManualsNet com search engine ...

Page 3: ...d 15 The ventilation openings should not be covered with items such as newspapers table cloth curtains etc 16 Avoid direct heat sources such as lighted candles should be placed on the apparatus 17 The procedure of disposing batteries should be exercised in an environmental friendly method 18 The use of apparatus in moderate climate 19 The apparatus shall not be exposed to dripping or splashing and...

Page 4: ... slots or openings Never spill any kind of liquid on the television receiver When the product is not used for an extended period of time it is advisable to disconnect the AC power cord from the AC outlet Do not block the ventilation holes in the back cover Ventilation is essential to prevent failure of electrical components Avoid exposing the main unit to direct sunlight and other sources of heat ...

Page 5: ... you can adjust the TV channel under the program addition and subtraction Under the menu page you can move the cursor up and down Under the menu page function equivalent to the OK key OK OK 1 RJ45 2 OPTICAL out terminal 3 HDMI1 ARC input terminal 4 HDMI2 input terminal 5 HDMI3 input terminal 6 Audio Video input terminal 7 Earphone terminal 8 LNB IN 9 RF antenna 10 USB 1 2 Connect USB device such a...

Page 6: ...ward Press to pause in multimedia mode Timeshift mode Pause Press to stop multimedia playback REC Timeshift mode stop SOURCE Press to open the input source list NETFLIX YouTube Press to open the NETFLIX Press to open the YouTube Press to open the prime video FreeviewPlay Press to open the Freeview Play TV unplug the power cord Press to open the google assistant or start a voice search HOME INFO Pr...

Page 7: ...leted Apps Icon to be redirected for all the listed applications On screen Menu with convenience Inputs Icon to select an input source Network Interent Settings For more detailed explanation regarding the settings please check the next page HOME SCREEN After initial setup press EXIT to exit the initial setup and enter the HOME screen NAVIGATING THE ON SCREEN MENU This TV includes 2 separate versio...

Page 8: ...our selected programme You can select any day to view 7 days before or after the current day using the Schedule option 1 While viewing the Guide press the RED button 2 Press the buttons to scroll to your desired day 3 Press the button to select the time then press the OK button The guide will now display the programmes for your chosen day and time While viewing the Guide press the GREEN button Scr...

Page 9: ... you can type in the name or number of the channel you re looking for 1 While viewing the Channel List press the YELLOW button The SELECT MORE menu will be displayed 2 Highlight SELECT TYPE and press the OK button A list of channel types will be displayed Highlight the type of channel that you are looking for and press OK You ll now be shown a list of channels to choose from that appear in your se...

Page 10: ...ton to scroll down to the RECORD menu then press button to highlight TIME SHIFT MODE Then Press OK 3 Press OK to activate TIME SHIFT MODE Your USB storage device will need to be setup for time shifting 1 Press the PAUSE button on your remote control and the DISK SETUP screen will appear 2 Highlight AUTO and press OK Your TV will now check and setup your USB device Once done press EXIT 3 Your USB d...

Page 11: ...ect the SCHEDULE LIST from the RECORD menu Then select the recording you would like to edit you ll now be able to change any of the setting If you need to delete any of the Scheduled recordings in the list select the SCHEDULE LIST from the RECORD menu Then select the recording you would like to delete you ll now be able to select Delete All of your recording are stored in RECORD LIST 1 While watch...

Page 12: ... PREFERENCES ABOUT Manually adjusting date time settings will automaticall change the Automatic date time to OFF NOTE Automatic date time Press button to select the option then press OK button to enter the sub menu Optional Use network provided time Off TIMER Power On Timer Type Press button to select the option then press OK button to choose ON OFF ONCE Power On Timer Press button to select the o...

Page 13: ...ion Press to decrease the parameter Press to increase the parameter Gamma Press button to select the option then press OK button to enter the sub menu Options Dark middle Bright Color Temperature Press button to select the option then press OK button to enter the sub menu Picture format Press button to select the option then press OK button to enter the sub menu Options Automatic Super zoom 4 3 Mo...

Page 14: ... select the option Press to decrease the parameter Press to increase the parameter Auto Volume Control Press button to select the option then press OK button to choose ON OFF Downmix Mode Press button to select the option then press OK button to enter the sub menu Optional Stereo Surround Reset to Default Reset all settings to the factory defaults STORAGE Internal shared storage Press button to se...

Page 15: ... to select the option then press OK to enter the sub menu Optional 5 15 30 minutes 1 2 hours Put device to sleep Press to select the option then press OK to enter the sub menu Optional 30 minutes 1 3 6 12 hours Never Start now Press to select the option then press OK to enter screen saver SCREEN SAVER Location status Press to select the option then press OK to enter the sub menu Optical Use Wi Fi ...

Page 16: ... Wait 30 seconds and then press the HOME and LEFT buttons at the bottom of the remote control for 5 seconds to repeat the previous steps 5 Press BACK or EXIT button return to the previous menu 1 In the HOME interface select the icon in the APPcolumn to add the application and click OK Press up and down to select the DigitalMediaPlay er application and click OK to add it to the HOME interface 2 Sel...

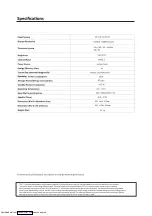
Page 17: ...931 x 80 x 515mm 931 x 190 x 554mm 5 3 kg 67 Downloaded from ManualsNet com search engine ...

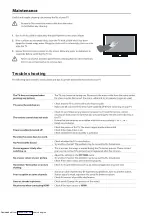
Page 18: ...Trouble shooting Downloaded from ManualsNet com search engine ...

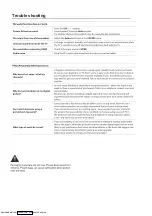
Page 19: ...Trouble shooting Downloaded from ManualsNet com search engine ...

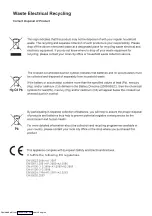
Page 20: ...It fullfils the following EU regulations Downloaded from ManualsNet com search engine ...

Reviews: