14
GB
4. Installation notes
4.1 Preparations
1. Unpack pump and check for damage
2. Take packing materials for recycling
3. Check intake and outlet openings for foreign objects
or packaging materials and remove if necessary.
4.2 Mounting arrangement
The pump can be installed in any position.
4.3 System specification
4.3.1 Pressure side
Every line system has a characteristic system curve that
indicates pressure loss relative to delivery flow rate. The
curve and thus the delivery flow rate are influenced by:
• Delivery height
• Line length and diameter
• Properties such as mounted accessories
i
Important!
Pump output data must match the curve.
If the system requires more pressure than the pump can
generate, the delivery rate reduces to zero.
In this case reduce the system pressure loss by using:
• shorter lines,
• accessories with lower pressure loss
(fewer bends, fittings, constrictions)
• reducing the delivery height
4.3.2 Suction side
The strainer cap with square holes must be located
below the level of the liquid.
5. Electrical connection of the pump
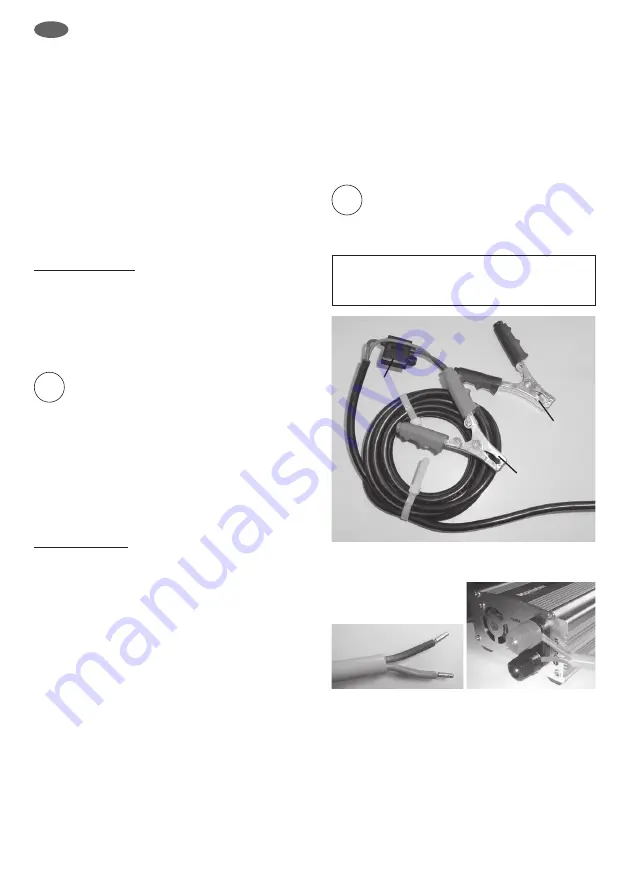
5.1 Connection via battery terminal clamps
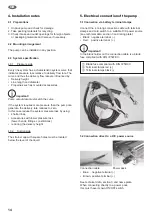
Connect the 4 m-long connection cable with terminal
clamps and cord switch to a suitable D/C power source
(see technical data, section 3 and rating plate):
• Black: negative terminal (-)
• Red: positive terminal (+)
i
Important!
In the black holder on the connection cable is a blade
fuse compliant with DIN 72581/3C.
a
Blade fuse compliant with DIN 7258/3C
b
Terminal clamps red (+)
c
Terminal clamps black (-)
a
b
c
5.2 Connection direct to a D/C power source
Connection cable
Power pack
• Blue: negative terminal (-)
• Brown: positive terminal (+)
See technical data, section 3 and name plate.
When connecting directly to a power pack,
this must have its own ON/OFF switch.
Summary of Contents for CENTRI SP30
Page 107: ...107 Notizen ...


