background image

Owner’s Manual & Safety Instructions

Save This Manual


Keep this manual for the safety warnings and precautions, assembly, 

operating, inspection, maintenance and cleaning procedures.  Write the product’s serial number in the back 
of the manual near the assembly diagram (or month and year of purchase if product has no number). Keep 
this manual and the receipt in a safe and dry place for future reference. 

18e

When unpacking, make sure that the product is intact 

and undamaged.  If any parts are missing or broken, 

please call 1-888-866-5797 as soon as possible.

Copyright

©

 2007 by Harbor Freight Tools

®

.  All rights reserved.  

No portion of this manual or any artwork contained herein may be reproduced in 

any shape or form without the express written consent of Harbor Freight Tools.  

Diagrams within this manual may not be drawn proportionally.  Due to continuing 

improvements, actual product may differ slightly from the product described herein.  

Tools required for assembly and service may not be included.

Read this material before using this product. 
Failure to do so can result in serious injury. 
SAVE THIS MANUAL.

Visit our website at: http://www.harborfreight.com

Email our technical support at: productsupport@harborfreight.com


6 FUNCTION MINI DIGITAL

Summary of Contents for 96308

Page 1: ... 888 866 5797 as soon as possible Copyright 2007 by Harbor Freight Tools All rights reserved No portion of this manual or any artwork contained herein may be reproduced in any shape or form without the express written consent of Harbor Freight Tools Diagrams within this manual may not be drawn proportionally Due to continuing improvements actual product may differ slightly from the product describ...

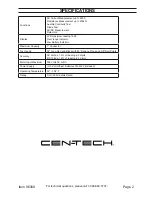
Page 2: ...Hold Display LCD maximum reading 1999 Over range Indicator Low Battery Indicator Maximum Capacity 1 Conductor Test Leads 36 Long Red and Black with 90 Banana Plugs and 5 8 Nail Points Accuracy AC Volts 1 5 of reading in 5 digits DC Volts 1 2 of reading in 5 digits Meter Input Maximum 300 Volts AC or DC Power Supply 3 3 Volt Lithium Batteries CR 2032 included Operating Temperature 32 104 F Rating C...

Page 3: ...ty or have residue on them c The battery is low d Near any explosive gases or fumes e Any abnormal operation is detected If in doubt about the condition of the Meter have it serviced before use f The battery cover is open 7 Power this Meter using only the battery ies referenced in the Specifications Chart 8 Use caution when working near voltages above 30 VAC rms 42 VAC peak or 60 VDC Voltages this...

Page 4: ...nly as specified in this manual 24 Prior to testing resistance diodes or continuity disconnect all power to the circuit and discharge all high voltage capacitors 25 Performance of this Meter may vary depending on battery condition 26 Use the proper settings terminals techniques and range for the tests performed Start with the range stated in the instructions 27 Do not apply voltage to the Test Lea...

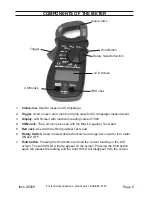
Page 5: ...isplay LCD Screen with maximum reading value of 1999 4 COM Jack The Common jack used with the Black negative Test Lead 5 Red Jack Used with the Red positive Test Lead 6 Rotary Switch Used to select desired function and range Also used to turn meter ON and OFF 7 Hold button Pressing the Hold button will hold the current reading on the LCD screen The word HOLD will also appear on the screen Pressing...

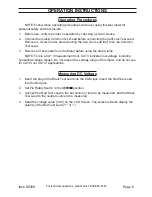
Page 6: ...all Test Leads from the Meter before using the Amp Clamp NOTE This is a CAT II measurement tool CAT II indicates low voltage including household voltage ranges Do not exceed the voltage range of this meter and do not use for CAT III nor CAT IV applications Measuring DC Voltage 1 Insert the plug of the Black Test Lead into the COM jack Insert the Red Test Lead into the Red jack 2 Set the Rotary Swi...

Page 7: ...st Lead to the neutral source to be measured 4 Read the voltage value V on the LCD Screen Measuring AC Current 1 Set the Rotary Switch to the desired AC current range 2 Press the Trigger to open the Clamp Jaw Clamp the Jaw on one of the wires to be tested Keep the wire in the center of the Jaw NOTE Only one wire can be tested at a time or else the readings from two wires will cancel each other and...

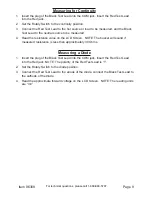
Page 8: ...d into the COM jack Insert the Red Test Lead into the Red jack 2 Set the Rotary Switch to the desired resistance range either 2000 Ohms or 200 kOhms 3 Connect the Red Test Lead to the hot source or load to be measured and the Black Test Lead to the neutral source to be measured 4 Read the resistance value on the LCD Screen 5 NOTE The buzzer will sound if measured resistance is less than approximat...

Page 9: ...source to be measured 4 Read the resistance value on the LCD Screen NOTE The buzzer will sound if measured resistance is less than approximately 30 Ohms Measuring a Diode 1 Insert the plug of the Black Test Lead into the COM jack Insert the Red Test Lead into the Red jack NOTE The polarity of the Red Test Lead is 2 Set the Rotary Switch to the diode position 3 Connect the Red Test Lead to the anod...

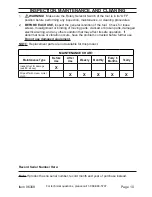
Page 10: ...oving parts cracked or broken parts damaged electrical wiring and any other condition that may affect its safe operation If abnormal noise or vibration occurs have the problem corrected before further use Do not use damaged equipment NOTE Replacement parts are not available for this product MAINTENANCE CHART Maintenance Type Before Use After Use Weekly Monthly Every 6 Months Yearly Inspect tool fo...

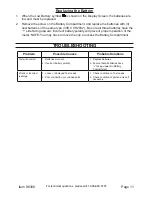
Page 11: ...e side facing upward Incorrect battery polarity will prevent proper operation of the meter NOTE You may have to move the clip to access the Battery Compartment TROUBLESHOOTING Problem Possible Causes Probable Solutions Tool will not start 1 Batteries worn out 2 Incorrect battery polarity 1 Replace batteries 2 Ensure that all batteries have facing upward in Battery Compartment Erratic or incorrect ...

Page 12: ...so the above limitation of exclusion may not apply to you THIS WARRANTY IS EXPRESSLY IN LIEU OF ALL OTHER WARRANTIES EXPRESS OR IMPLIED INCLUDING THE WARRANTIES OF MERCHANTABILITY AND FITNESS To take advantage of this warranty the product or part must be returned to us with transportation charges prepaid Proof of purchase date and an explanation of the complaint must accompany the merchandise If o...

Reviews: