background image

Page 7

SKU 98982

For technical questions, please call 1-800-444-3353.

Symbology

Underwriters Laboratories, Inc.

V~

Volts Alternating Current

A

Amperes

n0 xxxx/min.

No Load Revolutions per Minute 

(RPM)

SPECIFICATIOnS

Electrical 

Requirements

Input: 110 VAC~ / 60 Hz

Battery Type: 6 VDC Sealed Lead  Acid

Power Switch: ON/Off Rocker Switch

Power Plug: 3-Prong, Grounded  

Maximum

Weight

Capacity

330 Pounds (150 kilograms)

Main Functions

Auto Turn Off When Under Voltage

Count

Limit Set

Auto Zero Track

Keyboard Calibration

Overload Alarm

Control 

Panel Button 

Indicators

ADD, C, HOLD, FUNC, ZERO/TARE, UNIT

Additional 

Features

Four Adjustable Feet & Level Indicator for 

Leveling of Scale.

Built-In Rechargeable Battery.

unPACKInG

When unpacking, check to make sure 

that the item is intact and undamaged.  If 

any parts are missing or broken, please 

call Harbor Freight Tools at the number 

shown on the cover of this manual as soon 

as possible.

OPERATInG InSTRuCTIOnS

Read the EnTIRE IMPORTAnT 

SAFETY InFORMATIOn section 

at the beginning of this manual 

including all text under 

subheadings therein before set 

up or use of this product.


TO PREVEnT 

SERIOuS InjuRY 

FROM ACCIdEnTAL 

OPERATIOn: 

Turn the Power Switch (15) to 

its off position and unplug the 

Power Cord (17) before 

performing any inspection, 

maintenance, or cleaning 

procedures.

Assembly Instructions

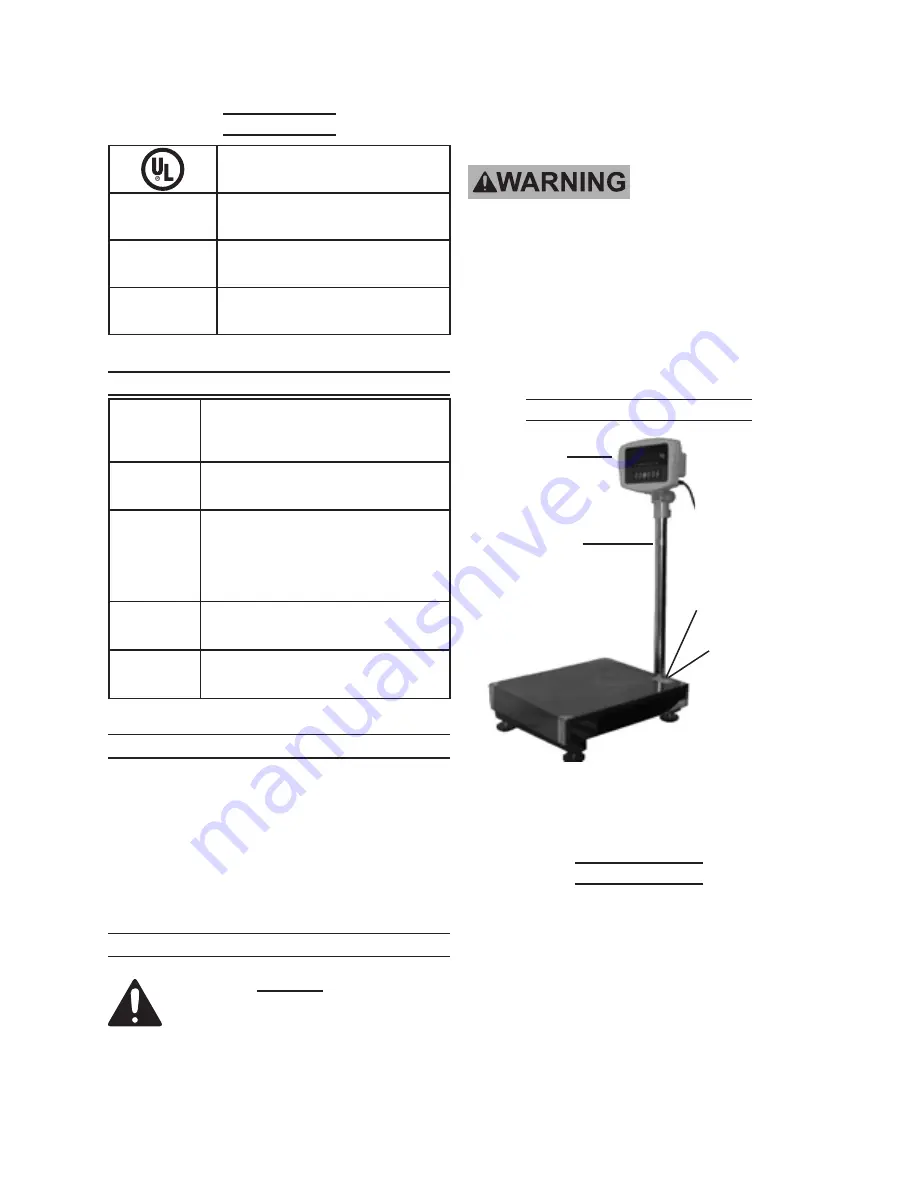
FIGuRE A

dISPLAY

(1)

STEEL TuBE

(4)

STEEL BASE

(5)

BOLTS

(6)

Attach the Display (1) and Steel Tube 

(4) to the Steel Base (5) of the Scale 

using four Bolts (6).  

(See Figure A.)

Scale Set up

Place the Scale on a clean, dry, flat, 

1. 

level surface capable of supporting 

the weight of the Scale and all ob-

jects to be weighed.
The work area must be free of vibra-

2. 

tion, strong air currents, direct sun-

shine, and high temperature.

Summary of Contents for CEN-TECH 98982

Page 1: ...in serious injury Save this manual Copyright 2008 by Harbor Freight Tools All rights reserved No portion of this manual or any artwork contained herein may be reproduced in any shape or form without the express written consent of Harbor Freight Tools Diagrams within this manual may not be drawn proportionally Due to continuing improvements actual product may differ slightly from the product descri...

Page 2: ...rdous situation which if not avoided could result in minor or moderate injury NOTICE is used to address practices not related to personal injury CAUTION without the safety alert symbol is used to address practices not related to personal injury General Safety Warnings WARNING Read all safety warn ings and instructions Failure to follow the warnings and instructions may result in electric shock fir...

Page 3: ...duce personal injuries Prevent unintentional starting c Ensure the Power Switch 15 is in the off position before connect ing to power source and or bat tery pack picking up or carrying the tool Carrying battery operated equipment with your finger on the Power Switch or energizing equip ment that have the Power Switch on invites accidents Do not overreach Keep proper d footing and balance at all ti...

Page 4: ... Scale contains a sealed lead 2 Battery 16 Do not dispose of an old Battery in fire to avoid explosion and possible personal injury Recycle old batteries according to local solid waste authority procedures Do not exceed the Scale s maximum 3 weight capacity of 330 pounds Use in a dry location only Risk of 4 electric shock Use on a level solid surface capable 5 of supporting the weight of the Scale...

Page 5: ...le con ditions and situations that may occur It must be understood by the operator that common sense and caution are factors which cannot be built into this product but must be supplied by the operator Save these instructions Grounding To prevent electric shock and death from incorrect grounding wire connection Check with a qualified electrician if you are in doubt as to whether the outlet is prop...

Page 6: ...re the greater the capacity of the cord For example a 14 gauge cord can carry a higher current than a 16 gauge cord See Table A When using more than one exten 3 sion cord to make up the total length make sure each cord contains at least the minimum wire size required See Table A If you are using one extension cord 4 for more than one tool add the nameplate amperes and use the sum to determine the ...

Page 7: ... and undamaged If any parts are missing or broken please call Harbor Freight Tools at the number shown on the cover of this manual as soon as possible Operating Instructions Read the entire Important Safety Information section at the beginning of this manual including all text under subheadings therein before set up or use of this product To prevent serious injury from accidental operation Turn th...

Page 8: ...IEW FROM REAR OF DISPLAY POWER SWITCH 15 I ON O OFF 1 Plug the Power Cord Plug 17 into the nearest 110 volt grounded electrical outlet Then turn the Power Switch to its ON position IMPORTANT Make sure there is no load on the Scale when turning the Power Switch on See Figure D For best accuracy allow the Scale to 2 warm up for ten minutes before ap plying weight When turned on the Scale will self 3...

Page 9: ...e The full capacity of the scale For this item 330 lb 150 kg Unit Press UNIT to choose the unit Lb or Kg See Figure E Hold Press HOLD at any time when 1 weighing The displayed value will be locked and will not change with weight Meanwhile the HOLD indi cator will show See Figure E Press HOLD again to exit the hold 2 mode Note Under the hold mode the Scale will sound an alarm when overloaded al tho...

Page 10: ... then ZERO TARE after the scale displays 012345 but before the scale is ready to weigh The scale will enter calibra tion mode and display the original maximum capacity value and the division These are factory settings and should not be altered Press ADD to continue The display will now read CAL 4 first then 0150 00 Now input the calibration weight in kg Leave the platform empty Press UNIT to selec...

Page 11: ...rts Battery leakage and any other condition that may affect its safe operation BATTERY REPLACEMENT 2 A Bat tery that fails to accept a charge is an indication the Battery should be replaced To replace the Battery FIGURE F BATTERY 16 Unscrew and remove the six Screws 18 located on the back panel of the Display 1 See Figure F Remove the front portion of the Dis play 1 to expose the Battery 16 See Fi...

Page 12: ...own Power Cord Plug 17 not shown Screws 18 not shown Part Description Qty Part Description Qty 1 Display 1 10 Lower Stand 1 2 Nut 1 11 Adjustable Foot 4 3 Bolt 1 12 Bolt 4 4 Steel Tube 1 13 Platform 1 5 Steel Base 1 14 Level Indicator 1 6 Bolt 4 15 Power Switch 1 7 Upper Stand 1 16 Battery 1 8 Sensor 1 17 Power Cord Plug 1 9 Bolt 8 18 Screw 6 ...

Page 13: ...roduct or part must be returned to us with transportation charges prepaid Proof of purchase date and an explanation of the com plaint must accompany the merchandise If our inspection verifies the defect we will ei ther repair or replace the product at our election or we may elect to refund the purchase price if we cannot readily and quickly provide you with a replacement We will return re paired p...

Reviews: