Ontario Drive & Gear Limited www.centaur8x8.ca
(519) 662-2840 FAX (519) 662-2421
Centaur Service Manual Transmission
Ontario Drive & Gear Limited www.centaur8x8.ca
(519) 662-2840 FAX (519) 662-2421
TR-69
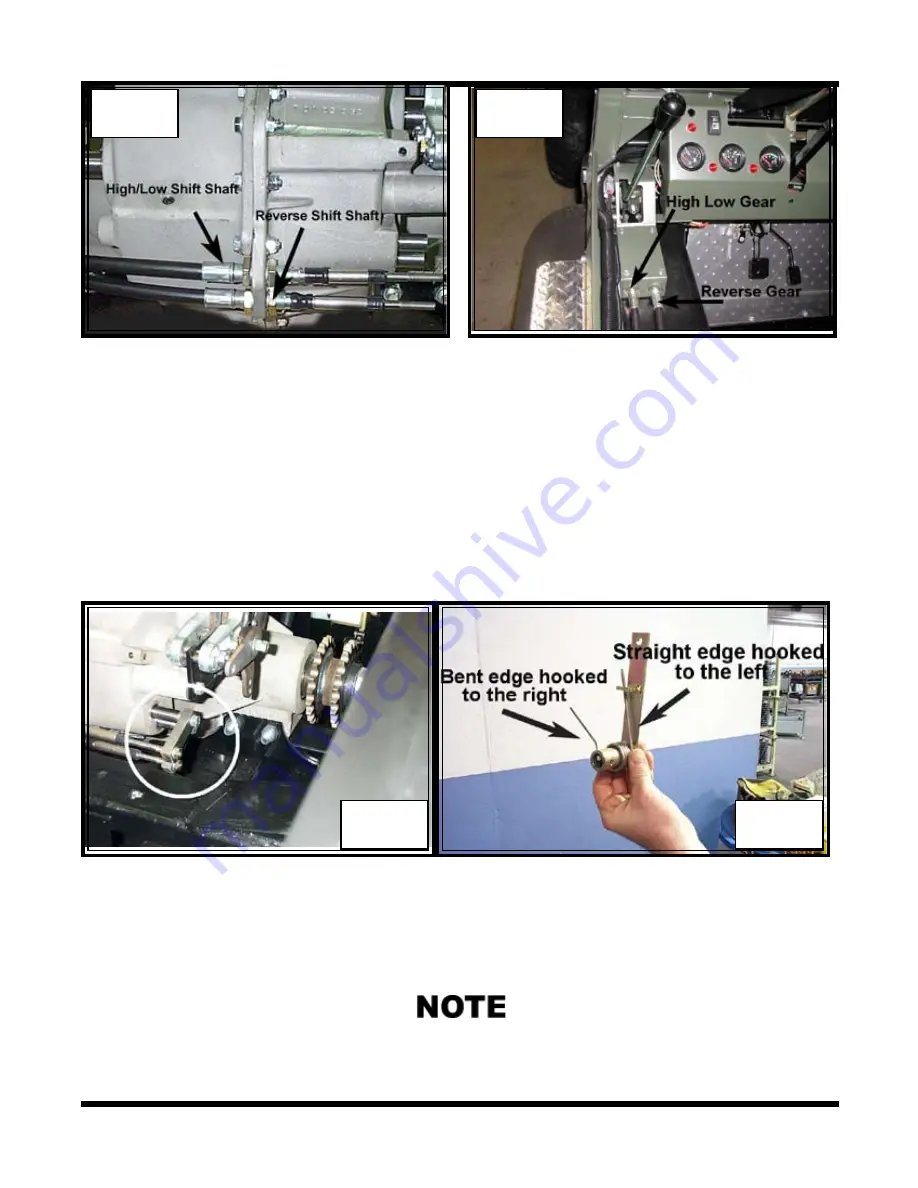
2. Insert each cable through the holes on the transmission casting. Tighten the cables so
that there are an equal amount of threads on each side of the transmission bosses.
Photo
TR-368
This is usually the correct placement at the rear. However, there may be a
slight adjustment required in some cases.
3. Thread the shift cable end bars on to each
cable
and secure with the specified lock
washers and nuts. Thread them to the cables so that when the mounting nuts and lock
washers are tightened, there are one or two threads protruding past the nuts.
Connect
the other end of the shift cable bar to the
shift shafts
using the specified bolts and lock
washers. Secure tightly.
Photo TR-369
4. Install the steering lever and spring assembly to the hydrostatic pump beneath the seat
in the drivers compartment. Assemble the spring to the lever as in
Photo TR-370 &
371
5. Apply some anti-seize compound to the hydrostatic pump steering post and install the
assembly securing it with the shoulder screw and locknut.
Photo TR-372
TR-369
TR-370
You will need to install the 809-205 Steering Lock Bracket to the steering post if your vehi
-
cle is so equipped. Refer to the transmission Illustration at the front of this section. Adjust
the cable lock accordingly.
TR-368
TR-369
Summary of Contents for 2001 950
Page 2: ......
Page 4: ......
Page 353: ......
Page 413: ......
Page 416: ...saue Axial Piston Pumps Motors and Transmissions Technical Information Series 70 15 Series ...
Page 429: ...14 saue Axial Piston Pumps Motors and Transmissions Series 70 15 Series Notes ...
Page 447: ...31 saue Axial Piston Pumps Motors and Transmissions Series 70 15 Series Notes ...
Page 449: ......


