Page 2
For technical questions, please call 1-800-444-3353.
SKU 68978
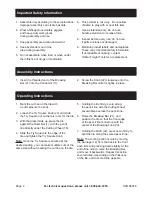
Important Safety Information
1. Assemble only according to these instructions.
Improper assembly can create hazards.
2. Wear ANSI-approved safety goggles
and heavy-duty work gloves
during assembly and use.
3. Keep assembly area clean and well lit.
4. Keep bystanders out of the
area during assembly.
5. Do not assemble when tired or when under
the influence of drugs or medication.
6. This product is not a toy. Do not allow
children to play with or near this item.
7. Use as intended only. Do not use
handle extension to increase force.
8. Inspect before every use; do not use
if parts are loose or damaged.
9. Maintain product labels and nameplates.
These carry important safety information.
If unreadable or missing, contact
Harbor Freight Tools for a replacement.
Assembly Instructions
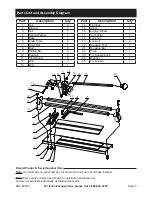
1. Insert the threaded end of the Breaking
Bar (21) into the Connector (17).
2. Screw the Knob (22) clockwise onto the
Breaking Bar until it is tightly in place.
Operating Instructions
1. Mark the cut line on the tile with
a soft carpenter’s pencil.
2. Loosen the Try Square Knob (23) and slide
the Try Square out so there is room for the tile.
3. With the glazed side up, place the tile
against the Ruler Bar (7), with the pencil
line directly under the Cutting Wheel (16).
4. Slide the Try Square to the edge of the
tile and tighten the Try Square Knob.
Note:
Once the Try Square is secured at the
desired setting, you can make multiple cuts of the
same size without marking the cut line on the tile.
5. Holding the tile firmly, score along
the pencil line with the Cutting Wheel
several times across the pencil line.
6. Raise the Breaking Bar (21), and
position the tile so that the front edge
of the pencil line is lined up with the
center of the Breaking Foot (20).
7. Holding the Knob (22), press down firmly to
split the tile along the scored pencil line.
Note:
The scoring action occurs by moving
the Carriage (14) from the back to the front
each time and pressing down slightly. At the
end of the motion, raise the Breaking Bar,
and move it backwards. Repeat this action
several times, depending on the thickness
of the tile, until a scored line appears.


