background image

Page 6 SKU # 42976

UNPACKING AND INSTALLATION

1.

Remove protective crating and skids carefully. In the event of damage in transit, contact Harbor Freight
Tools immediately.

2.

The machine is carefully inspected and tested in operation before it leaves the factory. If any
defects are found on delivery, contact us immediately.

3.

Read the owner’s manual and become familiar with the parts and controls on the drawings before
using this machine, as familiarity with the controls will enhance your ability and safety in using it.

ASSEMBLY

1.

After removing the machine from the crate and cleaning it, it must be mounted before use.

2.

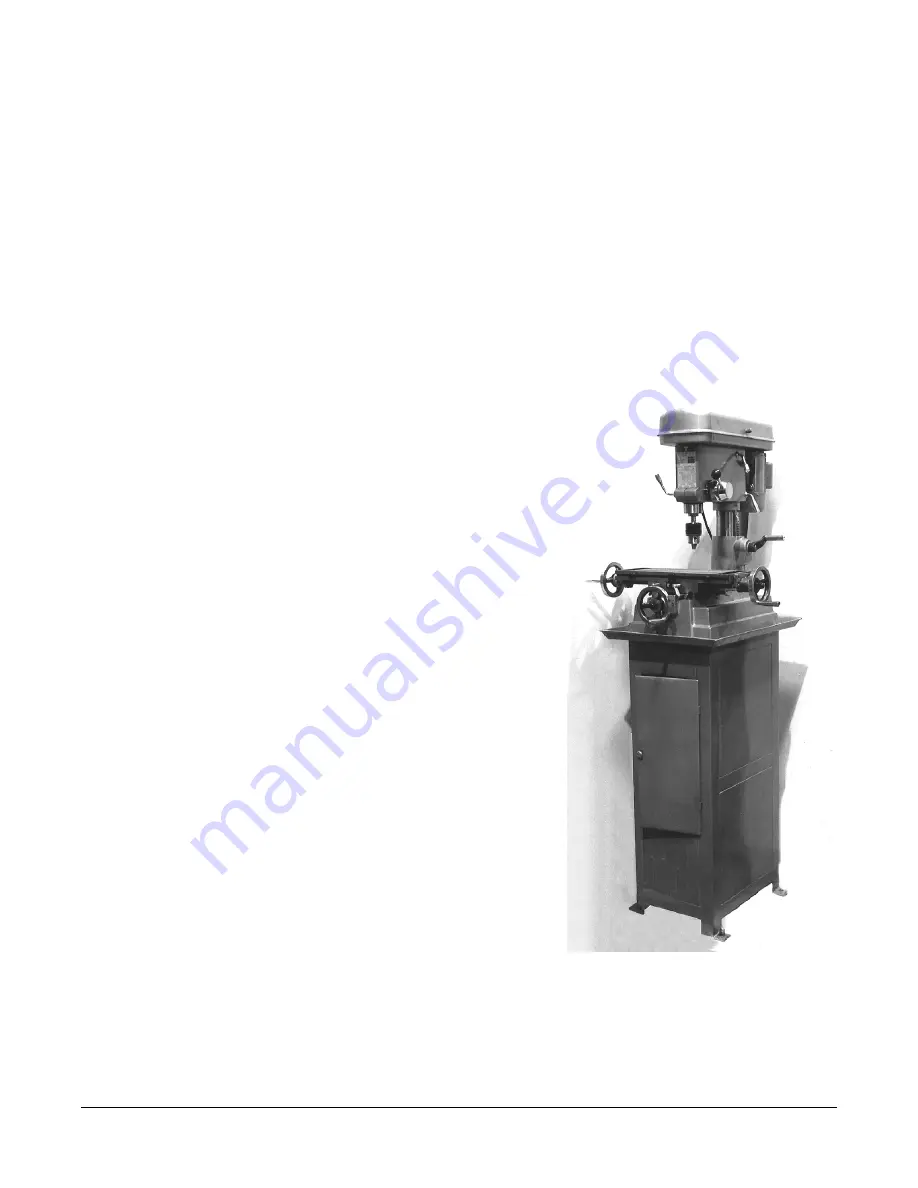
This machine can be mounted directly on a worktable, optional Stand (#42977), or floor.

3.

The drill chuck must be installed.

INSTALLATION

1.

It is important that the machine be located on a hard, solid,
level floor, worktable, or optional base, which is capable of
supporting this heavy machine and the workpieces that are
produced. Find a location that supplies easy access to 120
Volt electrical service. Make sure this machine is located in a
well lighted and well ventilated area. The floor should be
resistant to vibration.

2.

Warning: Drill/Mill machines are inherently top heavy.

Before moving the machine, be sure the head is fixed on the
column. Before moving, lower the head as much  as possible
to lower the center of gravity. When moving the machine be
careful to keep it balanced; do not allow it to topple over.

3.

To set the machine on a solid concrete foundation, it’s
advisable to apply a little grout to touch up any uneveness in
the concrete in order to get a solid foundation at all points.

4.

When setting machine on a floor or worktable that has any
surface irregularities, shims should be used to correct this
condition to the greatest extent possible.

5.

There are 4 holes in the base for mounting the machine
permanently to a smooth, solid, and level floor,
worktable, or optional stand (#42977).

CLEANING AND LUBRICATION

1.

Thoroughly clean the machine with a commercial degreaser.
Do not use gasoline, kerosene or other flammable liquids.
Avoid getting  solvent on rubber parts, or into the electrical
controls or motor.

2.

After cleaning, coat all bright metal with a light lubricant to
prevent corrosion.

3.

Lubricate all gears and moving parts


with a medium

consistency machine oil.

LEVELING THIS MACHINE

1.

Before operation, it is critical to level the work table both lengthwise and crosswise, using a precision
level. It will not be possible to maintain accuracy of machined parts if the mill is not properly leveled.

Figure 1. Shown with optional stand.

P/N #42977

Summary of Contents for 42976

Page 1: ... s Copyright 2000 by Harbor Freight Tools All Rights Reserved No portion of this manual or any artwork contained herein may be reproduced in any manner shape or form without the express written consent of Harbor Freight Tools For technical questions and replacement parts please call 1 800 444 3353 www HarborFreight com ...

Page 2: ...willneedthemanualforthesafetywarningsandcautions assemblyinstructions operatingprocedures maintenanceprocedures troubleshooting partslist anddiagram Keepyourinvoicewiththismanual Write the invoice number on the inside of the front cover Keep both this manual and your invoice in a safe dry place for future reference For fine adjustment use a dial test indicator not included mounted either to the ta...

Page 3: ...priate workclothing 8 USE EYE EAR AND BREATHING PROTECTION Always wear ANSI approved impact safety goggles if you are producing metal filings or wood chips Wear an ANSI approved dust mask or respirator when working around metal wood and chemical dusts and mists Use ANSI approved ear protection when working in a loud or noisy environment 9 DO NOT ABUSE THE POWER CORD Protect the power cord from dam...

Page 4: ...lified technician SPECIAL WARNINGS WHEN USING THIS DRILLING MILLING MACHINE Using this machine may create special hazards Take particular care to safeguard yourself and those around you Electrical Safety Never operate any tool if there is an electrical hazard Never operate an electrical tool in wet conditions Never operate a tool with an improper electrical cord or extension cord Never operate an ...

Page 5: ...tor 13 Drive Belt Cover 14 Motor Pulley 15 TransferPulley 16 DrivePulley 17 Drive Belt Tension Lever 18 DriveBeltTensionFixingBolt 19 HeadRotationControlLever 20 HorizontalControlWheels 2 8 28 4 13 14 15 16 17 18 5 12 19 1 9 20 6 7 3 2 3 10 11 9 23 25 20 22 26 27 24 21 26 25 21 Cross Feed Control Wheel 22 Butterfly Table Lock Bolts 4 23 T Slots 2 24 Tray 25 Mounting Bolts 4 26 Table Travel Stops 2...

Page 6: ...herently top heavy Before moving the machine be sure the head is fixed on the column Before moving lower the head as much as possible tolowerthecenterofgravity Whenmovingthemachinebe carefultokeepitbalanced donotallowittotoppleover 3 To set the machine on a solid concrete foundation it s advisable to apply a little grout to touch up any uneveness in the concrete in order to get a solid foundation ...

Page 7: ...ightToolscansupplyUL listed and outdoor rated cords in most AWG ratings as needed AWG RATING CHART CORD LENGTH 25 50 75 100 125 150 175 200 AMPS AWG AWG AWG AWG AWG AWG AWG AWG 0 10 0 18 18 16 16 14 14 12 12 10 1 13 0 16 16 14 14 14 12 12 12 13 1 15 14 14 12 12 12 12 12 15 18 14 12 12 12 12 12 GROUNDAGE VOLTAGE WARNING Common household current is 110 120 volts As long as the outlet used with the P...

Page 8: ... have a self centering MT 2 taper 1 Wipe a small amount of grease onto the spindle to prevent corrosion 2 Place the chuck onto the spindle pressing it upward with a twisting motion Tap the chuck gently home usingasoft facedmallet 3 Ifdesired finetunethechuckusingadialindicator Todothis mountadialindicatorfirmlyonthetable Place the dial indicator pointer in contact with the chuck and adjust the dia...

Page 9: ...orkpiece is properly attached to the table and alignedwiththedrillbit Adjustalignmentusingthe vertical and cross table control wheels The table can belockedintopositionusingthefourButterflyLock Bolts 22 which are located under the Table on therightside andabovetheCross FeedControlWheel Adjusting the Head 1 To raise or lower the head loosen the Vertical Head Lock 4 Use the Head Crank 3 to raise or ...

Page 10: ...ed by adjusting the position of the Table Stops 26 Changing Machine Speed 1 Turn the power off and unplug the power cord 2 To select the proper speed loosen the Drive Bolt TensionFixingBolt 18 thenloosentheDriveBelt Tension Lever 17 3 Open the Drive Belt Cover 13 4 Followingthespeedchartwhichismountedonthe front of the head position the two drive belts on the pulleys to achieve the desired speed 5...

Page 11: ...ke several passes to reach the required depth 4 The gib strip may be out of adjustment Check it and adjust it if necessary There is a vibration and the cut is not smooth 1 The spindle bearing may be improperly adjusted or is worn Check it and adjust or replace as necessary 2 The spindle is loose up and down Check the adjustment of the two inner bearing covers Adjust them so there is no free play i...

Page 12: ...uidleftonthemachine 5 Lubricategeared movingandmachinedmetalparts Applylightgreaseoroiltoallunpaintedmetalto prevent corrosion 6 Cover the machine to prevent dust or dirt contamination when not in use Daily Maintenance 1 Checkthetightnessofthemountingboltsholdingtheheadinplace 2 If overheating is observed or unusual noises are produced stop the machine immediately to check for lackoflubrication fa...

Page 13: ...lar 1 26 Handle 1 27 Screw Bracket 2 28 Dog 2 29 Screw 2 30 Support 1 31 Screw 4 32 BallBearing 1 33 ScaleRing 1 P N Description Quantity 34 HandleWheel 1 35 Washer 1 36 Nut 1 37 HandleCollar 1 38 Handle 1 39 Cover 1 40 Screw 3 41 Screw 2 42 Handboard 2 43 Pin 2 44 Crosswise Lead Screw 1 45 ShortGib 1 46 AdjustmentScrew 1 47 BallBearing 1 48 Support 1 49 Screw 4 50 BallBearing 1 51 ScaleRing 1 52 ...

Page 14: ...Page 14 SKU 42976 42976 DRILL MILL MACHINE TABLE AND BASE PARTS DIAGRAM Please refer to Parts List on Page 13 Note Parts for optional Stand are shown butnotincludedwiththeDrill Millmachine ...

Page 15: ...crew 1 98 Nut 4 99 Washer 4 100 Motor Base 1 101 Motor 1 102 Screw 4 103 MotorPulley 1 P N Description Quantity 104 Headless Set Screw 1 105 Nut 1 106 Nut 1 107 SlideBar 2 108 PulleyCover 1 109 Washer 4 110 Screw 4 111 V Belt 1 112 Nut 1 113 SpindlePulley 1 114 SpringSleeve 1 115 RetainingRing 1 116 BallBearing 1 117 Collar 1 118 BallBearing 1 119 RetainingRing 1 120 Nut 1 121 Washer 1 122 BallBea...

Page 16: ...Page 16 SKU 42976 42976 DRILL MILL MACHINE HEAD PARTS DIAGRAM Please refer to Parts List on Page 15 ...

Reviews: