background image

Visit our website at: http://www.harborfreight.com

 Email our technical support at: productsupport@harborfreight.com

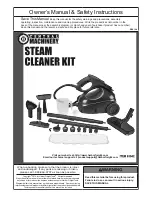
Owner’s Manual & Safety Instructions

Save This Manual


Keep this manual for the safety warnings and precautions, assembly, 

operating, inspection, maintenance and cleaning procedures.  Write the product’s serial number in the 

back of the manual near the assembly diagram (or month and year of purchase if product has no number). 

Keep this manual and the receipt in a safe and dry place for future reference.

When unpacking, make sure that the product is intact 

and undamaged.  If any parts are missing or broken, 

please call 1-888-866-5797 as soon as possible.

Copyright

©

 2015 by Harbor Freight Tools

®

.  All rights reserved.  

No portion of this manual or any artwork contained herein may be reproduced in 

any shape or form without the express written consent of Harbor Freight Tools.  

Diagrams within this manual may not be drawn proportionally.  Due to continuing 

improvements, actual product may differ slightly from the product described herein.  

Tools required for assembly and service may not be included.

Read this material before using this product. 

Failure to do so can result in serious injury. 

SAVE THIS MANUAL.

REV 16b

Summary of Contents for 63042

Page 1: ...nce When unpacking make sure that the product is intact and undamaged If any parts are missing or broken please call 1 888 866 5797 as soon as possible Copyright 2015 by Harbor Freight Tools All rights reserved No portion of this manual or any artwork contained herein may be reproduced in any shape or form without the express written consent of Harbor Freight Tools Diagrams within this manual may ...

Page 2: ...ire electric shock or injury 1 Do not leave appliance when plugged in Unplug from outlet when not in use and before servicing 2 Unplug from outlet and allow to cool completely before opening tank or adding water to tank 3 Do not touch steam nozzle or accessories or connect accessories while unit is plugged in 4 Only use water do not use cleaning agents they could cause injury or damage 5 Use only ...

Page 3: ...r other reproductive harm California Health Safety Code 25249 5 et seq 25 WARNING The cord of this product contains lead and or di 2 ethylhexyl phthalate DEHP chemicals known to the State of California to cause cancer and birth defects or other reproductive harm Wash hands after handling California Health Safety Code 25249 5 et seq 26 The warnings precautions and instructions discussed in this ins...

Page 4: ...Page 4 For technical questions please call 1 888 866 5797 Item 63042 Safety Operation Maintenance Setup Specifications Electrical Rating 120VAC 60Hz 12 5A Maximum Temperature 221º F 3140075 ...

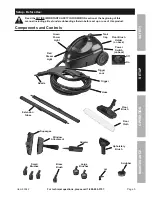
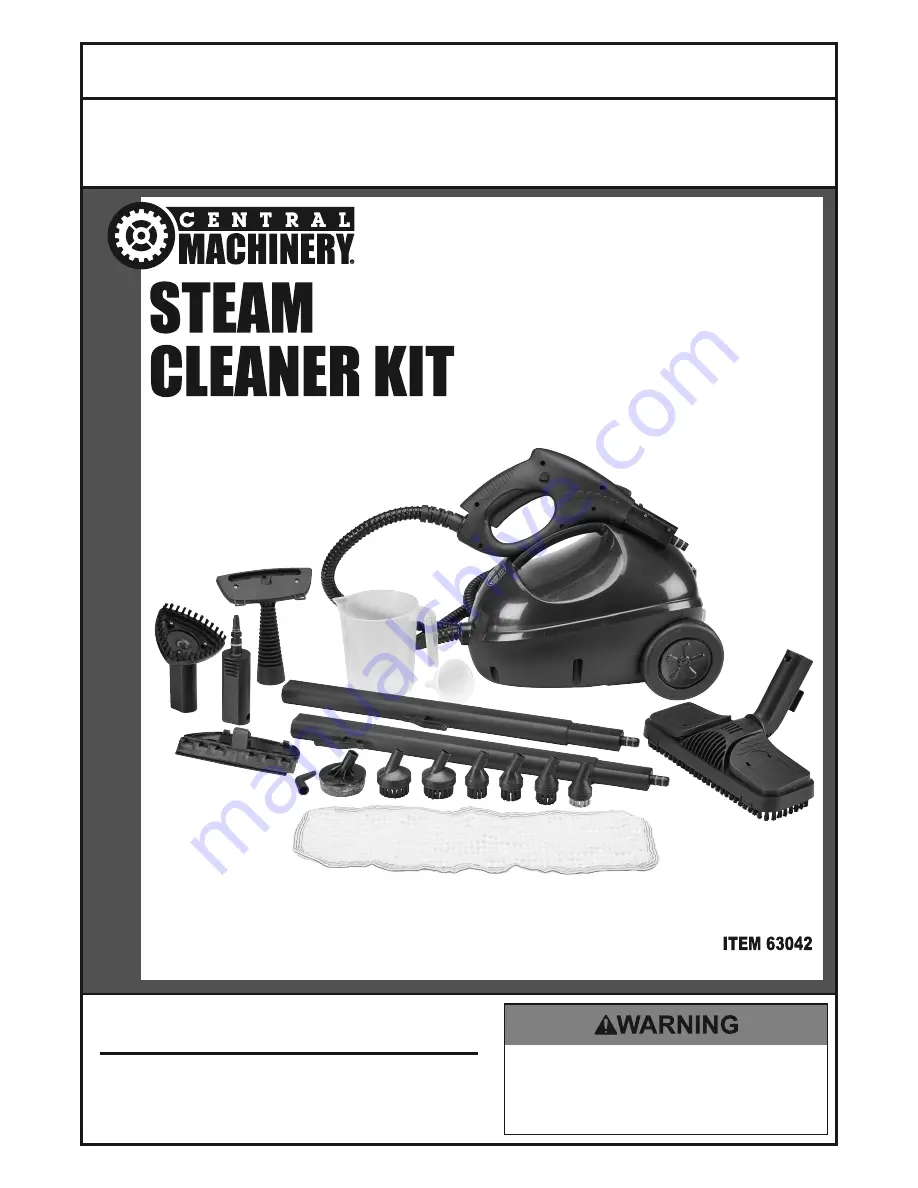
Page 5: ... this manual including all text under subheadings therein before set up or use of this product Components and Controls Floor Brush Holder on back On Off Tank Cap Nozzle Hose Trigger Trigger Lock Green Power Light Red Steam Light Floor Brush Floor Cloth Extension Tubes Squeegee Window Attachment Upholstery Brush Brass Brush Adapter Small Brushes Large Brushes Jet Scrubber Power Switch on back ...

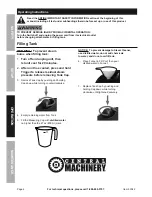
Page 6: ...revent steam burns when filling tank 1 Turn off and unplug unit then let unit cool for 20 minutes 2 After unit has cooled press and hold Trigger to release residual steam pressure before removing Tank Cap 3 Remove Tank Cap by pushing and holding Cap down while turning counterclockwise 4 Empty remaining water from Tank 5 Fill the Measuring Cup with distilled water no higher than the 27 oz 800 ml ma...

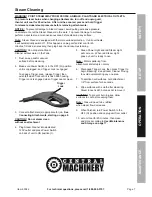
Page 7: ...ition unit is unplugged and Trigger Lock is engaged To engage Trigger Lock release Trigger then push left side of lock until it is flush with housing Trigger Lock is engaged when Trigger cannot move Trigger Lock 3 Connect attachment s appropriate for job See Connecting Attachments starting on page 8 CAUTION Do not steam clean without an attachment 4 Plug Steam Cleaner into dedicated 120V outlet an...

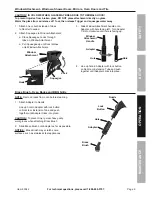
Page 8: ...on Tubes to Nozzle Line up hole in Extension Tube with lock button on Nozzle and push together until Extension Tube clicks into place Nozzle Extension Tube Hole Lock Button 3 carpets and Rugs Attach Floor Brush to Extension Tube Line up hole in Floor Brush with lock button on Extension Tube and push together until Floor Brush clicks into place Floor Brush 4 Hard Floors Attach Floor Brush with Clot...

Page 9: ...Squeegee Window Attachment Lock Tab Hook 3 Slide Window Attachment handle onto Adapter with hole facing left Turn Adapter 1 4 turn clockwise until hole is facing up Hole Adapter Window Attachment Handle Hole 4 Line up hole in Adapter with lock button on Nozzle or Extension Tube and push together until Adapter clicks into place Brass Brush Oven Racks and BBQ Grills NOTE Remove racks from oven befor...

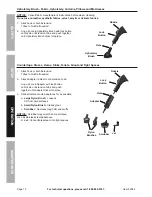
Page 10: ... clicks into place Nozzle Hole Lock Button Upholstery Brush Countertops Stoves Ovens Sinks Toilets Grout and Tight Spaces 1 Attach one or both Extension Tubes to Nozzle if needed 2 Attach Adapter to Nozzle or Extension Tube Line up hole in Adapter with lock button on Nozzle or Extension Tube and push together until Adapter clicks into place 3 Slide attachment onto Adapter as far as possible a Larg...

Page 11: ... moving parts cracked or broken parts damaged electrical wiring and any other condition that may affect its safe operation 2 AFTER EVERY USE a After unit has cooled for 20 minutes press and hold Trigger to release residual steam pressure b Remove attachments and rinse them with water Allow them to dry c Empty tank rinse with water and allow tank to dry before replacing cap d Wash Cloth separately ...

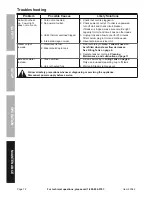
Page 12: ...cuit has no other loads 3 Unplug Unit and allow to cool for 20 minutes After cooled plug in Unit and continue use 4 Have technician service Unit Steam output is weak 1 Water level is low 2 Mineral build up in tank 1 Refill according to Note Tank will need to be refilled when steam flow decreases See Filling Tank on page 6 2 Descale tank according to Cleaning Maintenance and Lubrication on page 11 ...

Page 13: ...ANTY OF ANY KIND TO THE BUYER THAT HE OR SHE IS QUALIFIED TO MAKE ANY REPAIRS TO THE PRODUCT OR THAT HE OR SHE IS QUALIFIED TO REPLACE ANY PARTS OF THE PRODUCT IN FACT THE MANUFACTURER AND OR DISTRIBUTOR EXPRESSLY STATES THAT ALL REPAIRS AND PARTS REPLACEMENTS SHOULD BE UNDERTAKEN BY CERTIFIED AND LICENSED TECHNICIANS AND NOT BY THE BUYER THE BUYER ASSUMES ALL RISK AND LIABILITY ARISING OUT OF HIS...

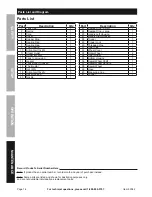
Page 14: ... 19 Back Housing 1 20 Nozzle 1 Part Description Qty 21 Sealing Ring Small 1 22 Sealing Ring Large 1 25 Handle Left Housing 1 27 Handle Right Housing 1 28 Trigger 1 29 Trigger Lock 1 30 Threaded Pipe 1 31 Inner Pipe 1 32 Wheel Cover 2 33 Outer Wheel 2 34 Inner Wheel 2 35 Bottom Housing 1 36 Swivel Wheel Shaft 1 37 Swivel Wheel Housing 1 38 Swivel Wheel 1 39 Hose 1 40 Measuring Cup 1 41 Funnel 1 Rec...

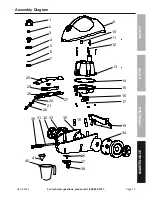
Page 15: ...r technical questions please call 1 888 866 5797 Item 63042 Safety Operation Maintenance Setup Assembly Diagram 9 1 2 3 4 5 6 7 10 11 13 12 14 15 16 17 19 36 40 41 37 38 18 30 27 28 29 25 20 21 22 31 32 33 34 35 ...

Page 16: ...so the above limitation of exclusion may not apply to you THIS WARRANTY IS EXPRESSLY IN LIEU OF ALL OTHER WARRANTIES EXPRESS OR IMPLIED INCLUDING THE WARRANTIES OF MERCHANTABILITY AND FITNESS To take advantage of this warranty the product or part must be returned to us with transportation charges prepaid Proof of purchase date and an explanation of the complaint must accompany the merchandise If o...

Reviews: