Page 7
For technical questions, please call 1-888-866-5797.
Item 63471
S
AFET
y
Op
ERA
TION
M
AINTENAN
c
E
SETU
p
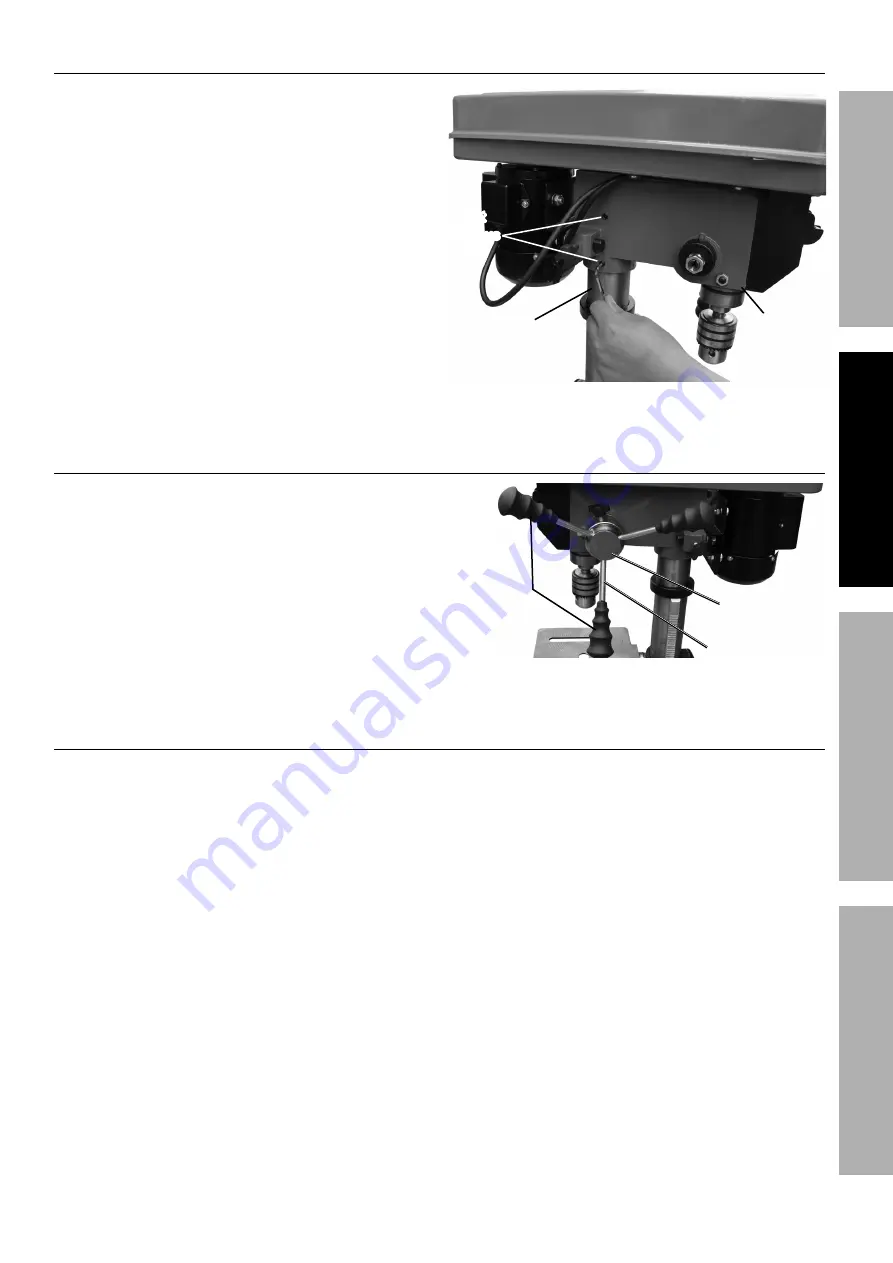
Headstock to column
1. Loosen the two Set Screws (17) on the
left side of the Headstock (67) so they
will stay clear while installing it.
2. With the help of an assistant, lift the Headstock
above the Column (6), and gently slide it
down the Column as far as it will go.
3. Tighten the two Set Screws to secure
the Headstock in place.
column (6)
Set
Screws
(17)
Headstock
(67)
Figure E: Installing Headstock
Feed Handles / Bars
Thread the Feed Bars (9) into the
Feed Bar Seat (10) and tighten them.
Feed
Handles (8)
Feed Bar
Seat (10)
Feed Bar (9)
Figure F: Installing Feed Handles
Installing the chuck
1. Thoroughly clean the Arbor (30) and the tapered
hole in the Chuck (29) of all dirt, grease, oil,
and protective coatings. Make sure all parts
are thoroughly clean, dry and burr free.
2. Insert the Arbor into the end of the
Spindle (31). If necessary, rotate the Arbor
to ensure that it is correctly positioned and
fully inserted into the Spindle shaft. Firmly
tap the Arbor nose with a rubber mallet.
3. Open the jaws of the Chuck to their
maximum, using the supplied Chuck Key.
4. Slide the Chuck onto the Arbor
nose as far as it will go.
5. Hold a piece of scrap wood against the Chuck
nose to protect it and firmly tap the wood with
a rubber mallet to ensure proper seating and
a solid fit of the Chuck on the Spindle.


