Page 10
For technical questions, please call 1-888-866-5797.
Item 42202
OPERATING INSTRUCTIONS
Read the ENTIRE IMPORTANT
SAFETY INFORMATION
section at the beginning of this
manual including all text under
subheadings therein before set
up or use of this product.
Inspect tool before use, looking
for damaged, loose, and
missing parts. If any problems
are found, do not use tool until
repaired.
Tool Set Up
TO PREVENT
SERIOUS INJURY
FROM ACCIDENTAL
OPERATION:
Release the Trigger, detach
the air supply, safely
discharge any residual air
pressure in the tool, and
release the Trigger again
before performing any
inspection, maintenance, or
cleaning procedures.
TO PREVENT SERIOUS
INJURY:
Do not adjust or tamper with
any control or component in a
way not specifically explained
within this manual. Improper
adjustment can result in
tool failure or other serious
hazards.
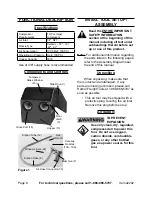
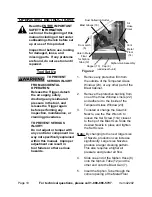
1.
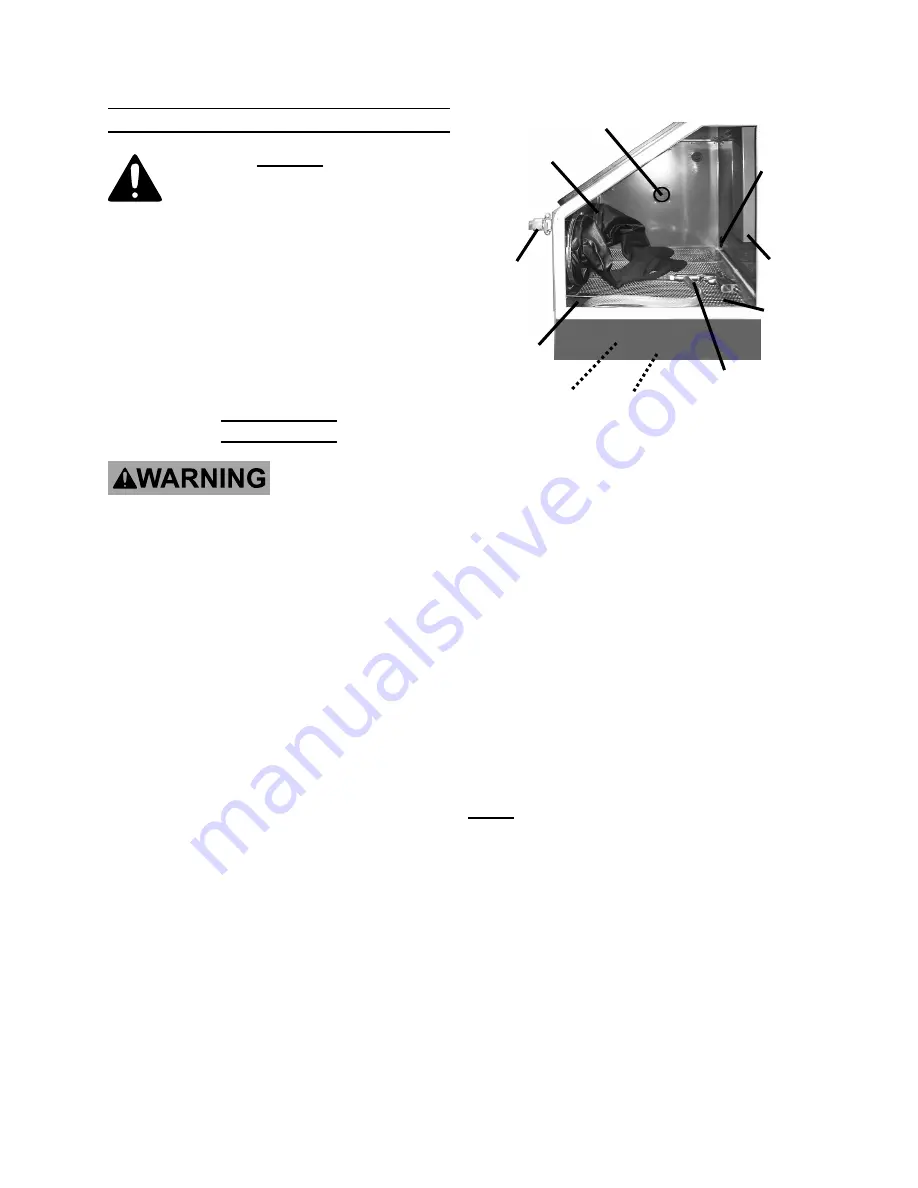
Cap (9)
(underneath unit)
Dust Collection Outlet
Metal
Floor
(14)
Air
Hose
Inlet
Vent
Siphon-Gun Assembly
Hole in Metal
Floor
for Siphon
Tube (12)
Blast Gloves (18)
Hopper (13)
Door Latch
(5)
Figure 2
Remove any protective film from
the outside of the Tempered Glass
Window (23), or any other part of the
Blast Cabinet.
2.
Remove the protective backing from
one of the three Window Liners (22)
and adhere it to the inside of the
Tempered Glass Window (23).
3.
To install or change the Ceramic
Nozzle, use the Hex Wrench to
loosen the Set Screw (11A) closest
to the tip of the Blast Gun. Slide the
desired Nozzle in place and tighten
the Set Screw.
Note:
By changing to the next larger size
of Nozzle, production can increase
significantly. Larger size Nozzles
produce a larger cleaning pattern.
This also requires a higher air
pressure and greater air flow.
4.
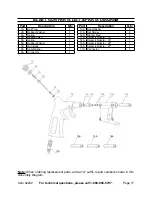
Slide one end of the Siphon Hose (8)
onto the Siphon Tube (12) and the
other end onto the Blast Gun (7).
5.
Insert the Siphon Tube through the
corner opening of the Metal Floor


