background image

Limited 90 Day Warranty

Harbor Freight Tools Co. makes every effort to assure that its products meet high quality and durability standards, 

and warrants to the original purchaser that this product is free from defects in materials and workmanship for the 

period of 90 days from the date of purchase. This warranty does not apply to damage due directly or indirectly, 

to misuse, abuse, negligence or accidents, repairs or alterations outside our facilities, criminal activity, improper 

installation, normal wear and tear, or to lack of maintenance. We shall in no event be liable for death, injuries 

to persons or property, or for incidental, contingent, special or consequential damages arising from the use of 

our product. Some states do not allow the exclusion or limitation of incidental or consequential damages, so the 

above limitation of exclusion may not apply to you. THIS WARRANTY IS EXPRESSLY IN LIEU OF ALL OTHER 

WARRANTIES, EXPRESS OR IMPLIED, INCLUDING THE WARRANTIES OF MERCHANTABILITY AND FITNESS.
To take advantage of this warranty, the product or part must be returned to us with transportation charges 

prepaid. Proof of purchase date and an explanation of the complaint must accompany the merchandise. 

If our inspection verifies the defect, we will either repair or replace the product at our election or we may 

elect to refund the purchase price if we cannot readily and quickly provide you with a replacement. We will 

return repaired products at our expense, but if we determine there is no defect, or that the defect resulted 

from causes not within the scope of our warranty, then you must bear the cost of returning the product.
This warranty gives you specific legal rights and you may also have other rights which vary from state to state.

3491 Mission Oaks Blvd.  •  PO Box 6009  •  Camarillo, CA 93011  •  (800) 444-3353

Summary of Contents for 60754

Page 1: ......

Page 2: ...fire and or serious injury Save all warnings and instructions for future reference The warnings precautions and instructions discussed in this instruction manual cannot cover all possible conditions a...

Page 3: ...milarly rated pump on an existing compressor that includes all other needed components Constructing a new compressor using this pump is not covered by this manual 2 Use Safety Guard for Pulleys The Ai...

Page 4: ...ose to move the compressor 12 Release the pressure in the storage tank before moving 13 The use of accessories or attachments not recommended by the manufacturer may result in a risk of injury to pers...

Page 5: ...h of pressure CFM Cubic Feet per Minute flow SCFM Cubic Feet per Minute flow at standard conditions NPT National pipe thread tapered NPS National pipe thread straight Double Insulated Canadian Standar...

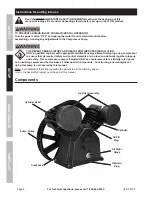
Page 6: ...DEATH FROM IMPROPER INSTALLATION ONLY a qualified engineer with appropriate certifications may attempt designing a new compressor to ensure that all required safety and control elements are in place a...

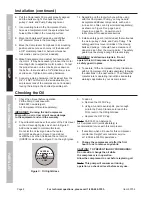
Page 7: ...or engine and related hardware and equipment It must also be capable of withstanding the vibration and tension of the drive belt 1 Place the Air Compressor Pump on the mounting surface at the same lev...

Page 8: ...ave a clearance of about one inch from the moving parts The safety guard must be sturdy enough to prevent injury WARNING Avoid serious injuries Do not operate this Air Compressor Pump without a safety...

Page 9: ...ir Hose Connects air to tool B Filter Prevents dirt and condensation from damaging tool or workpiece C Regulator Adjusts air pressure to tool D Lubricator optional For air tool lubrication E Coupler a...

Page 10: ...ibration reduction E Main Air Line 3 4 minimum recommended Distributes air to branch lines F Ball Valve To drain moisture from system G Branch Air Line 1 2 minimum recommended Brings air to point of u...

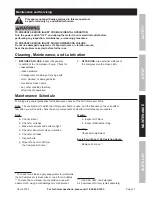
Page 11: ...r condition that may affect its safe operation 2 AFTER USE wipe external surfaces of the compressor with a clean cloth Maintenance Schedule Following are general guidelines for maintenance checks of t...

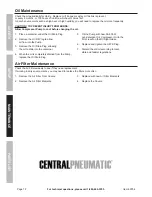
Page 12: ...2 Remove the Oil Fill Plug to allow air flow into the Pump 3 Remove the Oil Drain Plug allowing the oil to drain into the container 4 When the oil is completely drained from the Pump replace the Oil...

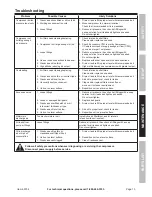
Page 13: ...or incorrect type 3 Crankcase oil level too low 4 Unusually dusty environment 5 Unit not on level surface 1 Check inlet and outlet filters Clean and or replace as needed 2 Drain oil and refill to pro...

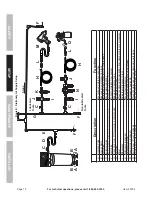
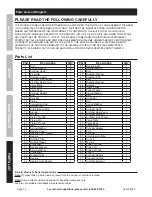
Page 14: ...er 1 57 Valve Plate 2 58 Valve Seat 1 59 Valve Plate 1 60 Cylinder Gasket 1 61 Bolt 4 62 Cylinder 1 63 Compression Ring 1 64 Air ring 1 65 Oil ring 1 66 Piston Pin Clip 1 67 Piston Pin 1 68 Piston Pin...

Page 15: ...0754 Safety Maintenance PARTS LIST Setup Assembly Diagram 1 2 3 4 5 6 7 8 9 10 11 12 13 14 15 16 17 18 19 20 21 22 23 24 25 26 27 28 29 30 31 32 33 34 35 36 37 38 39 40 41 42 43 44 45 46 47 48 49 50 5...

Page 16: ...so the above limitation of exclusion may not apply to you THIS WARRANTY IS EXPRESSLY IN LIEU OF ALL OTHER WARRANTIES EXPRESS OR IMPLIED INCLUDING THE WARRANTIES OF MERCHANTABILITY AND FITNESS To take...

Reviews: