background image

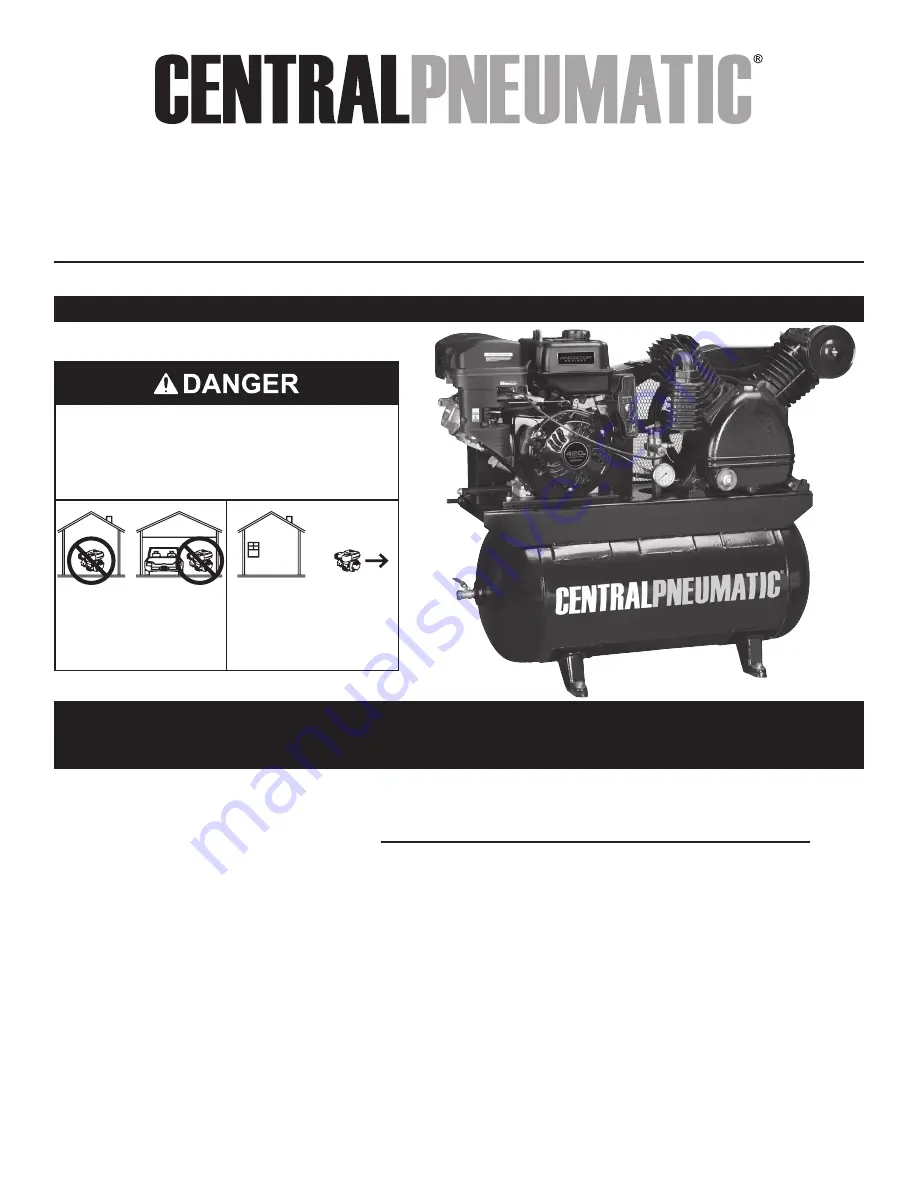
30 Gallon, 180 PSI  

Gas Powered Two-Stage Air Compressor

67853 Air Compressor

Using an engine indoors CAN KILL YOU 

IN MINUTES.
Engine exhaust contains carbon monoxide.  

This is a poison you cannot see or smell.

NEVER use inside 

a home or garage, 

EVEN IF doors and 

windows are open.

Only use OUTSIDE 

and far away from 

windows, doors, 

and vents.

When unpacking, make sure that the product is intact and undamaged.   

If any parts are missing or broken, please call 1-800-444-3353 as soon as possible. 

Record Product’s Serial Number Here: 

Note: 

If product has no serial number, record month and year of purchase instead.

Note:

  Some parts are listed and shown for illustration purposes only, and are not available individually 

as replacement parts.

Visit our website at: http://www.harborfreight.com 

Email our tech support at: tech@harborfreight.com

Copyright

©

 2010 by Harbor Freight Tools

®

.  All rights reserved.  No portion of this manual or any artwork contained herein may be reproduced in any shape 

or form without the express written consent of Harbor Freight Tools.  Diagrams within this manual may not be drawn proportionally.  Due to continuing 

improvements, actual product may differ slightly from the product described herein.  Tools required for assembly and service may not be included.

Manual Revised 11e

Summary of Contents for 67853

Page 1: ...no serial number record month and year of purchase instead Note Some parts are listed and shown for illustration purposes only and are not available individually as replacement parts Visit our websit...

Page 2: ......

Page 3: ...sepower WARNING marking concerning Risk of Eye Injury Wear ANSI approved safety goggles with side shields Read the manual before set up and or use WARNING marking concerning Risk of Hearing Loss Wear...

Page 4: ...close proximity to a heart pacemaker could cause pacemaker interference or pacemaker failure Caution is necessary when near the engine s magneto or recoil starter 12 Use only accessories that are rec...

Page 5: ...e that the safety of the equipment is maintained Do not attempt any service or maintenance procedures not explained in this manual or any procedures that you are uncertain about your ability to perfor...

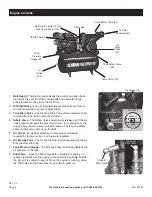
Page 6: ...n the tank 5 Air Outlet An air hose attaches to this valve Air pressure required by tools is set by an air pressure regulator 6 Air Storage Tank The Air Tank is where air pressurized by the Air Pump i...

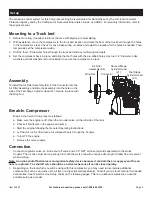
Page 7: ...Head 61 Secure in place with the Wing Nut Break In Compressor Break in the new Air Compressor as follows a Make sure the engine is off Open the air outlet valve on the left side of the tank b Check a...

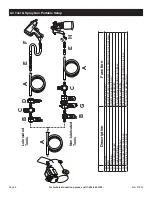
Page 8: ...ool or work piece C Regulator Adjusts air pressure to tool D Lubricator optional For air tool lubrication E Coupler and Plug Provides quick connection and release F Leader Hose optional Increases coup...

Page 9: ...lve To drain moisture from system G Branch Air Line 1 2 minimum recommended Brings air to point of use H Filter Prevents dirt and condensation from damaging tool or work piece I Air Cleaner Dryer opti...

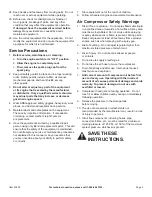
Page 10: ...onnections Do not use the air compressor unless all connections are air tight The extra air leaking out will cause the compressor to operate too often increasing wear on the compressor Before starting...

Page 11: ...tract fully and then pull it quickly Repeat until the engine starts Note Do not let the Starter Handle snap back against the engine Hold it as it recoils so it doesn t hit the engine 7 Allow the Engin...

Page 12: ...ained in the Maintenance and Servicing section Note When maximum tank pressure is reached the compressor automatically disengages and the engine RPM drops down to idle speed The engine remains at idle...

Page 13: ...67853 12 Close the in line Shutoff Valve 13 Bleed air from the tool then disconnect the tool 14 Open the Drain Valve at the bottom of the Tank to release any built up moisture and the internal tank p...

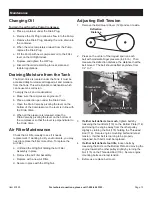
Page 14: ...our of use to remove any debris Adding Oil 1 Oil Sight Glass 19 Crankcase 16 overfill low full OIL LEVEL The oil level should be at the center of the full level on the Oil Sight Glass as shown above A...

Page 15: ...Air Filter Maintenance Check the Air Filter weekly to see if it needs replacement If working in dirty environments you may need to replace the filter more often To replace the Air Filter a Unthread t...

Page 16: ...ve Excessive noise 1 Loose drive pulley or flywheel 2 Misaligned pulleys 3 Lack of oil in crankcase 4 Worn connecting rod 5 Worn wrist pin bushing 6 Worn bearings 7 Loose belts 1 Loose pulleys are a c...

Page 17: ...o the buyer that he or she is qualified to make any repairs to the product or that he or she is qualified to replace any parts of the product In fact the manufacturer and or distributor expressly stat...

Page 18: ...num Seal 1 39 Bolt M6 25 4 40 Valve Stop Block 4 41 Spring 8 42 Valve Plate 4 43 Nut M6 4 44 Lock Nut 1 45 Elbow 1 46 Taper Sleeve 1 47 Nut 1 Part Description Qty 48 Brass Tube 1 49 Cylinder Head 1 50...

Page 19: ...Page 17 For technical questions please call 1 800 444 3353 Item 67853 Pump Assembly Diagram...

Page 20: ...0 4 109 Bracket 1 110 Bolt M10 50 4 111 Nut M10 4 112 Washer 8 1 113 Bolt M8 20 1 114 Bottom Plate 1 115 Nut M14 1 116 Spring Washer 14 1 Part Description Qty 117 Bracket 1 118 Threaded Rod 1 119 Bolt...

Page 21: ...Page 19 For technical questions please call 1 800 444 3353 Item 67853 Tank Assembly Diagram...

Page 22: ...ncidental or consequential damages so the above limitation of exclusion may not apply to you This warranty is expressly in lieu of all other warranties express or implied including the warranties of m...

Page 23: ...apacity 61 oz 1 8L Oil Type SAE 30W non detergent Air Compressor Oil SKU 95048 Sold separately Required Rotation viewed from PTO power takeoff the output shaft Counterclockwise Required Engine Idle Sp...

Page 24: ...ber Location on page 6 Note If product has no serial number record month and year of purchase instead Note Some parts are listed and shown for illustration purposes only and are not available individu...

Page 25: ...or below Capacity 0 5 Quart 1 16 Quart 1 16 Quart Run Time 50 Load with full tank 3 hr Sound Level at 22 feet 104 dB 108 dB 108 dB Bore x Stroke 70 mm x 55 mm 83 mm x 64 mm 90 mm x 66 mm Compression R...

Page 26: ...or moderate injury NOTICE is used to address practices not related to personal injury CAUTION without the safety alert symbol is used to address practices not related to personal injury Symbol Defini...

Page 27: ...cations must follow OSHA requirements 10 Do not leave the equipment unattended when it is running Turn off the equipment and remove safety keys if available before leaving the work area 11 Engine can...

Page 28: ...ove the spark plug cap from the spark plug 2 Keep all safety guards in place and in proper working order Safety guards include muffler air cleaner mechanical guards and heat shields among other guards...

Page 29: ...82 Horizontal Engines Engine Controls Starter Handle Oil Drain Plug Air Filter Muffler Fuel Valve Choke Fuel Cap Throttle Dipstick Starter Serial Number Location Write on front cover of manual Engine...

Page 30: ...may be required The operator should contact local fire agencies for laws or regulations relating to fire prevention requirements At high altitudes the engine s carburetor governor if so equipped and...

Page 31: ...he SAE Viscosity Grade chart on page 14 in the Service section shows other viscosities to use in different average temperatures 6 Thread the dipstick back in clockwise CAUTION Do not run the engine wi...

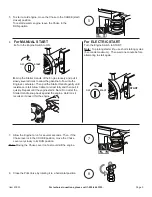
Page 32: ...the tool which functions the same as the Throttle Use the Speed Control Lever in place of the Throttle when the tool is so equipped 4 Turn the Engine Switch on 5 Grip the Starter Handle of the Engine...

Page 33: ...oper equipment and engine operation b The operational break in period will last about 3 hours of use During this period Do not apply a heavy load to the equipment Do not operate the engine at its maxi...

Page 34: ...e Choke in the RUN position 2 Open the Fuel Valve 3 Slide the Throttle or Speed Control Lever to 1 3 away from the SLOW position the turtle Note Some tools have a Speed Control Lever located elsewhere...

Page 35: ...proper equipment and engine operation b The operational break in period will last about 3 hours of use During this period Do not apply a heavy load to the equipment Do not operate the engine at its ma...

Page 36: ...ng Maintenance and Lubrication Schedule Note This maintenance schedule is intended solely as a general guide If performance decreases or if equipment operates unusually check systems immediately The m...

Page 37: ...el Valve 3 Place a drain pan not included underneath the crankcase s drain plug 4 Remove the drain plug and if possible tilt the crankcase slightly to help drain the oil out Recycle used oil 5 Replace...

Page 38: ...radually enter the engine and cause rust damage Apply a thin coat of rust preventive oil to all metal parts 2 FUEL WARNING TO PREVENT SERIOUS INJURY FROM FIRE Drain the fuel tank in a well ventilated...

Page 39: ...the start handle several times to air out the chamber Reinstall spark plug and set Choke to CHOKE position 9 Replace Fuel Filter IGNITION SPARK RELATED 1 Spark plug cap not connected securely 2 Spark...

Page 40: ...use gasoline with more than 10 ethanol E15 E20 E85 etc 3 Test replace fuel tank cap 4 Have qualified technician service magneto 5 Secure spark plug cap Engine stops when under heavy load 1 Dirty air f...

Page 41: ...onmental Protection Agency herein EPA and Harbor Freight Tools herein HFT are pleased to explain the emission control system warranty on your 1997 and later Small Off Road Engine herein engine Within...

Page 42: ...f any engine components caused by the failure of any warranted part while it is still covered under this warranty 4 Coverage Exclusions Warranty claims shall be filed in accordance with the provisions...

Page 43: ...ring 1 44 Retainer_ Exhaust Valve 1 45 Rotator Valve 1 46 Guide Seal 1 47 Tappet Valve 2 48 Lifter Valve 2 49 Plate Asm Lifter Stopper 1 50 Bolt Valve Adjusting 2 Part Description Qty 51 Rocker Valve...

Page 44: ...1 52 53 53 39 33 34 35 36 33 37 38 47 48 47 48 51 16 21 22 15 14 17 18 18 17 20 23 23 19 13 32 56 56 56 55 72 72 73 74 11 1 4 2 3 5 6 8 10 10 10 10 8 7 9 9 5 5 12 40 79 78 81 82 83 82 84 85 85 80 92 9...

Page 45: ...ter Valve 2 49 Plate Asm Lifter Stopper 1 50 Bolt Valve Adjusting 2 51 Rocker Valve 2 52 Nut_ Valve Adjusting 2 53 Nut Valve Lock 2 54 Spring Valve 2 Part Description Qty 55 Starter Asm Recoil 1 56 Bo...

Page 46: ...33 37 38 47 48 47 48 51 16 21 22 15 14 17 18 18 17 20 23 23 19 13 32 56 56 56 55 11 1 4 2 3 5 6 8 10 10 10 10 8 7 9 9 5 5 12 40 101 102 102 103 104 105 106 107 10 8 95 97 99 99 5 96 98 100 30 31 31 31...

Page 47: ...eat Valve Spring 1 52 Retainer Exhaust Valve 1 53 Rotator Valve 1 54 Guide Seal 1 55 Tappet Valve 2 56 Lifter Asm Valve 2 Part Description Qty 57 Plate Asm Lifter Stopper 1 58 Bolt Valve Adjusting 2 5...

Page 48: ...5 10 7 10 9 110 111 112 39 8 3 29 32 30 33 31 33 34 34 34 34 34 34 34 35 36 37 38 42 44 45 47 48 50 49 52 53 54 55 55 56 56 57 58 58 59 59 60 60 61 61 62 62 63 65 65 65 65 67 68 69 69 69 69 69 70 71 7...

Page 49: ...Tappet Valve 2 56 Lifter Asm Valve 2 57 Plate Asm Lifter Stopper 1 58 Bolt Valve Adjusting 2 59 Rocker Valve 2 60 Nut Valve Adjusting 2 61 Nut Valve Lock 2 Part Description Qty 62 Spring Valve 2 63 Re...

Page 50: ...0 10 1 10 2 10 3 104 105 10 7 10 6 97 86 85 90 89 92 92 91 88 89 87 93 94 96 97 112 109 111 113 114 115 116 39 40 15 25 8 3 19 20 25 25 25 26 29 32 30 33 31 33 34 34 34 34 34 34 34 35 36 37 38 42 44 4...

Page 51: ...520 0882 Horizontal Engines Mounting Hole Diagrams Note Not to scale ITEM 68120 68121 212cc 6 38 in 162mm 2 6 in 66mm 1 6 in 40 5mm 2 97 in 75 5mm 3 17 in 80 5mm ITEM 68136 346cc and ITEM 68306 420cc...

Page 52: ...45 5mm 0 67 in 17mm 5 16 24UNF 0 75 in 19 05mm 0 64 in 16 36mm 0 1875 in 4 78mm 4x5 16 24UNF 5 16 24UNF 4 17 in 106mm 3 625 in 92mm ITEM 68136 346cc and ITEM 68306 420cc 3 48 in 88 5mm 1 17 in 29 7mm...

Page 53: ...3491 Mission Oaks Blvd PO Box 6009 Camarillo CA 93011 800 520 0882 www harborfreight com...

Reviews: