


TESTING THE FULL SEQUENTIAL SAFETY TRIP MECHANISM
WARNING: Even though the Nailer should be empty during this
procedure, ALWAYS point the Nailer at a piece of scrap wood when testing.
1.
Make sure the tool is disconnected from its air supply.
2.
Completely empty the Magazine Assembly (73) of Nails.
3.
The Nailer should not fire if the Nose (40) is not depressed against the
workpiece.
4.
Make sure the Trigger (58) and Nose (40) move freely, without sticking.
5.
Connect the air supply to the tool at the Quick Connector (85). Set the regulator
at the recommended
90 PSI. Do not exceed the maximum 125 PSI.
6.
Test the tool by depressing the Nose (40) against the workpiece without
pulling the Trigger (58).
The tool must not cycle (fire).
If it cycles (fires), stop
immediately and have it repaired by a qualified service technician.
7.
Hold the tool away or off the workpiece in a safe direction. The Nose (40) of the
tool should return to its original position. Squeeze the Trigger (58).
The tool
should not cycle (fire).
If the tool cycles (fires), stop immediately and have it
repaired by a qualified service technician.
SKU 93760
For technical questions, please call 1-800-444-3353
PAGE 6
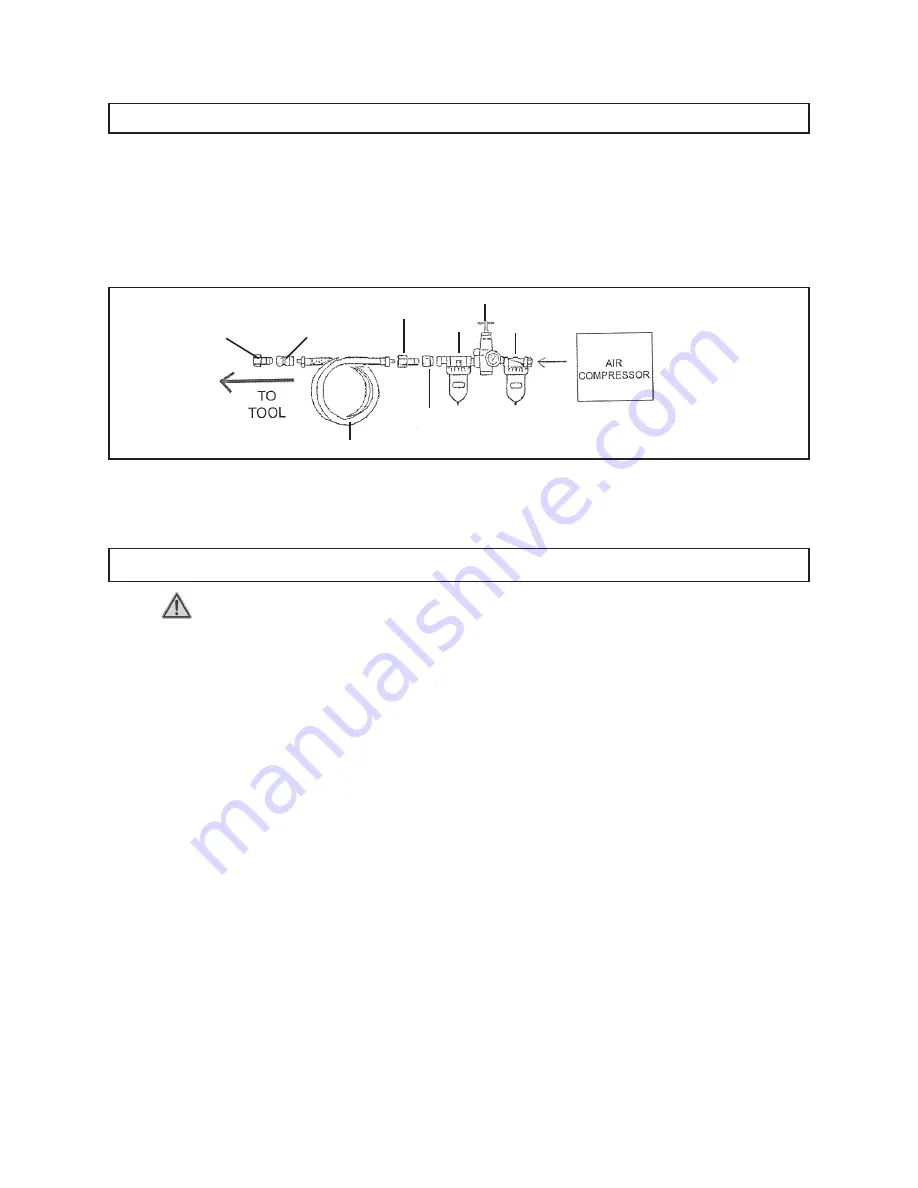
OPERATION
For best service, you should incorporate an oiler, regulator, and in-line filter as shown in
the diagram below. Hoses, couplers, oilers, regulators, and filters are all available at
Harbor Freight Tools.
NOTE: If you are not using an automatic oiler system, before operation, add a few
drops of Tool Oil (89) to the airline connection. Add a few drops more after each
hour of continual use.
FILTER
OILER
REGULATOR
QUICK
COUPLER
QUICK
COUPLER
QUICK
CONNECTOR
QUICK
CONNECTOR
AIR HOSE
Rev 11/06


