SKU 99637
For technical questions, please call 1-800-444-3353.
Page 10
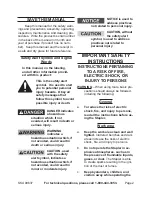
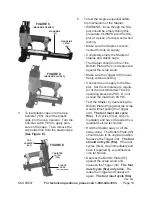
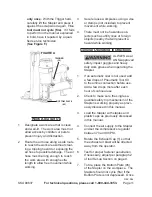
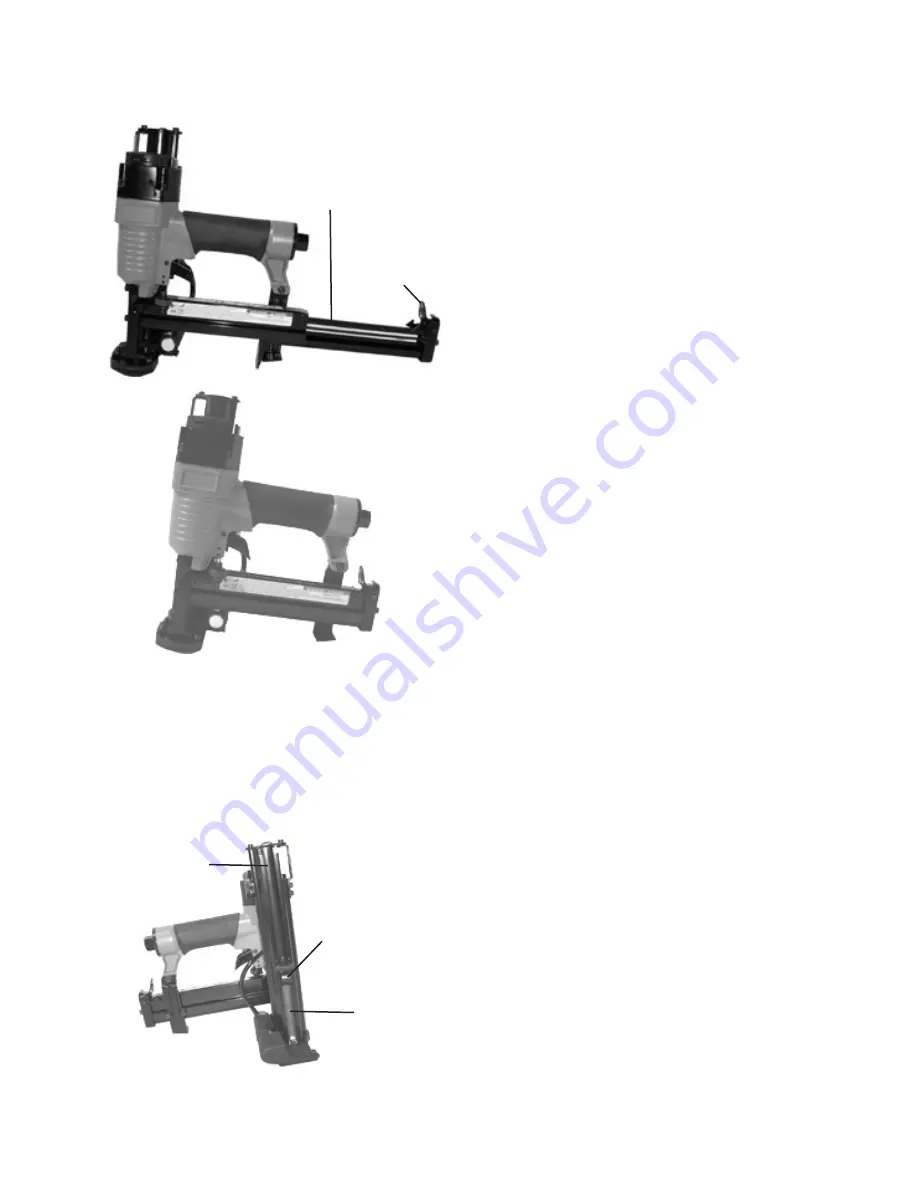
FIGURE C
(MAGAZINE OPENED)
MAGAZINE
LATCH
(63)
MAGAZINE
(73)
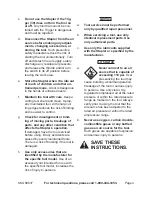
4. To load plastic caps into the Cap
Canister (105), insert the plastic
caps into the Cap Canister. Turn the
Canister Latch (104) to apply pres-
sure on the caps. Then remove the
cap holder line from the plastic caps.
(See Figure E.)
5. To test the single sequential safety
trip mechanism of the Stapler:
• WARNING: Even though the Sta-
pler should be empty during this
procedure, ALWAYS point the Sta-
pler at a piece of scrap wood when
testing.
• Make sure the Stapler is discon-
nected from its air supply.
• Completely empty the Stapler of
staples and plastic caps.
• The Stapler should not fire if the
Bottom Plate (95) is not depressed
against the scrap wood.
• Make sure the Trigger (39) moves
freely, without sticking.
• Connect the air supply to the Sta-
pler. Set the compressor’s regula-
tor at the recommended 70 to 90
operating pressure (PSI). Do not
exceed the maximum 90 PSI.
• Test the Stapler by depressing the
Bottom Plate (95) against the scrap
wood without pulling the Trigger
(39).
The tool must not cycle
(fire).
If it cycles (fires), stop im-
mediately and have it repaired by a
qualified service technician.
• Hold the Stapler away or off the
scrap wood. The Bottom Plate (95)
should return to its original position.
Squeeze the Trigger (39).
The tool
should not cycle (fire).
If the tool
cycles (fires), stop immediately and
have it repaired by a qualified ser-
vice technician.
• Depress the Bottom Plate (95)
against the scrap wood and
squeeze the Trigger (39).
The tool
must cycle (fire) only once.
Re-
lease the Trigger and squeeze it
again.
The tool must cycle (fire)
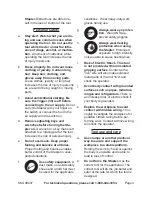
FIGURE D
(MAGAZINE CLOSED)
FIGURE E
PLASTIC
CAPS
(NOT INCLUDED)
CAP
CANISTER
(105)
CANISTER
LATCH
(104)
REV 08k


