background image


Revision 1. 2 November 2017 

© 2017 Centrica plc. 
Registered office: Millstream, Maidenhead Road, Windsor, Berkshire. SL4 5GD. Registered in England & Wales No 3033654 

Page 6 of 22 

Unpacking the Hardware 

We recommend that you follow these unpacking instructions. 

How to proceed 

1.


Check  the  box.  If  any  damage  occurred  during  shipment,  contact  your  sales 
representative. 

2.


Open the box. It must include the following items: 


Bridge 


Cellular antenna 


RF antenna, labeled Rx-1 (Europe) or Rx-2 (USA)  


5V DC wall adapter 


4-Piece reclosable fastener with adhesive 

3.


Keep the box in case you need to repack the bridge. 

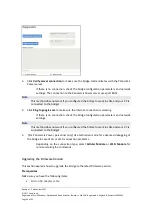
Attaching the Antennas 

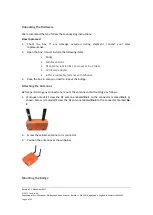
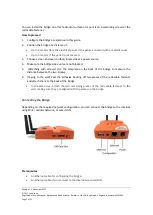
Before performing any connections, mount the antennas onto the bridge as follows: 

1.


(European  model)  Screw  the  RF  antenna  labeled 

Rx-1

  to  the  connector  marked 

Rx-1

,  as 

shown below. (US model) Screw the RF antenna labeled 

Rx-2

 to the connector marked 

Rx-

2


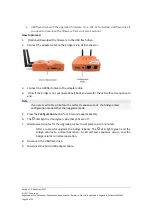
4.


Screw the cellular antenna to its connector. 

5.


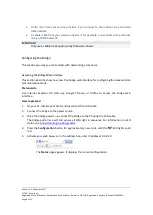
Position the antennas as shown below. 


Mounting the Bridge 

Summary of Contents for Panoramic Power

Page 1: ...tered office Millstream Maidenhead Road Windsor Berkshire SL4 5GD Registered in England Wales No 3033654 Page 1 of 22 Version 2 January 2018 Installation and configuration guide Panoramic Power advanced cellular bridge For firmware version 2x Build 107 ...

Page 2: ...rements Power supply Certified AC DC adapter marked Limited Power Source LPS or NEC Class 2 suitably rated for voltage current and ambient temperature Electrical rating 5VDC maximum 1A Environmental rating Maximum ambient temperature 60 C Pollution degree 2 Indoor use Relative humidity up to 80 Product end of use handling WEEE Waste of Electrical and Electronic Equipment Centrica Business Solution...

Page 3: ...guring the Bridge 8 Accessing the Bridge Web Interface 8 Entering Credentials 9 Configuring the Bridge for Wi Fi Connection 9 Configuring the Bridge for Cellular Connection 12 Configuring the Bridge for Wired LAN 14 Loading the Bridge Configuration from a Configuration File 15 Modifying the Bridge Administration Settings 15 Modifying the Default URL and or Port of the Panoramic Power Server 15 Mod...

Page 4: ...stallation with almost no disturbance to operations Sensors are easily attached to circuit breakers by just snapping them on to the outgoing electrical cable They monitor the flow of electricity through the magnetic field it creates and also use it as power source The sensors do not require any maintenance Sensors report the power consumption to the bridge which in turn transfers the information t...

Page 5: ...ield upgradable firmware X Initial configuration Via the Bridge Configuration Tool Windows application Via built in web interface The Advanced Cellular Bridge provides store and forward capability In case of a network loss that impacts connectivity with the PowerRadar cloud platform the bridge stores measurements until communication is resumed The bridge storage capacity is shown in the table belo...

Page 6: ...lude the following items Bridge Cellular antenna RF antenna labeled Rx 1 Europe or Rx 2 USA 5V DC wall adapter 4 Piece reclosable fastener with adhesive 3 Keep the box in case you need to repack the bridge Attaching the Antennas Before performing any connections mount the antennas onto the bridge as follows 1 European model Screw the RF antenna labeled Rx 1 to the connector marked Rx 1 as shown be...

Page 7: ...face located near a power source 4 Make sure the bridge side vents are not blocked 5 Attaching with screws Use the template on the back of the bridge to measure the distance between the two screws 6 Taping to the wall Peel the adhesive backing off two pieces of the reclosable fastener and attach them to the back of the bridge In the same way attach the two remaining pieces of the reclosable fasten...

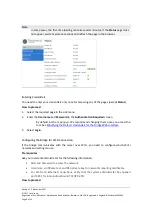
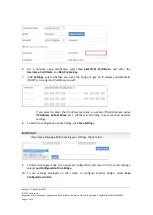
Page 8: ...section describes how to access the bridge web interface for configuring the relevant data communication mode Prerequisite Use Internet Explorer 9 0 and up Google Chrome or Firefox to access the bridge web interface How to proceed 1 On your PC disable your Wi Fi and disconnect the LAN cable 2 Connect the bridge to the power source 3 Once the bridge powers up connect the bridge to the PC using the ...

Page 9: ...name and Password in the Authentication Required screen By default both are panpwr We recommend changing them once you access the tool See Modifying the Default Credentials for the Bridge Web Interface 3 Select Login Configuring the Bridge for Wi Fi Connection If the bridge communicates with the server over Wi Fi you need to configure which Wi Fi network and settings to use Prerequisites Ask your ...

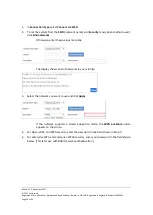
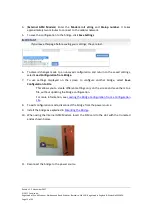
Page 10: ...od used click Find networks Otherwise enter these values manually The display shows a list of networks in your vicinity 3 Select the network you want to use and click Apply If the network supports a mixed encryption mode the WPA available notice appears on the screen 4 For Open WEP and WPA security enter the password in the field shown in Step 3 5 For enterprise WPA and enterprise WPA2 security en...

Page 11: ...ally DHCP or to assign an IP address yourself If you select to enter the IP address manually a number of fields become active IP Address Subnet Mask etc Fill them in according to your required network settings 8 To save the configuration to the bridge click Save Settings IMPORTANT If you leave this page before saving your settings they are lost 9 To discard changes made to an unsaved configuration...

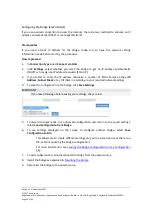
Page 12: ...via a standard GSM network Use a cellular stick if for example you connect to the Internet using a CDMA network IMPORTANT Only use a cellular stick approved by Panoramic Power Prerequisites For some SIM cards the system fills details automatically in the Connection Setup page For others you need to get the information from the SIM card supplier or the service provider How to proceed 1 In Connectio...

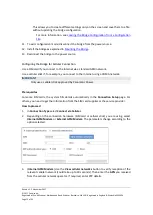
Page 13: ... configuration and return to the saved settings select Load Configuration from Bridge 7 To use settings displayed on the screen to configure another bridge select Save Configuration to File This allows you to create different settings only on the screen and save them to a file without updating the bridge configuration For more information see Loading the Bridge Configuration from a Configuration F...

Page 14: ...ect to enter the IP address manually a number of fields become active IP Address Subnet Mask etc Fill them in according to your required network settings 4 To save the configuration to the bridge click Save Settings IMPORTANT If you leave this page before saving your settings they are lost 5 To discard changes made to an unsaved configuration and return to the saved settings select Load Configurat...

Page 15: ...le does not include passwords for security reasons You must enter passwords manually for each bridge How to proceed 1 Access the bridge web interface 2 Access the Connection Setup page 3 Select Load Configuration from File 4 Select the relevant file and click Apply 5 Optional Enter password manually for example Wi Fi password SSL Password RSA Private Key Modifying the Bridge Administration Setting...

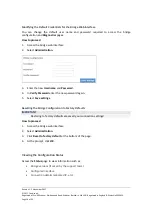
Page 16: ...ect Administration 3 Enter the new Username and Password 4 In Verify Password enter the new password again 5 Select Save settings Resetting the Bridge Configuration to Factory Defaults IMPORTANT Restoring to factory defaults erases all your connection settings How to proceed 1 Access the bridge web interface 2 Select Administration 3 Click Reset to factory default at the bottom of the page 4 At th...

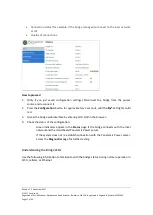
Page 17: ...Press the Configuration button for approximately 3 seconds until the LED lights solid red 3 Access the bridge web interface by entering 10 0 0 10 in the browser 4 Check the status of the configuration Green indicators appear in the Status page if the bridge connects with the local network and the cloud based Panoramic Power server If the system does not re establish connection with the Panoramic P...

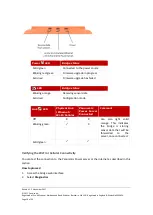
Page 18: ... Blinking orange Receiving sensor data Solid red Configuration mode Link LED Physical Link Ethernet Wi Fi Cellular Panoramic Power Server Connected Comment Off X X Can also light solid orange This indicates the bridge is storing sensor data that will be forwarded to the server once connected Blinking green X Solid green Verifying the Wi Fi or Cellular Connectivity You can test the connection to th...

Page 19: ...d to the bridge 4 Click Ping to google com to make sure the Internet connection is working If there is no connection check the bridge configuration parameters and network settings Note This method does not work if you configured the bridge to work in LAN and your PC is connected to the bridge 5 For Panoramic Power personnel only Use technician mode for advanced debugging of the bridge in case of 3...

Page 20: ...apter cable 4 Only if the bridge is not yet operational Boot and wait for the LED self test sequence to end Note If you proceed to Step 5 before the self test sequence ends the bridge enters configuration mode rather than upgrade mode 5 Press the Configuration button for 10 seconds approximately 6 The LED lights red and green All other LEDs are off 7 Wait several minutes for the upgrade process to...

Page 21: ... of them should light solid green and the other should be blinking orange If this is not happening tighten both ends of the LAN cable or replace it If the LED blinks green but does not turn solid it means that local network connectivity is established but the bridge can not access the Panoramic Power server This is often caused by local firewalls blocking TCP port 8051 Please verify this with your...

Page 22: ...ing the SIM card is tightly secured in its slot disconnect the bridge from the power source and reconnect it Verify with your service provider that a data plan is enabled for your SIM card The bridge connects to the cellular data network only if the SIM card has a data plan In low reception areas it may take a while for the bridge to connect Enter configuration mode and check the reception bar in ...

Reviews: