12
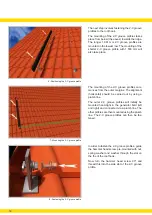
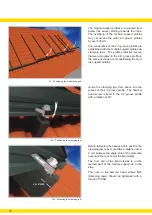
6 - Positioning the 2-C groove profile
The next step involves fastening the 2-C groove
profiles
to the roof hook.
The mounting of the 2-C groove profiles takes
place from below (the eaves) towards the ridge.
The longer 1,681 mm 2-C groove profiles are
mounted in the lowest row. The mounting of the
shorter 2-C groove profile with 1,533 mm will
also take place.
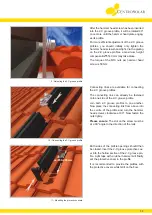
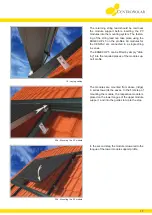
7 - Mounting the 2-C groove profile
The mounting of the 2-C groove profiles com
-
mences from the outer margins. The alignment
(horizontal) should be carried out by using a
plumb line.
The outer 2-C groove profiles will initially be
mounted hand-tight in the generator field (left
and right) and connected via a plumb line. The
other profiles are then mounted using the plumb
line. The 2-C groove profiles can then be fas
-
tened.
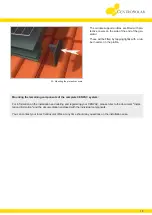
8 - Fastening the 2-C groove profile
In order to fasten the 2-C groove profiles, guide
the hammer head screw, pre-mounted with nut,
spring washer and washer through the slot on
the the of the roof hook.
Now turn the hammer head screw 90° and
thread this into the side slot of the 2-C groove
profile.
Summary of Contents for CENPAC 3 Series
Page 1: ...www centrosolar com www centrosolar co uk CENPAC Mounting instructions CENPAC 3 x CENPAC 5 x...
Page 2: ......
Page 4: ...4...
Page 22: ...Notes 22...
Page 23: ......


