background image


V1.0b 


CERIO Corporation 


CW-300N 


eXtreme Power 11n 2.4Ghz 2x2 Ceiling / 

Wall PoE Access Point (500mW) 


Quick Start Guide 


Summary of Contents for CW-300N

Page 1: ...V1 0b CERIO Corporation CW 300N eXtreme Power 11n 2 4Ghz 2x2 Ceiling Wall PoE Access Point 500mW Quick Start Guide...

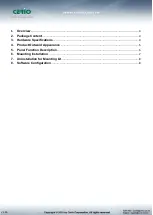
Page 2: ...verview 3 2 Package Content 3 3 Hardware Specifications 4 4 Product Outward Appearance 5 5 Panel Function Description 6 6 Mounting Installation 7 7 Uninstallation for Mounting kit 8 8 Software Configu...

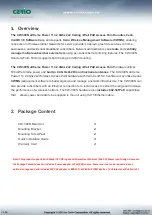
Page 3: ...11n 2 4Ghz 2x2 Wireless Access Point hardware with Cerio CenOS 3 0 software may utilize Cerios CWMS management software to better organize and manage a network infrastructure The CW 300N can also pro...

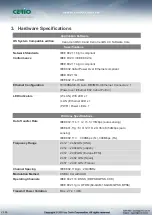
Page 4: ...over Ethernet 802 3 af at PoE in LED Indicators WLAN Wifi LED x 1 LAN Ethernet LED x 1 PWR Power LED x 1 Wireless Specifications Data Transfer Rate IEEE802 11b 1 2 5 5 11Mbps auto sensing IEEE801 11g...

Page 5: ...iling Mounting and Wall mounting installed using a provided Mounting Bracket System Power Consumption 9W Max Power Require Supports 110 220V AC Power 12 VDC 1A Input optional Supports Power Over Ether...

Page 6: ...The LED by Ethernet LAN Network function 3 The LED by Wi Fi function 4 The Ethernet connect by LAN Port 5 Reset button Please press and hold for about 15 seconds and then release 6 12V 1A DC input pow...

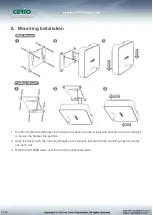
Page 7: ...d location Use the screws and anchors in the mounting kit to secure the bracket into position 2 Align the device with the mounting Hinges on the bracket Ensure that the mounting clips fit correctly in...

Page 8: ...gment Windows 7 IP Segment Set up for Administrator s PC NB Set the IP segment of the administrator s computer to be in the same range as CW 300N for accessing the system Do not duplicate the IP Addre...

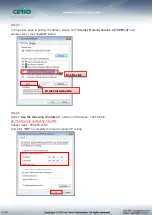
Page 9: ...Please click on the computer icon in the bottom right window and click Open Network and Sharing Center Step 2 In the Network and Sharing Center page Please click on the left side of Change adapter se...

Page 10: ...1 0b Step 3 In Change adapter setting Page Please find Local LAN and Click the right button on the mouse and Click Properties Step 4 In Properties page please Click Properties button to TCP IP setting...

Page 11: ...ersion 4 TCP IPv4 and double click or click Install button Step 6 Select Use the following IP address and fix in IP Address 192 168 2 ex The is any number by 1 to 253 Subnet mask 255 255 255 0 And Cli...

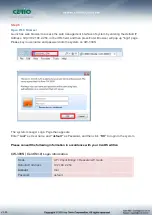
Page 12: ...n page Please key in username and password into the system on CW 300N The system manager Login Page then appears Enter root as User name and default as Password and then click OK to login to the syste...

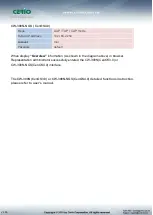
Page 13: ...work default When display Overview information As shown in the diagram above in browser Representation administrator successfully entered the CW 300N CenOS3 0 or CW 300N NGS CenOS4 0 interface The CW...

Reviews: