background image

Performing System Operations

Viewing System Information

75

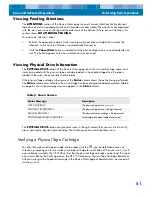
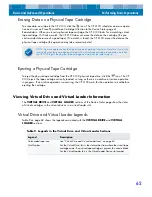
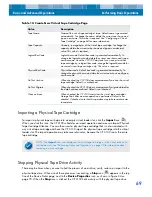
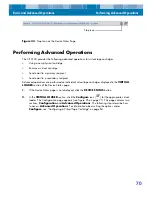
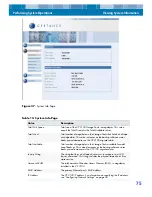
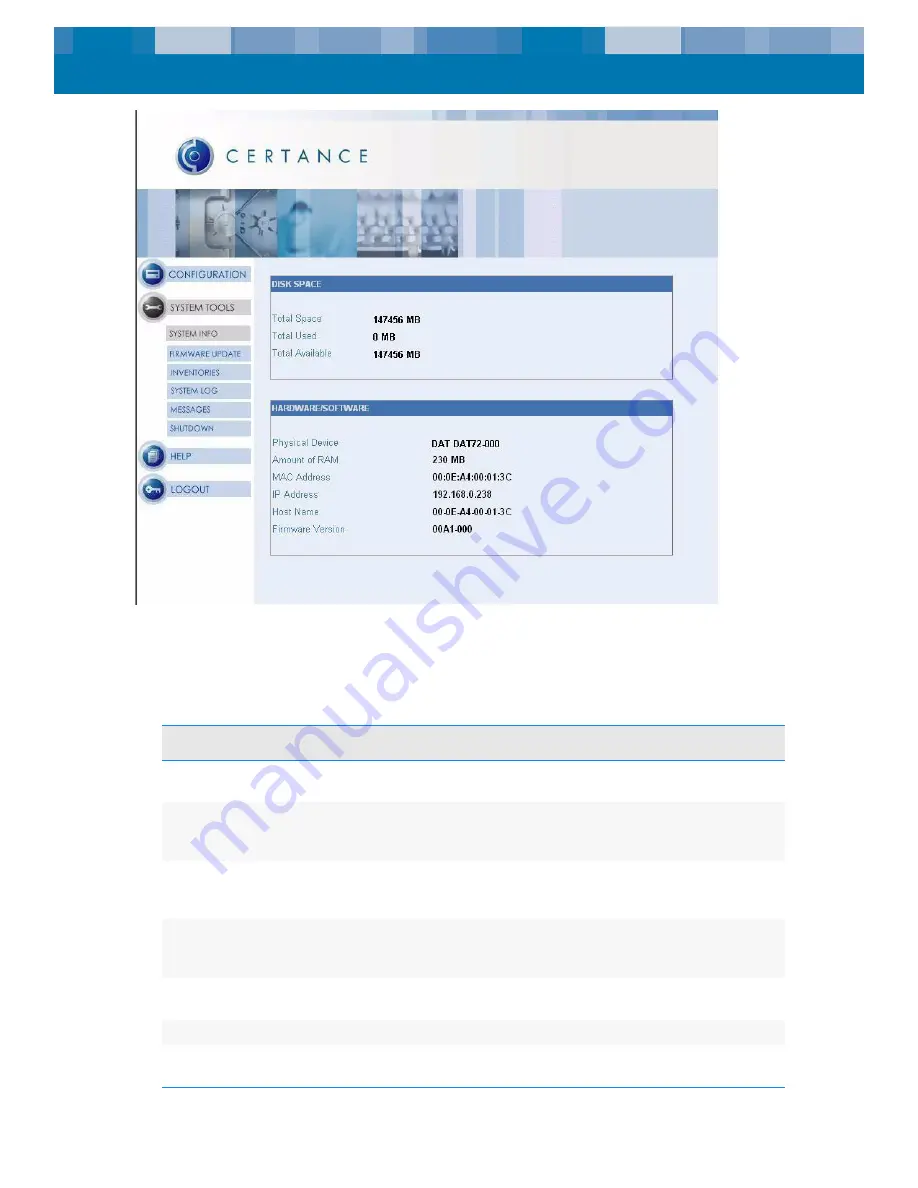
Figure 37. 

System Info Page

Table 14. System Info Page 

Value

Description

Total Disk Space

Total size of the CP 3100 Storage Pools in megabytes. This value 
equals the Total Used plus the Total Available values.

Total Used

Total number of megabytes in the Storage Pools that hold virtual tape 
cartridge data. This value increases as the backup software writes 
backups and decreases as the CP 3100 migrates data.

Total Available

Total number of megabytes in the Storage Pools available for addi-
tional backups. This value decreases as the backup software writes 
backups and increases as the CP 3100 migrates data.

Inquiry String

The string that the virtual tape drive returns in response to a SCSI 
Inquiry command. This string includes the physical tape drive’s firm-
ware version.

Amount of RAM

The total amount of Random Access Memory (RAM), in megabytes, 
installed in the CP 3100.

MAC Address

The primary Ethernet port's MAC address.

IP Address

The CP 3100 IP address. For information on specifying the IP address, 
see “Configuring Network Settings” on page 48.

Summary of Contents for CP3100 D2D2T

Page 1: ...i Online User s Guide CP 3100 D2D2T Solution C E R T A N C E ...

Page 2: ...ion may be reproduced in any form without written permission from Certance LLC Certance provides this manual as is without warranty of any kind either expressed or implied including but not limited to the implied warranties of merchantability and fitness for a particular purpose Certance reserves the right to change without notification the specifications contained in this manual Certance assumes ...

Page 3: ...product Power cord protection The power cord should be routed so that it is not likely to be walked on or pinched by items placed upon or against it paying particular attention to the cord at the wall receptacle and the point where the cord exits from the product To complete the disconnection of the electricity please remove the power electric cord and the SCSI cable from their connections in the ...

Page 4: ...40 F 40 C Keep the unit away from direct sunlight strong magnetic fields excessive dust humidity and electronic electrical equipment which generate electrical noise Hold the power cord by the head when removing it from the AC outlet pulling the cord can damage the internal wires Use the unit on a firm level surface free from vibration and do not place anything on top of the unit ...

Page 5: ... one or more of the following measures Reorient the receiving antenna Relocate the computer with respect to the receiver Move the computer into a different outlet so that the computer and receiver are on different branch circuits Further this equipment complies with the limits for a Class B digital apparatus in accordance with Canadian Radio Interference Regulations Cet appareil numérique de la cl...

Page 6: ...e CP 3100 23 Unpacking and Inspection 23 Installing an Internal CP 3100 23 Installing a Desktop CP 3100 36 Installing the Rack Mount CP 3100 40 Chapter 4 Initial Setup 44 Setting the Initial Configuration 44 Installing Your Backup Software 53 Verifying Your Installation 53 CP 3100 Operation 53 Chapter 5 Basic and Advanced Operations 54 Overview 54 Logging into RemoteAdmin 54 Performing Basic Opera...

Page 7: ...otecting a DDS Cartridge 89 Cleaning the Tape Path 90 Chapter 9 Troubleshooting 91 Damaged Parts 91 Handling Attentions 91 SCSI ID Problems 92 SCSI Termination Problems 92 CP 3100 Does Not Work 93 Power On Self Test Fails 93 Computer Does Not Boot 93 Computer Does Not Recognize the CP 3100 93 Backup Program Does Not Recognize the CP 3100 94 Removing the Hard Disk 94 Chapter 10 Recording Your Setti...

Page 8: ... Ethernet Cable from Your LAN to the Host Computer 30 Figure 15 Unknown Medium Changer in the Computer Management Window 32 Figure 16 Unzipping the Compressed File 33 Figure 17 Information Box 34 Figure 18 Hardware Update Wizard 34 Figure 19 Back Panel of the Desktop CP 3100 37 Figure 20 Back Panel of the Rack Mount CP 3100 41 Figure 21 Welcome Page 45 Figure 22 Date Time Settings Page 46 Figure 2...

Page 9: ...eting an Inventory 79 Figure 41 System Log Page 80 Figure 42 Messages Page 81 Figure 43 Restart Shutdown Page 82 Figure 44 Front Panel LEDs 83 Figure 45 Inserting a Cartridge 88 Figure 46 Ejecting a Cartridge 89 Figure 47 Write Protecting a DDS Cartridge 89 Figure 48 Slider Arrow 94 Figure 49 Swinging Out the Latch 95 Figure 50 Choosing Use New Physical Cartridge 98 ...

Page 10: ... 62 Table 10 Configuration Page 65 Table 11 Virtual Tape Cartridge Pop up Information 65 Table 12 Create New Virtual Tape Cartridge Page 69 Table 13 Advanced Operation Values 72 Table 14 System Info Page 75 Table 15 System LED 84 Table 16 Attention LED 84 Table 17 Virtual Tape LED 85 Table 18 Physical Tape LED 85 Table 19 Network Activity LED 85 Table 20 Matching Drives with the Media They Support...

Page 11: ...of all companies report each hour of downtime costs them 50 000 according to a study by Contingency Planning Group For one in four companies the cost of each minute of downtime can range from 250 000 to more than 1 million Protecting vital business data and minimizing downtime are the primary reasons that organizations back up data Recovering a critical file or an entire system requires quick and ...

Page 12: ...CP 3100 and a stand alone tape drive of the same format Performs policy based migration from disk to tape for archive Incorporates dual Ultra 160 SCSI controllers to provide performance and flexibility without impacting network performance during archival to tape Combines the features and functionality typical of high end solutions in a form factor as small as a 5 25 inch half height internal devi...

Page 13: ...d archive Dual Ultra 160 SCSI host and archive Dual Ultra 160 SCSI host and archive Dual Ultra 160 SCSI host and archive Archive The process by which the CP 3100 copies data from a Virtual Tape Cartridge to a physical tape cartridge The data is copied according to policies chosen in the RemoteAdmin Web browser tool Archive SCSI Bus One of two CP 3100 SCSI buses The Archive SCSI bus is dedicated fo...

Page 14: ...ve attached to the CP 3100 Archive SCSI bus RemoteAdmin The tool the Administrator uses to access the CP 3100 s configuration management and control interface via a Web browser enabled Ether net connection Storage Pools Storage Pools are created on the CP 3100 s hard disk s and are used by the Virtual Loader to read write Virtual Tape Cartridge data and control information Storage Pools are the me...

Page 15: ...ost to the CP 3100 s virtual auto loader writing data to the disk drive in the same format it would to a physical autoloader Once the backup to the virtual autoloader is complete the CP 3100 copies the data to the attached physical tape drive in the background and without intervention from the host or user creating an exact replica archive on tape Figure 1 Backup Data Flow from a Host to a CP 3100...

Page 16: ...sures a 1 to 1 relationship between a virtual tape cartridge and a physical tape cartridge In this way backup data written to a virtual tape cartridge is archived copied to a physical tape cartridge and the physical tape cartridge can be used with any compatible tape drives to successfully restore data This 1 to 1 relationship between a virtual tape cartridge and a physical tape cartridge prevents...

Page 17: ...00 Web based management tool to perform the initial setup of the CP 3100 Chapter 5 describes how to use RemoteAdmin to perform basic and advanced operations Chapter 6 describes how to use RemoteAdmin to perform system operations Chapter 7 describes the CP 3100 LEDs Chapter 8 provides information for CP 3100 configurations equipped with an integrated tape drive Chapter 9 provides troubleshooting pr...

Page 18: ...ly on page 24 3 The CP 3100 s SCSI ID defaults to that of the attached tape drive Be sure no other device on the SCSI chain has this SCSI ID See Reviewing the SCSI ID on page 24 4 Shut down the computer and disconnect the computer s AC power cord Then install the CP 3100 in a 5 25 inch half height bay See Installing the Internal CP 3100 on page 25 5 Use the supplied VHDC 1 to HD68 converter and VH...

Page 19: ...cedures Log into RemoteAdmin See Logging into RemoteAdmin on page 44 Set the CP 3100 clock to the current date and time See Setting the CP 3100 s Internal Clock on page 46 Set a RemoteAdmin password See Specifying a Password on page 47 Specify the CP 3100 network settings See Configuring Network Settings on page 48 Configure the CP 3100 email settings See Configuring Email Settings on page 50 12 I...

Page 20: ... or DAT 72 tape drive See Connecting to a Tape Drive on page 37 7 Terminate the SCSI chain appropriately for your configuration See Terminating the SCSI Chain on page 38 8 Connect the CP 3100 to your LAN See Connecting to the Network on page 38 9 Power up the CP 3100 See Powering up the Desktop CP 3100 on page 38 10 If your operating system or backup software does not recognize the CP 3100 you may...

Page 21: ... DAT 72 tape drive See Connecting to a Tape Drive on page 42 7 Terminate the SCSI chain appropriately for your configuration See Terminating the SCSI Chain on page 42 8 Connect the CP 3100 to your LAN See Connecting to the Network on page 42 9 Power up the CP 3100 See Powering up the Rack Mount CP 3100 on page 43 10 If your operating system or backup software does not recognize the CP 3100 you may...

Page 22: ...pping container on a flat clean stable surface Then carefully remove the con tents and verify the packing list If parts are damaged notify your Certance representative 3 Save the CP 3100 container and packing materials in case you ever need to ship the CP 3100 Installing an Internal CP 3100 Installing an internal CP 3100 involves the following steps 1 Handling Precautions on page 24 2 Items You Mu...

Page 23: ... internal CP 3100 either on top of the antistatic bag or place it inside of the bag to reduce the chance of damage from static discharge Items You Must Supply To install the internal CP 3100 you may need the following additional items An available 5 25 inch half height bay where the CP 3100 is to be installed An available expansion card slot opening on the back of your computer An Ethernet cable f...

Page 24: ...of the computer The documentation that came with your computer should explain this procedure 4 Select an available 5 25 inch half height mounting bay and remove the front panel 5 Install the CP 3100 in the mounting bay by sliding the unit through the front of the computer see Figure 4 on page 25 Figure 4 Installing the CP 3100 NOTE If you disconnect cables to gain access to the mounting bay note w...

Page 25: ...sult the documentation that came with your com puter for proper device installation 7 Connect the host DC power cable existing inside the host computer to the POWER CONNECTOR on the back panel of the internal CP 3100 see Figure 5 on page 26 and Figure 6 on page 26 Figure 5 Back Panel of the Internal CP 3100 Figure 6 Connecting the DC Power Cable NOTE The following connectors on the back panel of t...

Page 26: ...VHDC 1 to HD68 converter and VHDC 1 to HD68 Archive Cable supplied with the CP 3100 To connect the CP 3100 to a host and a tape drive 1 Connect the supplied VHDC 1 to HD68 Archive Converter to the HOST SCSI connector upper connector on the back panel of the CP 3100 see Figure 5 on page 26 and Figure 7 on page 27 Figure 7 Connecting the VHDC 1 to HD68 Converter 2 Connect the supplied VHDC 1 to HD68...

Page 27: ...2 archive tape drive Attach the supplied terminator to the last SCSI connector on this cable see Figure 9 on page 28 Figure 9 Connecting to an Archive Tape Drive 4 Connect an existing SCSI cable from the CPU mainboard or a SCSI adapter card to the VHDC 1 to HD68 converter see Figure 10 on page 28 Figure 10 SCSI Cable Connections Terminator ...

Page 28: ...nnector on the back panel of the CP 3100 see Figure 12 on page 29 Facing the back of the CP 3100 this is the left Ethernet connector see Figure 5 on page 26 Figure 12 Connecting the Ethernet Cable to the Internal CP 3100 NOTE If you want to configure the CP 3100 s IP address before connecting to the LAN you may have to use a crossover cable and set up a private subnet for configuring the CP 3100 R...

Page 29: ... host computer s backplane Confirm that the Ethernet connector and cable do not come in contact with surrounding cards see Figure 13 on page 30 Figure 13 Securing the Ethernet PCI Bracket 3 Connect an Ethernet cable from your existing LAN to the Ethernet PCI port on the back of the host computer see Figure 14 on page 30 Figure 14 Connecting the Ethernet Cable from Your LAN to the Host Computer ...

Page 30: ...most LED turns on If the integrated hard disk has not been initialized the CP 3100 prepares the disk for use This can take from 3 to 5 minutes The CP 3100 loads the current LED configuration settings initializes the network interface starts the device emulation and activates its RemoteAdmin management tool The System LED turns solid green Installing the Driver The CP 3100 appears to the operating ...

Page 31: ...changer drivers now Refer to the drivers directory on the Resource CD that came with your CP 3100 or find them on the Web at http www certance com support tape drivers scsidpa html To install the drivers 1 Go into Computer Management and open Device Manager You will see the device is unknown see Figure 15 on page 32 Figure 15 Unknown Medium Changer in the Computer Management Window ...

Page 32: ...eb site unzip the compressed file to a directory see Figure 16 on page 33 Otherwise insert the Resource CD in your computer s CD ROM drive Figure 16 Unzipping the Compressed File 3 Double click SEAGATE DAT in Device Manager 4 Click the Driver tab The information box in Figure 17 on page 34 appears ...

Page 33: ...talling the CP 3100 Installing an Internal CP 3100 34 Figure 17 Information Box 5 Click the Update Driver button The Hardware Update wizard in Figure 18 on page 34 appears Figure 18 Hardware Update Wizard ...

Page 34: ...upport information For your convenience you can register the CP 3100 through our Web site at http register certance com How to Proceed After you install the CP 3100 proceed to Chapter 4 to continue with the initial setup of the internal CP 3100 After you perform the initial setup and verify your installation you can refer to Chapter 5 to use the RemoteAdmin tool to perform basic and advanced opera...

Page 35: ...he SCSI ID Each SCSI device on the bus must have its own unique ID CP3100D 160 units inherit the SCSI ID of the tape drive to which they are attached If another device on the SCSI bus uses this SCSI ID change the SCSI ID on the tape drive or on the other device CP3101D 160 units default to SCSI ID 6 If another device on the SCSI bus uses this SCSI ID change the SCSI ID on the other device to one t...

Page 36: ... back panel of the desktop CP 3100 see Figure 19 on page 37 3 Connect the other end of the cable to the computer Connecting to a Tape Drive If you purchased the CP3100D 160 connect the unit to an approved DDS 4 or DAT 72 tape archive device 1 Connect an LVD Male HD68 SCSI cable to the ARCHIVE SCSI connector on the back panel of the desktop CP 3100 see Figure 19 on page 37 2 Connect the other end o...

Page 37: ...puter s AC power cord then turn on the computer 2 Attach the power cord securely to the power receptacle on the back panel of the CP 3100 see Figure 19 on page 37 3 Set the Power switch on the CP 3100 back panel to the ON position Facing the back of the CP 3100 the Power button is located to the right of the power receptacle see Figure 19 on page 37 4 Wait 2 minutes up to 5 minutes on first use fo...

Page 38: ...egistering it ensures that you will receive the lat est information about the CP 3100 as well as other product service and support information For your convenience you can register the CP 3100 through our Web site at http register certance com How to Proceed After you install the CP 3100 proceed to Chapter 4 to continue with the initial setup of the desktop CP 3100 After you perform the initial se...

Page 39: ...to be installed An external Ultra 160 SCSI cable and terminator for connecting the CP 3100 to the host Another external Ultra 160 SCSI cable and terminator if you intend to connect an existing SCSI tape drive A Phillips screwdriver and other appropriate tools Reviewing the SCSI ID Each SCSI device on the bus must have its own unique ID CP3100R 320 units inherit the SCSI ID of the tape drive to whi...

Page 40: ...computer use the following procedure 1 Shut down the host computer and disconnect the computer s AC power cord 2 Connect an LVD Male HD68 SCSI cable not provided to the SCSI IN connector upper con nector on the back panel of the CP 3100 see Figure 20 on page 41 3 Connect the other end of the cable to the computer Figure 20 Back Panel of the Rack Mount CP 3100 NOTE Do not set the CP 3100 selector s...

Page 41: ...te the last SCSI device in the chain Connecting to the Network To configure the rack mount CP 3100 via its Web Browser interface connect the CP 3100 to your company s LAN The following procedure describes how to connect the CP 3100 to a LAN 1 Connect an Ethernet cable to the NETWORK Gbe1 connector on the back panel of the CP 3100 see Figure 20 on page 41 2 Connect the other end of the cable to you...

Page 42: ...e This can take from 3 to 5 minutes The CP 3100 loads the current configuration settings initializes the network interface starts the device emulation and activates its RemoteAdmin management tool The System LED turns solid green Installing the Driver For information about installing the driver see Installing the Driver on page 31 Registering the CP 3100 After you install the CP 3100 be sure to re...

Page 43: ...anagement tool Logging into RemoteAdmin The following procedure describes how to log into RemoteAdmin 1 Start a Web Browser on a computer that is on the same subnet as the CP 3100 In the Browser s address line enter the IP address of the CP 3100 If this is the first time you are log ging in enter the default IP address 192 168 0 250 Otherwise enter the IP address previ ously configured for the CP ...

Page 44: ...ropriate password and click LOG IN The Device Status page appears CAUTION This procedure will fail if the computer is on a different subnet than the CP 3100 or if the CP 3100 has an IP address that is already in use by another device on the subnet NOTE RemoteAdmin automatically logs you out after 20 minutes of idle time If this occurs log into RemoteAdmin starting with step 1 on the previous page ...

Page 45: ...e 2 Enter the information described in the Date Time Settings page see Table 3 on page 47 Click Update A message confirms that the date and time have been updated NOTE Do not change the date or time when the CP 3100 is reading from or writing to virtual or physical tape cartridges NOTE The Date Time Settings page has a Reset button you can click to cancel your changes If you enter the date and or ...

Page 46: ...age appears see Figure 23 on page 47 Figure 23 Password Settings Page Table 3 Date Time Settings Page Value Description Date Enter the current date in mm dd yyyy format Example 05 09 2004 is equiva lent to May 9 2004 Time Enter the current time in 24 hour format using the syntax hh mm ss You do not need to specify AM or PM Example 14 18 56 is equivalent to 2 18 56 PM CAUTION After you record the p...

Page 47: ...k NETWORK The Network Settings page appears see Figure 24 on page 49 NOTE The Password Settings page has a Reset button you can click to cancel your changes Table 4 Password Settings Page Value Description Old Password Your current password For first time login leave this blank New Password The new password you want to use The password is case sensitive For security purposes each password characte...

Page 48: ...e network settings in Chapter 10 5 Click SYSTEM TOOLS click MESSAGES and click Download Messages to download the Messages file that displays your current network settings CAUTION If you change any network settings write down the settings before you click Update and store in a safe place for future reference You will not be able to access the CP 3100 if you lose the settings NOTE The Network Settin...

Page 49: ... text you want IP Address The IP address that uniquely identifies the CP 3100 up to four octets from 0 to 255 separated by periods You enter this IP address in your browser to launch RemoteAdmin Default is 192 168 0 250 The RemoteAdmin user must be on the same subnet as the CP 3100 Be sure no other device on the subnet has this IP address Network Mask The CP 3100 network mask up to four octets fro...

Page 50: ... The Email Settings page has a Reset button you can click to cancel your changes Table 6 Email Settings Page Value Description SMTP Server IP IP address of the SMTP mail server up to four octets from 0 to 255 separated by periods Example 192 168 31 7 SMTP Port Decimal number of the SMTP server port Default is 25 Sender s Email Address Email address that appears in the Sent line of the email sent b...

Page 51: ...ntact s who are to receive email messages from RemoteAdmin if the Attention does not get cleared within the Secondary Email Timeout period This entry is entered in standard email address format of a text string followed by an and an Internet domain Example jfisher abccompany com To specify more than one email address separate the addresses with a semicolon Secondary Email Timeout Number of minutes...

Page 52: ...ts DDS 4 and DAT 72 tape drives If a DDS 4 is attached the CP 3100 emulates a DDS 4 autoloader If a DAT 72 is attached the CP 3100 emulates a DAT 72 autoloader In both cases the autoloader has 25 slots by default to let you set up tape rotation schemes with your backup and restore software If the backup and restore software unloads a virtual tape cartridge at the end of a backup the backed up data...

Page 53: ...al tape and changing virtual tape name and bar code settings See Performing Basic Operations on page 57 Advanced Operations activities associated with the CP 3100 s advanced features Advanced operations include using a new physical cartridge removing a virtual cartridge and sending email to primary and secondary recipients See Performing Advanced Opera tions on page 70 System Operations activities...

Page 54: ...click LOG IN The Device Status page appears For more information about the Device Status page see Displaying and Understanding the Device Sta tus Page on page 57 NOTE A subnet is a portion of a network that shares a common address component On TCP IP networks subnets are defined as all devices whose IP addresses have the same prefix For example all devices with IP addresses that start with 192 168...

Page 55: ...logged in The Login page appears with the words Forced Login above the host name see Figure 27 on page 56 Figure 27 Login Screen with Forced Login Message If the administrator re enters the correct password and clicks LOG IN the user currently logged in is logged out and the administrator is logged in This behavior is useful if the administrator accidentally loses contact with the CP 3100 while lo...

Page 56: ...e 62 Manually Performing an Archive Operation on page 67 Manually Performing a Migrate Operation on page 67 Clearing Errors and Virtual Tape Drive Error Attentions on page 67 Creating a New Virtual Tape Cartridge on page 68 Importing a Physical Tape Cartridge on page 69 Stopping Physical Tape Drive Activity on page 69 Displaying and Understanding the Device Status Page The Device Status page shows...

Page 57: ...ewing Pending Attentions on page 61 PHYSICAL DRIVE shows the status of the physical drive See Viewing Physical Drive Infor mation on page 61 VIRTUAL DRIVE shows the status of the virtual tape drive including any virtual tape car tridge that is loaded See Viewing Virtual Drive and Virtual Loader Information on page 62 VIRTUAL LOADER shows the status of each slot of the virtual loader including any ...

Page 58: ...ected properties for all virtual tape cartridges in the CP 3100 see Table 7 on page 60 Any change entered on this page affects all virtual tape cartridges To configure an individual virtual tape cartridge see Configuring a Virtual Tape Cartridge on page 64 NOTE To update the information on this page automatically set the Auto Refresh setting at the top of the page you can also manually update the ...

Page 59: ...es after the backup software moves the VTC back into the virtual loader A change in this value affects all VTCs in the CP 3100 Default Migrate Policy A migrate operation removes a virtual tape cartridge s data from the storage pools after the data has been archived successfully Select one of the following Automatic data written to newly created virtual tape car tridges is automatically migrated De...

Page 60: ... tape cartridge is being used the Status column shows the action being performed The Status column also indicates when a cartridge has been changed loaded or ejected Table 8 on page 61 shows the messages that can appear in the Status column The PHYSICAL DRIVE section also provides icons in the right column that you can click to verify erase and eject a physical tape cartridge The following section...

Page 61: ...on is occurring the CP 3100 waits for the operation to end before ejecting the cartridge Viewing Virtual Drive and Virtual Loader Information The VIRTUAL DRIVE and VIRTUAL LOADER sections of the Device Status page show the status of virtual cartridges in the virtual drive or in a virtual loader slot Virtual Drive and Virtual Loader Legends Table 9 on page 62 shows the legends associated with the V...

Page 62: ... 3100 or configured by the administrator If no virtual tape cartridge is present this area is blank See Configuring a Virtual Tape Cartridge on page 64 for more infor mation Status Describes the current status as reflected by the color of the status icon If the status icon indicates a serious problem you can refer to this status information for information about the problem For the virtual drive t...

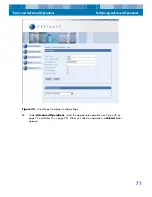
Page 63: ... two sections Configure and Advanced Operations The following steps describe how to access the Configure options For information about setting Advanced Operations see Performing Advanced Operations on page 70 Figure 31 Configuration Page 2 Complete the Configure values described in the Configuration page see Table 10 on page 65 3 Click Update NOTE The Configure button is displayed when there is a ...

Page 64: ...current one shown and type a new bar code The Physical Bar Code name has a limit of 31 characters You may want to choose names that reflect your backup rotation and or match names on your physical media Do Not Archive When checked the CP 3100 does not archive the virtual tape car tridge See Appendix A for a discussion about checking or unchecking Do Not Archive Do Not Migrate When checked the CP 3...

Page 65: ...ve Appears if the virtual tape cartridge s Do Not Archive option is set on the Create New Virtual Tape Cartridge Page or the Configuration page see Creating a New Virtual Tape Cartridge on page 68 Do Not Migrate Appears if the virtual tape cartridge s Do Not Migrate option is set see Creating a New Virtual Tape Cartridge on page 68 Clear on Erase Appears if the virtual tape cartridge s Clear on Er...

Page 66: ...idge is only migrated when the CP 3100 needs to claim the space You can perform a manual migrate operation by clicking the Migrate icon If you click this icon the CP 3100 determines whether data for the virtual cartridge has been archived If the data has been archived the migrate occurs immediately Otherwise the CP 3100 requests a physical tape so the archive can be performed first After the archi...

Page 67: ...ridge icon appears 1 Click the Create New Cartridge icon The Create New Virtual Tape Cartridge page appears see Figure 33 on page 68 Figure 33 Create New Virtual Tape Cartridge Page 2 Enter the information in the Create Virtual Tape Cartridge page see Table 12 on page 69 3 Click Create NOTE The Create button is not displayed if a virtual tape cartridge is in the virtual drive or vir tual loader sl...

Page 68: ...uired See Configuring a Virtual Tape Cartridge on page 64 for more information Tape Capacity Capacity in megabytes of the virtual tape cartridge To change the capacity delete the current value shown and type a new decimal value This value is required Logical Bar Code Logical bar code Default bar code is generated automatically To change the logical bar code delete the current one shown and type a ...

Page 69: ...med on individual virtual tape cartridges displayed in the VIRTUAL LOADER section of the Device Status page 1 If the Device Status page is not displayed click the DEVICE STATUS button 2 In the VIRTUAL LOADER section click the Configure icon for the appropriate virtual loader The Configuration page appears see Figure 35 on page 71 This page contains two sections Configuration and Advanced Operation...

Page 70: ...ming Advanced Operations 71 Figure 35 Virtual Tape Cartridge Configure Page 3 Under Advanced Operations select the appropriate operation see Figure 36 on page 72 and Table 13 on page 72 When you select an operation a Submit button appears ...

Page 71: ...hysical tape cartridge with a new one You can only use a new physical tape cartridge if the data in the virtual tape car tridge has not been migrated Remove Virtual Cartridge The virtual tape cartridge s data is deleted and the virtual tape car tridge is removed from the virtual tape drive or virtual loader device slot The virtual tape drive or virtual loader device slot is then empty Any unarchiv...

Page 72: ... for the slot or drive whether or not an email has already been sent to the primary email address Send Email to Secondary Recipient The CP 3100 sends email to the secondary email address for all pend ing Attentions for the slot or drive whether or not an email has already been sent to the secondary email address Table 13 Advanced Operation Values Continued Value Description ...

Page 73: ...es on page 77 Viewing the System Log on page 80 Viewing Messages on page 81 Restarting or Shutting Down the CP 3100 on page 82 Viewing System Information The System Tools page consists of read only pages that display status generic system and firmware information To display this page click SYSTEM TOOLS Figure 37 on page 75 shows an example of the System Info page Table 14 on page 75 describes the ...

Page 74: ... migrates data Total Available Total number of megabytes in the Storage Pools available for addi tional backups This value decreases as the backup software writes backups and increases as the CP 3100 migrates data Inquiry String The string that the virtual tape drive returns in response to a SCSI Inquiry command This string includes the physical tape drive s firm ware version Amount of RAM The tot...

Page 75: ...an click the Browse button to find and select the firmware file 5 Click the Update Firmware button The firmware file is uploaded to the CP 3100 and checked for errors If there are no errors the firmware is unpacked from the file and loaded into the CP 3100 Flash memory The CP 3100 reboots to use the new firmware During the reboot process the CP 3100 will not be accessible from RemoteAdmin When it ...

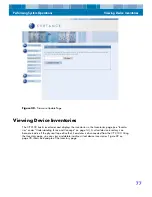
Page 76: ...ventories in the Inventories page see Invento ries under Understanding Terms and Concepts on page 14 A virtual device inventory can become inactive if the physical tape drive that it emulates is disconnected from the CP 3100 Using the Inventory page you can view and delete inactive virtual device inventories Figure 39 on page 78 shows an example of the Inventory page ...

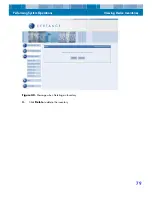
Page 77: ...ape drive of the same class creates a new inventory To delete an inactive inventory 1 Click SYSTEM TOOLS then click INVENTORIES The Inventory page appears 2 Click the Delete button next to the inventory you want to delete A message asks whether you are sure you want to delete the inventory see Figure 40 on page 79 NOTE If all physical tape drives are disconnected from the CP 3100 the CP 3100 recog...

Page 78: ...Performing System Operations Viewing Device Inventories 79 Figure 40 Message when Deleting an Inventory 3 Click Delete to delete the inventory ...

Page 79: ...the oldest one on the top row Figure 41 on page 80 shows an example of the System Log page If the number of entries exceeds the viewable area you can use the scroll arrows and scroll bar to scroll through the entries The System Log page provides a Download System Log button you can click to download a text version of the system log to another system Figure 41 System Log Page NOTE To update the inf...

Page 80: ...gure 42 on page 81 shows an example of the Messages page If the number of entries exceeds the viewable area you can use the scroll arrows and scroll bar to scroll through the messages The Messages page provides a Download Messages button you can click to download a text version of the message to another system Figure 42 Messages Page NOTE To update the information on this page click the Refresh bu...

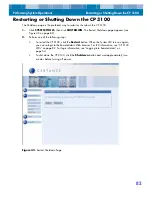
Page 81: ... appears see Figure 43 on page 82 2 Perform one of the following steps To restart the CP 3100 click the Restart button When the System LED turns on again you can re login to the RemoteAdmin Web browser For LED information see CP 3100 LEDs on page 83 For login information see Logging into RemoteAdmin on page 54 To shut down the CP 3100 click the Shutdown button and wait approximately two minutes be...

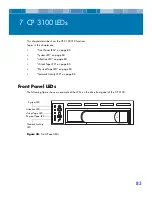
Page 82: ...on page 84 Attention LED on page 84 Virtual Tape LED on page 85 Physical Tape LED on page 85 Network Activity LED on page 85 Front Panel LEDs The following figure shows an example of the LEDs on the drive front panel of the CP 3100 Figure 44 Front Panel LEDs System LED Attention LED Virtual Tape LED Physical Tape LED Network Activity LED ...

Page 83: ...hrough a reset Green The CP 3100 is operating properly Slow blinking green The CP 3100 is booting Red If during booting a system diagnostic failure occurred Otherwise a system failure occurred Red slow blinking The CP 3100 has failed its internal diagnostics upon boot up Red fast blinking While booting a CP 3100 boot loader failure occurred Otherwise a fatal error occurred Table 16 Attention LED L...

Page 84: ...s the status of the Network Activity LED Table 17 Virtual Tape LED LED Status Description Off There is no virtual tape drive activity occurring Slow blinking green A virtual tape cartridge is loaded in the virtual tape drive Red The CP 3100 hard disk s is not recognized or not present Table 18 Physical Tape LED LED Status Description Off There is no physical tape drive activity occurring Slow blin...

Page 85: ...g a Cartridge on page 88 Write Protecting a DDS Cartridge on page 89 Cleaning the Tape Path on page 90 Using the Appropriate Media For CP 3100 units that contain an integrated tape drive use data grade DDS 4 and DAT 72 car tridges such as those listed below NOTE 60 meter DDS data cartridges cannot be used with these CP 3100s In addition the use of 90 meter and 120 meter DDS data cartridges is not ...

Page 86: ... dry or humid places extreme changes in temperature or humidity or X rays Handle cartridges gently Do not treat cartridges roughly or drop them Keep cartridges in plastic cases when they are not in use Do not try to clean the tape guides or tape path inside the cartridge Apply just one label to the designated area on the cartridge Affixing more labels can jam the drive Never touch the exposed tape...

Page 87: ...ay while the drive identifies the cartridge type and state and moves the tape to the data area Ejecting a Cartridge Use the following procedure to eject a cartridge 1 Be sure the CP 3100 Physical Tape LED is OFF 2 Use the RemoteAdmin tool to unload the cartridge see Ejecting a Physical Tape Cartridge on page 62 When you eject a cartridge the tape drive automatically flushes the drive buffer to tap...

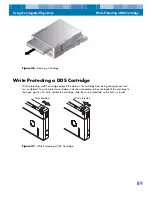
Page 88: ... DDS cartridge protects the data on the cartridge from being changed overwrit ten or deleted To write protect a cartridge slide the write protect tab on the back of the cartridge to the open position To write enable the cartridge slide the write protect tab so the hole is closed Figure 47 Write Protecting a DDS Cartridge Write protected Write enabled ...

Page 89: ...ble 22 on page 90 lists the frequency that the tape path should be cleaned To clean the tape path use an approved DAT cleaning cartridge such as Certance Model CDMCL and refer to the instructions that come with the cartridge NOTE For more information about the integrated tape drive contained in the CP 3100 desktop and rack mount units see the Certance DAT72 DDS 4 Online User s Guide on the Certanc...

Page 90: ... 3100 on page 94 Removing the Hard Disk on page 94 Damaged Parts If any of the contents included with your CP 3100 are damaged contact your place of purchase immediately Handling Attentions An Attention is an error or condition that requires administration intervention When an Attention occurs The Attention LED blinks amber slowly If email notification has been configured using the RemoteAdmin too...

Page 91: ...he manual that came with the device should describe this procedure Table 23 CP 3100 Attentions Attention Action Required PTC Required The CP 3100 is requesting a blank physical tape cartridge warning that a physical tape cartridge may be overwritten or requesting a specific physi cal tape cartridge Archive Failed The immediately prior archive operation failed due to an error with the physical tape...

Page 92: ...connected to the computer is controlled by a wall switch that is removing power from the outlet Either switch outlets or set the wall switch so that power is applied to the outlet 4 The computer has two SCSI host adapters installed whose resources are conflicting with each other Remove the conflicting device or consult the documentation that came with the device for suggestions about resolving the...

Page 93: ...rivers are not required If the Device Manager shows the CP 3100 check the documentation that came with your backup program to determine whether the program needs a particular driver to be installed If the Device Manager does not list the CP 3100 the CP 3100 may not be installed or config ured properly Check your CP 3100 installation and configuration Removing the Hard Disk If you need to remove th...

Page 94: ...Troubleshooting Removing the Hard Disk 95 Figure 49 Swinging Out the Latch 3 Using the latch as a handle gently pull the drive assembly straight out of the unit ...

Page 95: ...ettings Host Name IP Address Network Mask Default Gateway Email Settings SMTP Server IP SMTP Port Sender s Email Address Primary Email Address Secondary Email Address Secondary Email Timeout Device Properties Page Number of Virtual Storage Slots Default Archive Policy Select one Automatic Do Not Archive Archive Timeouts Default Migrate Policy Select one Automatic Do Not Migrate Default Clear on Er...

Page 96: ...he physical tape is ejected If a completely blank tape is available use it for the archive If a blank tape is not available you can use a non blank tape for the archive by performing the following procedure 1 Start RemoteAdmin see Logging into RemoteAdmin on page 44 and click the Device Status page 2 In the Physical Drive section of the Device Status page click the Erase icon 3 Insert the non blan...

Page 97: ...vice Status page displayed go to the Virtual Loader section and click the Configure icon that corresponds to the slot number you want to archive 3 When the Configuration page opens go to Advanced Operations and choose Use New Physical Cartridge see Figure 50 on page 98 Figure 50 Choosing Use New Physical Cartridge 4 Click Submit 5 Insert the blank physical tape and the archive continues The archiv...

Page 98: ...e same choices are available for Migrate There is a consequence for choosing Do Not Archive or Do Not Migrate If you choose Do Not Archive to never perform an archive your data will never be perma nently stored on a removable medium that you can safely store away In addition the CP 3100 hard drive s will eventually become full and you will not be able to store data onto the CP 3100 Consequently yo...

Page 99: ...pe cartridge 64 CP 3100 configurations 13 features and benefits 13 introduction 12 LEDs 83 Attention 84 Network Activity 85 Physical Tape 85 System 84 Virtual Tape 85 recording configuration information 96 registering 35 39 43 restarting 82 shutting down 82 theory of operation 15 unpacking 23 updating firmware 76 CP 3100 installation desktop unit 36 connecting to a host 37 connecting to a tape dri...

Page 100: ... 41 connecting to a tape drive 42 connecting to the network 42 installing in rack 41 installing the driver 43 items supplied by user 40 power up 43 setting SCSI ID 40 terminating the SCSI chain 42 desktop CP 3100 quick start 21 internal CP 3100 quick start 19 rack mount CP 3100 quick start 22 verifying 53 Installing internal drives 23 Integrated tape drive applying labels 87 cleaning the tape path...

Page 101: ...grate operation 67 Scheduling an archive operation 67 SCSI ID problems 92 SCSI termination problems 92 Setting SCSI ID CP 3100 desktop unit 36 CP 3100 internal unit 24 CP 3100 rack mount unit 40 Setting the date 46 time 46 Shutting down the CP 3100 82 System information 74 System LED 84 System log 80 T Tape path cleaning 90 Termination problems 92 Theory of operation 15 Time setting 46 Troubleshoo...

Reviews: