Installing the CP 3100
Installing an Internal CP 3100
29
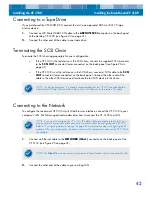
Connecting to the Network
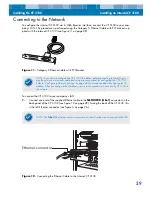
To configure the internal CP 3100 via its Web Browser interface, connect the CP 3100 to your com-
pany’s LAN. This procedure is performed using the Category 5 Ethernet Cable with PCI bracket sup-
plied with the internal CP 3100 (see Figure 11 on page 29).
Figure 11.
Category 5 Ethernet Cable with PCI Bracket
To connect the CP 3100 to your company’s LAN:
1.
Connect one end of the supplied Ethernet cable to the
NETWORK (Gbe1)
connector on the
back panel of the CP 3100 (see Figure 12 on page 29). Facing the back of the CP 3100, this
is the left Ethernet connector (see Figure 5 on page 26).
Figure 12.
Connecting the Ethernet Cable to the Internal CP 3100
NOTE. If you want to configure the CP 3100’s IP address before connecting to the LAN, you
may have to use a crossover cable and set up a private subnet for configuring the CP 3100.
Refer to “Configuring Network Settings” on page 48 for information about configuring the IP
address. After you configure the IP address, return to this procedure to connect the CP 3100 to
the network.
NOTE. The
Gbe2
Ethernet connector is reserved and should not be used to connect to the LAN.
Ethernet connector


