background image

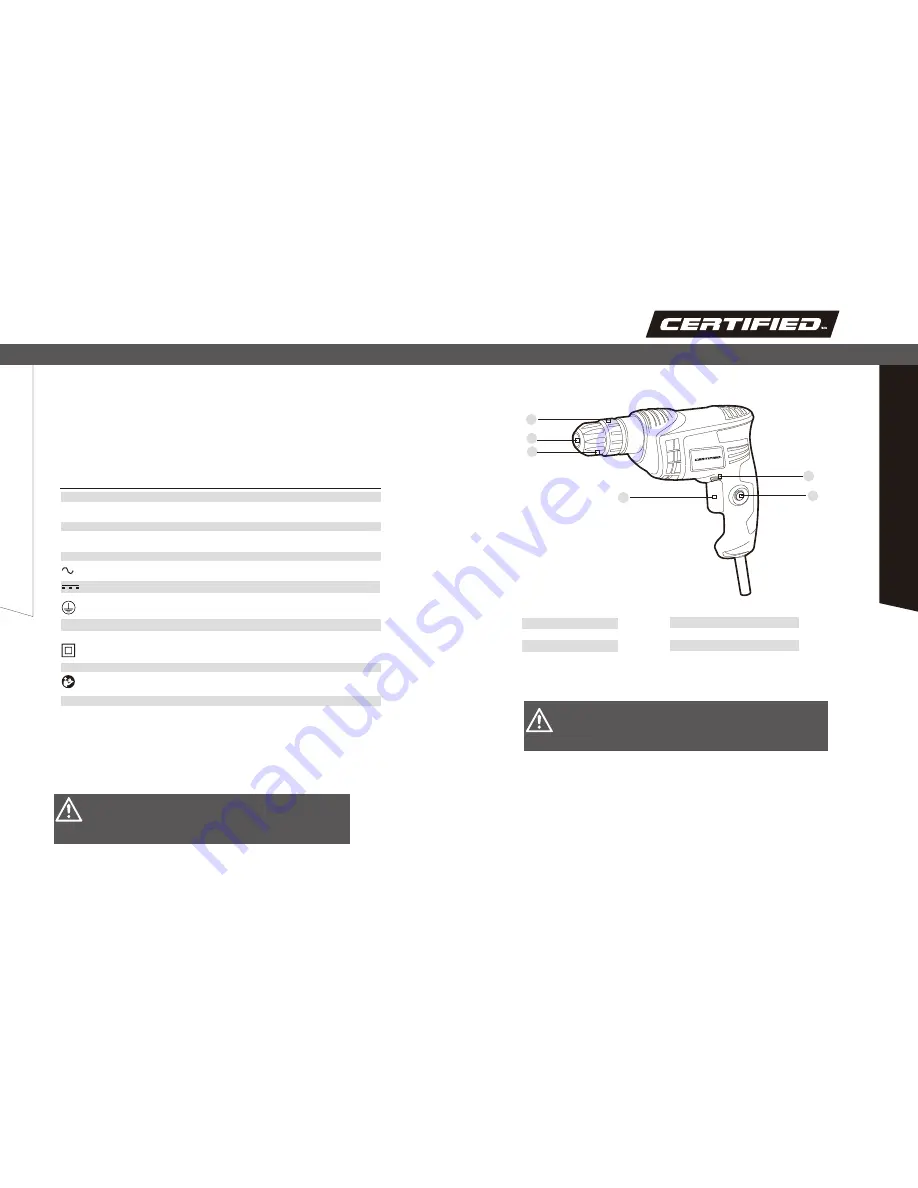
Know your tool

No. 

Description 

No. 

Description

Chuck Jaws 

Lock-on Button

2   

Chuck S leeve 

             T rigger 

3   

Collar 

Before attempting to use this tool, become familiar with all of its operating features and 

safety requirements. For optimum performance and safety, read the following operating 
instructions carefully before using.

Do not allow familiarity with the drill to cause a lack of alertness. A fraction of a second of 
carelessness is enough to cause severe injury.

Safety guidelines for corded drill


Use  the  auxiliary  handles  if  supplied  with  the  tool.  Loss of control can cause personal injury.

• 

Hold  the  power  tool  by  the  insulated  gripping  surfaces  when  performing  an  operation


where  the  cutting  tool  may  contact  hidden  wiring  or  its  own  cord.  Contact with a “live” wire


may make exposed metal parts of the power tool “live” and could give the operator an electric shock.

• 

The  label  on  your  tool  may  include  the  following  symbols. The  symbols  and  their 
definitions  are  as  follows:


V                          Volts


A                          Amperes                                        


Hz                        Hertz                                              


W                         Watts                                             


min                     Minutes                                          


                    Alternating 


Current


  Direct current

  n


No-load speed                             Rational


speed

,

 at no load.


               Class II Construction                 Double-insulated construction.


/

min                    Per


Minute


                    Grounding terminal


BPM                 Beats per minute

Read


The


Operator’s


Manual


To reduce the risk of injury  user must read and


understand

,

.

• 

Use  clamps  or  another  practical  way  to  support  the  workpiece  and  secure  it  to  a  stable


platform. Holding the workpiece by hand or against your body is unstable and may lead to loss of control.

• 

Inspect  the  tool  cords  periodically  and,  if  damaged,  have  them  repaired  by  a  qualified 
repair  person.  Constantly stay aware of the cord location. Following this rule will reduce the risk of 

Corded drill and instruction manual.

Remove the drill from the package and examine it carefully. Do not discard the carton or 

any packaging material until all parts have been examined.

7

8

WARNING!

S

A

FE

TY G

U

ID

EL

IN

ES

D

ES

C

R

IP

TI

O

N

WARNING!

• 

electric


shock


or


fire

.

Contents

:

Symbol

Name                                        Designation/Explanation

                          Type or a characteristic of current. 

                         Revolutions, strokes, surface speed, orbits minute.

operator’s

manual

before

using

this

product

Switch

3

1

2

4

5

6

Type of current.

Time

.

Power.

Frequency (cycles per second).

Current

Voltage.

model number 054-5847-8 

Direction of Rotation Selector

Summary of Contents for 054-5847-8

Page 1: ...model number 054 5847 8 CORDED DRILL IMPORTANT Please read this manual carefully before running this corded drill and save it for reference INSTRUCTION MANUAL ...

Page 2: ...d understand this instruction manual thoroughly before using the TECHNICAL SPECIFICATIONS 3 SAFETY GUIDELINES 4 7 DESCRIPTION 8 OPERATING INSTRUCTIONS 9 13 MAINTENANCE 14 15 TROUBLESHOOTING 16 PARTS LIST 17 18 WARRANTY 19 20 2 model number 054 5847 8 TABLE OF CONTENTS TABLE OF CONTENTS SAVE THESE INSTRUCTIONS This manual contains important safety and operating instructions Read all the instruction...

Page 3: ...e to follow the warnings and instructions Save all warnings and instructions for future reference battery operated cordless power tool RATED POWER 4A RATING VOLTAGE 120V 60 Hz NO LOAD SPEED 3000 RPM KEYLESS CHUCK 3 8 10 mm MAXIMUM DRILLING CAPACITY IN WOOD IN METAL UP TO 3 8 10 mm DRILL BITS TOOL WEIGHT 3 lb 3 oz 1 46 kg Safety symbols in this Instruction Manual are used to flag possible dangers Th...

Page 4: ...replacement parts This will ensure that the safety of the power tool is maintained Work area safety Keep the work area clean and well lit Cluttered or dark areas invite accidents Do not operate power tools in explosive atmospheres such as in the presence of flammable liquids gases or dust Power tools create sparks which may ignite the dust or fumes Keep children and bystanders away while operating ...

Page 5: ...rnating Current Direct current n 0 No load speed Rational speed at no load Class II Construction Double insulated construction min Per Minute Grounding terminal BPM Beats per minute Read The Operator s Manual To reduce the risk of injury user must read and understand Use clamps or another practical way to support the workpiece and secure it to a stable platform Holding the workpiece by hand or aga...

Page 6: ...bit to be thrown from the drill resulting in possible serious personal injury or damage to the chuck Never hold the collar by one hand and press the trigger to release tighten the chuck as this could cause serious personal injury Never connect the drill to the power source when you are assembling parts making adjustments installing or removing bits cleaning or when it is not in use as this could c...

Page 7: ... correct setting forward 4 Hold the drill firmly and place the bit at the point to be drilled 5 Press the trigger switch to start the drill 6 Move the drill bit into the workpiece applying only enough pressure to keep the bit cutting Do not force the drill or apply side pressure to elongate a 7 When drilling hard smooth surfaces use a center punch to mark the desired location of the hole This will ...

Page 8: ...ntrol can be maintained 4 Keep sufficient pressure on the drill to prevent the bit turning out of the screw head The screw head can easily become damaged making it difficult 5 To stop the drill release the trigger switch and allow the tool to come to a It is advisable to drill a pilot hole first slightly longer than the screw to be driven and just smaller than the shank diameter of the screw The pilo...

Page 9: ... the chuck jaws by turning the sleeve in a counterclockwise direction 3 Use a star head screwdriver not included to remove the chuck screw by turning it i in a clockwise direction 4 Insert a 5 16 or larger hex key not included into the chuck and securely tighten the chuck jaws around the hex key 5 Tap the hex key sharply with a mallet not included in a counterclockwise direction This will loosen t...

Page 10: ...1 12 13 14 15 16 17 18 19 20 21 22 23 24 SPIN SCREW DRILL CHUCK BALL BEARING CIRCLIP OUTPUT SHAFT STEEL BALL BIG GEAR CIRCLIP BALL BEARING BALL BEARING WASHER ROTOT No Description STATOR BRUSH HOLDER COPPER BRUSH HOLDER CARBON BRUSH BALL BEARING LEFT HOUSING REVERSE BUTTON SWITCH CABLE SHEATH CABLE SCREW RIGHT HOUSING model number 054 5847 8 ...

Page 11: ...ical cleaners and i this warranty will not apply to component parts sold by and identified as the product of anothercompany which shall be covered under the product Additional limitations This warranty applies only to the original purchaser and may not be transferred Neither the retailer nor the manufacturer shall be liable for any other expense loss or damage including without limitation any indir...

Reviews: