STORING AND MAINTENANCE
WARNING:
Before performing any maintenance or cleaning work, switch
off the engine and wait until the blade has come to a stop.
Cleaning
General cleaning
The lawnmower should be cleaned thoroughly every time after it has been used.
Always clean your lawnmower immediately after use.
Do not allow grass cuttings and other debris to become dry and hard on any of the mower
surfaces.
Dried grass remnants and dirt may impair the mowing operation.
Check that the grass chute is free of any residual grass. Remove any such residue.
Check the underside of the lawnmower and the blade mount. When checking, tilt the
lawnmower onto its left side (opposite the oil filler neck).
NOTE:
Before placing the lawnmower on its side, fully drain the fuel tank using a gas
extraction pump.
Do not tilt the lawnmower by more than 90 degrees.
Maintenance of the spark plug
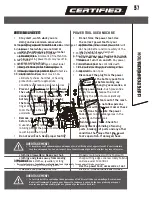
As shown in Fig. 21.
1. Once the engine has cooled, pull off the
spark cover with a twist.
2. Remove the spark plug using a spark plug
wrench.
3. Clean the spark plug with a wire brush
(not supplied).
4. Using a feeler gauge, set the gap to
0.457 – 0.61 mm.
5. Install the spark plug carefully by hand
to avoid cross-threading.
6. After the spark plug is seated, tighten with
the spark plug wrench to compress the washer.
Maintenance of the air filter
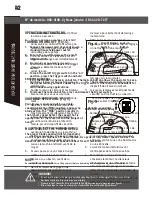
As shown in Fig. 22.
Soiled air filters reduce the engine output by supply too little air to the carburetor. If the air
contains a lot of dust, the air filter should be checked more frequently.
WARNING
!
Never run the engine without the air filter element installed.
1. Open the cover.
2. Remove the foam element.
3. Wash the foam element in liquid detegent
and water. Squeeze dry the foam element
in a clean cloth.
4. Saturate the foam element with clean
engine oil. To remove the excess engine oil,
squeeze the foam element in a clean cloth.
5. Install the foam element.
6. Close the cover.
Changing the engine oil
Tilt the lawnmower towards the oil filler. Have a container ready to catch the oil and remove the
dipstick. Once the oil has been emptied, replace the dipstick and wipe clean any spillages.
Refill with 470 mL SAE30 oil or equivalent, ie. SAE5W/30, SAE10W/30. To ensure the correct oil
level, replace dipstick without twisting closed. The oil level must be between the min and max
marks on the dipstick.
See "Checking and filling engine oil" on page 14.
Start the engine and allow it to run briefly.
Stop the engine, wait one minute and check the oil level. Top up if necessary.
Replacing the blade
For safety reasons you should only ever have your blade sharpened, balanced and mounted by an
authorised service workshop. For optimum results it is recommended that the blade be inspected
once a year.
WARNING!
Before you remove the grass collection bag, stop the engine and wait until the
blade stops completely.
WARNING!
You will need garden gloves (not provided) and a wrench (not provided) to
remove the blade.
NOTE!
Don’t invert the mower. Tip it slightly towards the oil filler pipe and reach under the
deck.
WARNING!
Always handle the blade with care; sharp edges could cause injury. USE
GLOVES. Replace your metal blade after 50 hrs mowing or 2 years whichever is sooner
regardless of condition.
WARNING!
If the blade is cracked or damaged replace it with a new one.
WARNING!
Don’t hold the blade by hand directly.
NOTE!
Maintain the sharpness of the blade when cutting grass. If the blade has worn
excessively and become pitted and blunt, it should be replaced or sharpened. The
sharpness of the blade will affect the performance of the lawnmower.
For safety reasons we recommend that the blade only be changed by someone qualified and
authorised to do so.
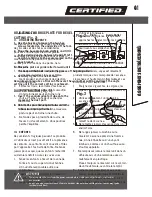
Hold the blade and unscrew the blade bolt counter-clockwise using a wrench. Remove the washer
and the blade.
Fit a new blade or re-sharpen the blade. Place
the blade on the two studs on the blade flange and
then replace the washer and bolts. Make sure the
blade is correctly located, and then firmly tighten
the bolt (tightening torque 40–45 Nm). Do not over
tighten.
Storing the lawnmower for short periods
The lawnmower can be stored for short periods of time (less than 15 days) without performing any
storage maintenance. Before placing the lawnmower into storage always carry out the following:
1. Allow the engine to fully cool.
2. Ensure the grass bag is empty.
3. Clean all debris from under the mower deck.
4. Store the lawnmower on flat and level surface with the mower upright.
5. Store in a safe place which is not accessible by children or people who are not familiar with
lawnmower operation.
Storing the lawnmower for extended periods
If the lawnmower is to be placed into storage for more than 15 days, storage maintenance must
be performed on the lawnmower. If the following steps are not carried out, when you next operate
the lawnmower it may not start correctly and may need to be serviced.
CAUTION!
Do not empty the gas tank in enclosed areas, near fire or when smoking. Gas
fumes can cause explosions and fire.
1. Empty the gas tank with a gas suction pump if available.
2. Start the engine and let it run until any remaining gas has been used up.
3. Change the oil at the end of every season. To do so, remove the used engine oil from a warm
engine and refill with fresh oil.
4. Clean the cooling fins of the cylinder and the housing.
5. Be sure to clean the entire machine to protect the paint.
6. Store the machine in a well-ventilated place.
Maintenance schedule
Performing routine maintenance correctly on your lawnmower will ensure you get years of
trouble-free use.
Please keep this manual safe for future reference.
It is recommended that the following maintenance schedule is adhered to. This will ensure the
lawnmower operates correctly and is safe to use.
The engine oil should be changed after the first 8 hours.
Transporting the lawnmower
Empty the gas tank. Always let the engine run until it has used up the remainder of gas in the
tank.
Empty the engine oil from the warm engine.
Remove the spark plug cover from the spark plug.
Clean the cooling fins of the cylinder and the housing.
Use the original packaging to ship whenever possible.
TROUBLESHOOTING
WARNING:
Before performing any maintenance or cleaning work, switch off the engine and
wait until the blade has come to a stop.
Caution!
Improper repairs can result in the product functioning unsafely. This endangers yourself
and your environment.
Faults which cannot be rectified with the aid of following table may be rectified by a specialist
company only (customer service centre).
Please be aware that any improper repairs will also invalidate the warranty and additional costs
may be incurred.
Use only genuine spare parts. Only these spare parts are designed and suitable for the product.
The use of other spare parts not only voids the warranty, you can also endanger yourself and your
environment.
27
TROUBLESHOOTING
Summary of Contents for 060-0190-2
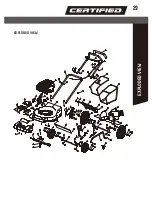
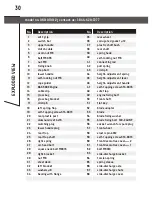
Page 30: ...EXPLODED VIEW 29 EXPLODED VIEW ...
Page 34: ......
Page 64: ...VUE ÉCLATÉE 63 VUE ÉCLATÉE ...

