background image

For 

Training 

Purposes 

Only

Summary of Contents for A150M

Page 1: ...F o r T r a i n i n g P u r p o s e s O n l y...

Page 2: ...F o r T r a i n i n g P u r p o s e s O n l y...

Page 3: ...AEROBAT 1977 MODEL A150M Serial N o Registration N o THIS HANDBOOK INCLUDES THE MATERIAL REQUIRED TO BE FURNISHED TO THE PILOT BY CAR PART 3 CESSNA AIRCRAFT COMPANY WICHITA KANSAS USA F o r T r a i n...

Page 4: ...cific benefits and provisions of warranty plus other important benefits for you are contained in your Customer Care Program book sup plied with your airplane Warranty service is available to you at au...

Page 5: ...Company These are distributed to Cessna Dealers and to those who subscribe through the Owner Follow Up System If you are not receiving subscription service you will want to keep in touch with your Ces...

Page 6: ...F o r T r a i n i n g P u r p o s e s O n l y...

Page 7: ...Baggage Space Dimensions Specific Loadings Symbols Abbreviations and Terminology General Airspeed Terminology and Symbols Meteorological Terminology Engine Power Terminology Airplane Performance and...

Page 8: ...robe lights are installed wing span is 32 BY 2 Maximum height shown with nose gear depressed all tires and nose strut prop erly inflated and flashing beacon in stalled 3 Wheel base length is 58 4 Prop...

Page 9: ...eledyne Continental l filne Model Nu_mbet _ 0 200 A _ Engine Type Normally aspirated direct drive air cooled horizontally opposed carburetor equipped four cylinder engine with 201 cu in displacement H...

Page 10: ...il change Continue to use until a total of 50 hours has accumulated or oil consumption has stabilized NOTE The airplane was delivered from the factory with a corro sion prevehtive aircraft engine oil...

Page 11: ...507 lbs CABIN AND ENTRY DIMENSIONS Detailed dimensions of the cabin interior and entry door openings are illustrated in Section 6 BAGGAGE SPACE DIMENSIONS Dimensions of the baggage area are illustrate...

Page 12: ...the airplane is controllable Stalling Speed or the minimum steady flight speed at which the airplane is controllable in the landing configuration at the most forward center of gravity Best Angle of Cl...

Page 13: ...f fuel that can not be safely used in flight Gallons Per Hour is the amount of fuel in gallons consumed per hour Nautical Miles Per Gallon is the distance in nautical miles which can be expected per g...

Page 14: ...which the airplane must be operated at a given weight Standard Empty Weight is the weight of a standard airplane including unusable fuel full operating fluids and full engine oil Basic Empty Weight i...

Page 15: ...Markings Weight Limits Center of Gravity Limits Maneuver Limits Inverted Flight Limitations Engine Speed Limitations Flap Extension Limitations Flight Load Factor Limits Kinds of Operation Limits Fuel...

Page 16: ...F o r T r a i n i n g P u r p o s e s O n l y...

Page 17: ...odel No A150M AIRSPEED LIMITATIONS Airspeed limitations and their operational significance are shown in figure 2 1 SPEED KCAS KIAS REMARKS VNE Never Exceed Speed 168 164 Do not exceed this speed in an...

Page 18: ...4 Operations must be conducted with caution and only in smooth air Red Line 164 Maximum speed for all operations Figure 2 2 Airspeed Indicator Markings POWER PLANT LIMITATIONS Engine Manufacturer Tele...

Page 19: ...mum Landing Weight 1600 lbs Maximum Weight in Baggage Compartment LIMIT 2750 RPM 240 F 100 psi Baggage Area 1 or passenger on child s seat Station 50 to 76 120 lbs See note below Baggage Area 2 Statio...

Page 20: ...flight maneuvers are not approved because the gravity fuel system and conventional carbu retor will not permit continuous engine operation in this negative g condi tion In addition the loss of oil pre...

Page 21: ...equipment for these operations The refer ence to types of flight operations on the operating limitations placard re flects equipment installed at the time of Airworthiness Certificate issu ance Flight...

Page 22: ...Approved Fuel Grades and Colors 2 8 80 Formerly 80 87 Grade Aviation Fuel Red 100LL Grade Aviation Fuel Blue 100 Formerly 100 130 Grade Aviation Fuel Green CESSNA MODELA150M F o r T r a i n i n g P u...

Page 23: ...rohibited Baggage compartment and or child s seat must not be occupied during aerobatics THE FOLLOWING AEROBATIC MANEUVERS ARE APPROVED Maneuver Reem Entry Speed Maneuver Reem Entry Speed Chandelles S...

Page 24: ...Balance Data 3 Near fuel shut off valve standard tanks FUEL 22 5 GALS ON OFF Near fuel shut off valve long range tanks FUEL 35 0 GALS ON OFF 4 Near fuel tank filler cap standard tanks FUEL 80 87 MIN G...

Page 25: ...CY DOOR RELEASE J 1 UNLATCH DOOR 2 PULL D RING 6 On door near window latch DO NOT OPEN WINDOW ABOVE 143 KNOTS IAS J 7 On the instrument panel near over voltage light H I_G_H_v __ o_L_T_A_G_E _________...

Page 26: ...F o r T r a i n i n g P u r p o s e s O n l y...

Page 27: ...nary Landing With Engine Power Ditching Fires During Start On Ground Engine Fire In Flight Electrical Fire In Flight Cabin Fire Wing Fire Icing Inadvertent Icing Encounter Landing With A Flat Main Tir...

Page 28: ...Clouds 3 11 Recovery From A Spiral Dive 3 12 Flight In Icing Conditions 3 12 Spins 3 12 Rough Engine Operation Or Loss Of Power 3 13 Carburetor Icing 3 13 Spark Plug Fouling 3 13 Magneto Malfunction...

Page 29: ...problem Emergen cy procedures associated with the ELT and other optional systems can be found in Section 9 AIRSPEEDS FOR EMERGENCY OPERATION Engine Failure After Takeoff Maneuvering Speed At All Weigh...

Page 30: ...s UNLATCH PRIOR TO TOUCHDOWN 8 Touchdown SLIGHTLY TAIL LOW 9 Brakes APPLY HEAVILY PRECAUTIONARY LANDING WITH ENGINE POWER 1 Airspeed 60 KIAS 2 Wing Flaps 20 3 Selected Field FLY OVER noting terrain an...

Page 31: ...CONTINUE to get a start which would suck the flames and accumulated fuel through the carburetor and into the engine If engine starts 2 Power 1700 RPM for a few minutes 3 Engine SHUTDOWN and inspect fo...

Page 32: ...within a closed cabin ventilate the cabin If fire appears out and electrical power is necessary for continuance of flight 5 Master Switch ON 6 Circuit Breakers CHECK for faulty circuit do not reset 7...

Page 33: ...used by carburetor ice or air intake filter ice Lean the mixture for maxi m m RPM if carburetor heat is used continuously 6 Plan a landing at the nearest airport With an extremely rapid ice build up s...

Page 34: ...SUPPLY SYSTEM MALFUNCTIONS OVER VOLTAGE LIGHT ILLUMINATES 1 Master Switch OFF both sides 2 Master Switch ON 3 Over Voltage Light OFF If over voltage light illuminates again 4 Flight TERMINATE AMMETER...

Page 35: ...ing turn necessary to return to the runway The checklist procedures assume that adequate time exists to secure the fuel and ignition systems prior to touchdown After an engine failure in flight the be...

Page 36: ...and flaps lowered to 20 by using throttle and elevator trim controls Then do not change the elevator trim control setting control the glide angle by adjusting power exclusively At flareout the nose do...

Page 37: ...ly with skidding motions rather than rolling motions so that the compass will read more accurately 5 Maintain altitude and airspeed by cautious application of eleva tor control Avoid overcontrolling b...

Page 38: ...ding 6 Apply carburetor heat 7 Clear engine occasionally but avoid using enough power to dis turb the trimmed glide 8 Upon breaking out of clouds resume normal cruising flight FLIGHT IN ICING CONDITIO...

Page 39: ...heat and readjust the throttle If conditions require the continued use of carburetor heat in cruise flight use the minimum amount of heat necessary to prevent ice from forming and lean the mixture sli...

Page 40: ...em can be detected by periodic monitoring of the ammeter and over voltage warning light how ever the cause of these malfunctions is usually difficult to determine Broken or loose alternator wiring is...

Page 41: ...y occurs at night power must be conserved for later use of the landing light and flaps during landing INSUFFICIENT RATE OF CHARGE If the ammeter indicates a continuous discharge rate in flight the alt...

Page 42: ...F o r T r a i n i n g P u r p o s e s O n l y...

Page 43: ...ing Edge Left Wing Trailing Edge Before Starting Engine Starting Engine Before Takeoff Takeoff Normal Takeoff Short Field Takeoff Enroute Climb Cruise Before Landing Landing Normal Landing Short Field...

Page 44: ...r Aerobatic Maneuvers Aerobatic Considerations Maneuver Limitations Dual Instruction Physical Condition Loose Equipment and Baggage Seat Belts and Shoulder Harnesses Parachutes Federal Aviation Regula...

Page 45: ...Normal Climb Out Short Field Takeoff Flaps Up Speed at 50 Feet Climb Flaps Up Normal Best Rate of Climb Sea Level Best Rate of Climb 10 000 Feet Best Angle of Climb Sea Level thru 10 000 Feet Landing...

Page 46: ...ve even small accumulations of frost ice or snow from wing tail and control surfaces Also make sure that control surfaces contain no internal accumula tions of ice or debris If a night flight is plann...

Page 47: ...g Edge 1 Aileron CHECK freedom of movement and security RIGHT WING 1 Wing Tie Down DISCONNECT 2 Main Wheel Tire CHECK for proper inflation 3 Before first flight of day and after each refueling use sam...

Page 48: ...and drain small quantity of fuel from fuel tank sump quick drain valve to check for water sediment and proper fuel grade 3 Fuel Quantity CHECK VISUALLY for desired level 4 Fuel Filler Cap SECURE j LE...

Page 49: ...H below 5000 feet 7 Elevator Trim TAKEOFF 8 Throttle 1700 RPM a Magnetos CHECK RPM drop should not exceed 150 RPM on either magneto or 75 RPM differential between magnetos b Carburetor Heat CHECK for...

Page 50: ...FULL OPEN 3 Mixture FULL RICH mixture may be leaned above 5000 feet CRUISE 1 Power 2000 2750 RPM no more than 75 2 Elevator Trim ADJUST 3 Mixture LEAN BEFORE LANDING 1 Seats Belts Harnesses ADJUST an...

Page 51: ...HEAVILY 7 Flaps RETRACT BALKED LANDING 1 Throttle FULL OPEN 2 Carburetor Heat COLD 3 Wing Flaps RETRACT TO 20 4 Airspeed 55 KIAS 5 Wing Flaps RETRACT slowly AFTER LANDING 1 Wing Flaps UP 2 Carburetor...

Page 52: ...F o r T r a i n i n g P u r p o s e s O n l y...

Page 53: ...htly to keep it running After starting if the oil gage does not begin to show pressure within 30 seconds in the summertime and about twice that long in very cold weather stop engine and investigate La...

Page 54: ...trong quartering tail winds require caution Avoid sudden bursts of the throttle and sharp braking when the airplane is in this attitude Use the steerable nose wheel and rudder to maintain direction Fi...

Page 55: ...ow greater than 75 RPM differential between magnetos If there is a doubt concerning opera tion of the ignition system RPM checks at higher engine speeds will usual ly confirm whether a deficiency exis...

Page 56: ...throttle static runup After full throttle is applied adjust the throttle friction lock clock wise to prevent the throttle from creeping back from a maximum power position Similar friction lock adjust...

Page 57: ...should be full rich below 5000 feet and may be leaned if necessary above 5000 feet for smoother engine operation NORMAL CLIMB Normal climbs are conducted at 65 to 75 KIAS with flaps up and full throt...

Page 58: ...ved fuel economy that is obtainable when operating at lower power settings and higher altitudes The use of lower power settings and the selection of cruise altitude on the basis of the most favorable...

Page 59: ...The stall characteristics are conventional for the flaps up and flaps down condition Slight elevator buffeting may occur just before the stall with flaps down The stall warning horn produces a steady...

Page 60: ...the wing flap setting should be reduced to 20 immediately after full power is applied Upon reaching a safe airspeed flaps should be slowly retracted to the full up position COLD WEATHER OPERATION Prio...

Page 61: ...ion Switch START 6 Pump throttle rapidly to full open twice Return to 1 4 inch open position 7 Release ignition switch to BOTH when engine starts 8 Continue to prime engine until it is running smoothl...

Page 62: ...ll pilots to minimize the effect of airplane noise on the public We as pilots can demonstrate our concern for environmental im provement by application of the following suggested procedures and thereb...

Page 63: ...d for any lesser weight MANEUVER Chandelles Lazy Eights Steep Turns Stall except whip stalls Spins Loops Cuban Eights Immelmanns Aileron Rolls Barrel Rolls Snap Rolls Vertical Reversements RECOMMENDED...

Page 64: ...t having re ceived dual instruction from a qualified aerobatic instructor PHYSICAL CONDITION The pilot should be in good physical condition and mentally alert Initial indoctrination flights should be...

Page 65: ...c practice areas should be in accordance with government regulations and in some cases after consulting local aviation authorities CABIN DOOR JETTISON SYSTEM The cabin door jettisoning mechanism shoul...

Page 66: ...mpleted well above the minimum 1500 feet above ground level required by FAR 91 rr Another reason for using high altitudes for practicing spins is that a great er field of view is provided which will a...

Page 67: ...CESSNA MODELA150M Figure 4 4 Spin SECTION 4 NORMAL PROCEDURES 4 25 F o r T r a i n i n g P u r p o s e s O n l y...

Page 68: ...TATION STOPS Prei iiitlire relaxation of the recovery control inputs may result in extended recoveries 5 AS ROTATION STOPS NEUTRALlZE RUDDER AND MAKE A SMOOTH RECOVERY FROM THE RESULTING DIVE NOTE If...

Page 69: ...n of back pressure may be necessary to prevent stall buffeting from occuring through the downward side of the loop and to maintain the symmetrical pattern of the maneuver Observation of landmarks thro...

Page 70: ...d reference heading During the entry a gradual pullup is initiated and as the nose passes through the horizon a coordinated turn begun After 45 degrees of turn the airplane should be positioned in a 9...

Page 71: ...15 degrees above the horizon and a coordinated steep turn entry initiated Aileron deflection is progressively increased until maximum deflection is obtained Rudder and elevator should be coordinated t...

Page 72: ...mb at 80 KIAS At this speed the elevator control is abruptly pulled back to the full aft position while simultaneously applying full rudder in the desired direction of roll The use of aileron in the d...

Page 73: ...r to a point where the nose of the airplane is approximately 45 degrees below the hor izon At this point the back pressure is slightly relaxed and a half aile ron roll initiated A slight forward contr...

Page 74: ...power by the time a vertical position is reached As the airplane nears the inverted position a slight relaxation of elevator back pressure should be accomplished and full aileron control deflection ra...

Page 75: ...s the airplane snaps over the top aileron control is added in the direction of roll The control wheel should then be eased forward and appropriate rudder and aileron controls used to J l e establish a...

Page 76: ...F o r T r a i n i n g P u r p o s e s O n l y...

Page 77: ...istance Figure 5 5 Rate of Climb Figure 5 6 Time Fuel and Distance to Climb Figure 5 7 Cruise Performance Figure 5 8 Range Profile 22 5 Gallons Fuel Range Profile 35 0 Gallons Fuel Figure 5 9 Enduranc...

Page 78: ...F o r T r a i n i n g P u r p o s e s O n l y...

Page 79: ...r turbulence may account for variations of 10 or more in range and endurance Therefore it is important to utilize all available information to estimate the fuel required for the particular flight USE...

Page 80: ...e information pres ented for a pressure altitude of 2000 feet and a temperature of 30 C should be used and results in the following Ground roll Total distance to clear a 50 foot obstacle 990 Feet 1865...

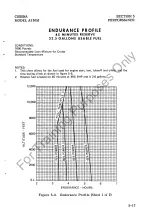
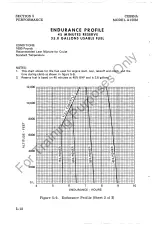
Page 81: ...ge of 381 nautical miles under no wind condi tions The endurance profile chart figure 5 9 shows a corresponding 4 1 hours The range figure of 381 nautical miles is corrected to account for the expecte...

Page 82: ...lower rate of climb In this case assuming a temperature 16eC above standard the correction would be 16ec x 1001 2001 Increase gee 10 10 With this factor included the fuel estimate would be calculated...

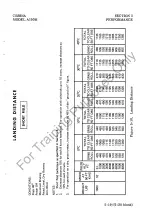
Page 83: ...he trip with ample reserve LANDING A procedure similar to takeoff should be used for estimating the landing distance at the destination airport Figure 5 10 presents land ing distances for various airp...

Page 84: ...AS 39 FLAPS 40 KIAS 40 KCAS 38 5 8 AIRSPEED CALIBRATION 50 60 70 80 90 100 110 49 58 68 78 88 98 108 50 60 70 80 85 48 58 68 78 84 50 60 70 80 85 49 61 72 83 87 Figure 5 1 Airspeed Calibration CESSNA...

Page 85: ...HART 120 I i I II 100 I J II I 80 IJ J I J 60 J LU J r z LU IJ a r J 40 u I LU v LU a UJ J LU 0 20 1 I J f J J 0 II I J J I IJ 20 v I II 40 I 40 20 0 20 40 60 DEGREES CELSIUS Figure 5 2 Temperature Co...

Page 86: ...KIAS KCAS KIAS KCAS KIAS KCAS UP 49 48 53 52 58 57 69 68 1600 10 47 45 51 48 56 54 66 64 40 44 42 47 45 52 50 62 59 MOST FORWARD CENTER OF GRAVITY ANGLE OF BANK WEIGHT FLAP oo 30 45 60 LBS DEFLECTION...

Page 87: ...figure TAKEOFF o 0 c 10 c 20 c 30 c 4o 0 c SPEED PRESS WEIGHT KIAS ALT TOTAL TOTAL TOTAL TOTAL LBS TOTAL LIFT AT FT GRND TO CLEAR GRND TO CLEAR GRND TO CLEAR GRND TO CLEAR GRND TO CLEAR OFF 50 FT ROLL...

Page 88: ...8000 10 000 12 000 RATE OF CLIMB MAXIMUM CESSNA MODEL A150M CLIMB SPEED RATE OF CLIMB FPM KIAS 20 c o0 c 20 c 40 c 68 770 710 655 595 67 675 615 560 500 65 580 520 465 405 64 485 430 375 310 63 390 3...

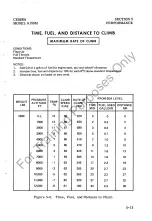
Page 89: ...o wind PRESSURE CLIMB RATE OF FROM SEA LEVEL WEIGHT TEMP ALTITUDE SPEED CLIMB LBS FT oc KIAS FPM TIME FUEL USED DISTANCE MIN GALLONS NM 1600 S L 15 68 670 0 0 0 j 1000 13 68 630 2 0 2 2 2000 11 67 590...

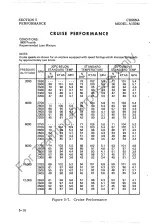
Page 90: ...2400 58 90 4 4 54 90 4 1 50 89 3 9 2300 51 86 3 9 48 85 3 7 45 84 3 5 2200 45 81 3 5 42 80 3 3 40 79 3 2 6000 2750 77 105 5 8 71 104 5 3 2700 79 104 5 9 73 103 5 4 67 102 5 1 2600 70 99 5 2 64 98 4 8...

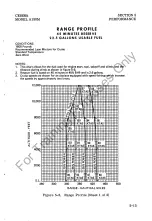
Page 91: ...lons 3 Cruise speeds are shown for an airplane equipped with speed fairings which increase the speeds by approximately two knots I w w LL w Cl I j J 12 000 10 000 8000 6000 4000 2000 S L 260 300 97 88...

Page 92: ...BHP and is 2 6 gallons 3 Cruise speeds are shown for an airplane equipped with speed fairings which increase the speeds by approximately two knots I w w u I w 0 I 5 16 12 000 II 97 KTAS 88 KTAS I V 11...

Page 93: ...l l l H l l l l l l I l l l l l IH l l l l l l H 1 l ll H l IH W l l 11 1 l l l W 4 W l l 1 _j_j 10 000 0 1 l l li t i t li t 1 i t l i t 1 1 8000 6000 4000 1 1 1 H H H H I 0 1 1 _ _ _ H l l W l l li...

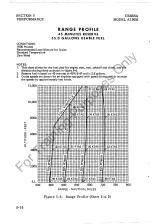
Page 94: ...start taxi takeoff and climb and the time during climb as shown in figure 5 6 2 Reserve fuel is based on 45 minutes at 45 BHP and is 2 6 gallons 12 000 I I I I I I 1 1 t I I 0 I A 1 10 000 I I I 8000...

Page 95: ...O CLEAR GRND TO CLEAR GRND TO CLEAR GRND TO CLEAR GRND TO CLEAR ROLL 50 FT OBS ROLL 50 FT OBS ROLL 50 FT OBS ROLL 50 FT OBS ROLL 50 FT OBS 1600 52 S L 425 1045 440 1065 455 1090 470 1110 485 1135 1000...

Page 96: ...F o r T r a i n i n g P u r p o s e s O n l y...

Page 97: ...LANCE EQUIPMENT LIST SECTION 6 WEIGHT BALANCE EQUIPMENT LIST TABLE OF CONTENTS Introduction Airplane Weighing Procedures Weight and Balance Equipment List Page 6 3 6 3 6 6 6 14 6 1 6 2 blank F o r T r...

Page 98: ...L F o r T r a i n i n g P u r p o s e s O n l y...

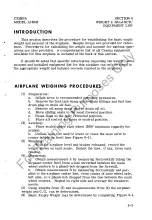
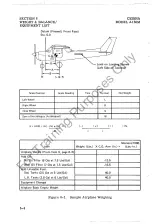
Page 99: ...eats to the most forward position e Raise flaps to the fully retracted position f Place all control surfaces in neutral position 2 Leveling a Place scales under each wheel 500 minimum capacity for sca...

Page 100: ...e 6 3 Add Oil No Oil Filter 6 Ots at 7 5 Lbs Gal With Oil Filter 7 Ots at 7 5 Lbs Gal Add Unusable Fuel Std Tanks 3 5 Gal at 6 Lbs Gal LR Tanks 3 0 Gal at 6 Lbs Gal Equipment Changes Airplane Basic Em...

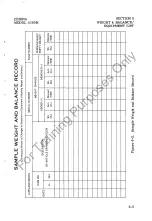
Page 101: ...and Balance I SERIAL NUMBER I PAGE NUMBER WEIGHT CHANGE RUNNING BASIC ADDED REMOVED EMPTY WEIGHT DESCRIPTION OF ARTICLE OR MODIFICATION Wt Arm Moment Wt Arm Moment Wt Moment lb In 1000 lb In 1000 lb...

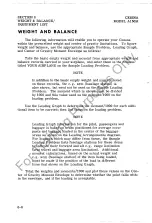
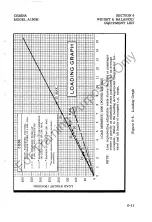
Page 102: ...oblem Use the Loading Graph to determine the moment 1000 for each addi tional item to be carried then list these on the loading problem NITTE Loading Graph information for the pilot passengers and bag...

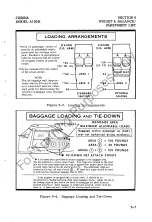
Page 103: ...E DOWN 40 POUNDS 120 POUNDS TIE DOWN NET ATTACH POINTS A tie down net is provided to secure baggage in the baggage area The net attaches to six tie down rings Two rings are located on the floor just a...

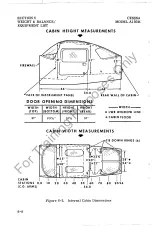
Page 104: ...STRUMENT PANEL 56 0 DOOR OPENING DIMENSIONS WIDTH IWIDTH HEIGHT TOP BOTTOM FRONT 31 I 331 i 31V2 HEIGHT REAR 31 REAR WALL OF CABIN WIDTH LWR WINDOW LINE CABIN FLOOR CABIN WIDTH MEASUREMENTS CABIN STAT...

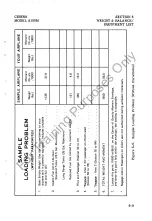
Page 105: ...o 41 340 13 3 Baggage Area 1 Or passenger on child s seat Station 50 to 76 Baggage Area 2 Station 76 to 94 TOTAL WEIGHT AND MOMENT 1600 56 0 Locate this point 1600 at 56 0 on the Center of Gravity Mom...

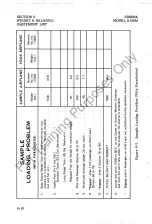
Page 106: ...tes Average weight 20 Lbs each 40 1 7 Baggage Area 1 Or passenger on child s seat Station 50 to 76 Baggage Area 2 Station 76 to 94 TOTAL WEIGHT AND MOMENT 1600 56 1 Locate this point 1600 at 56 1 on t...

Page 107: ...35 MAX 1 200 H __ L f H3o i o I _ __ I I I I_ __ I I I I I I I I I I 4 I _ I 150 I I I I I r I I I I I 20 1 _ 22 5 MAX 1 1 I I I I I _I_ _ LOADING GRAPH I 120 _ 1 1 100 i I H i lOi i _1 r c 50 I c lj...

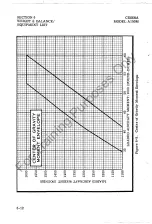
Page 108: ...ITY I MOMENT ENVELOPE I I I I r I I 1 r I I I I I I I I I I I I I I 35 40 45 50 55 LOADED AIRCRAFT MOMENT 1000 POUND INCHES Figure 6 9 Center of Gravity Moment Envelope c 60 tc l s tl l tc l tc l Sl C...

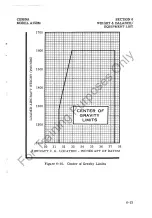
Page 109: ...1 a t t 1 t l jt t 11 1 H il lt l l l 1 1 1 1 t t l 1 I I I I t 13oo t t t t a f t _ _f H t r 1 CENTER OF I _L r 1 GRAVITY 1 a 1 _ f 1 f LIM ITS t 1200 1 4_ U j _l l _i_ l _ _ j 1 i l 1 _i r F t tt i...

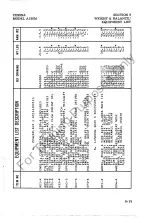
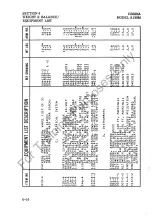
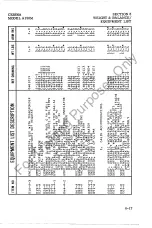
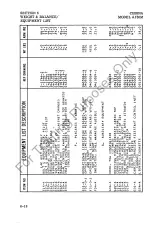
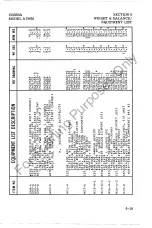
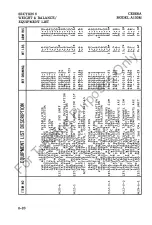
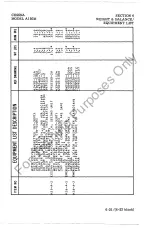
Page 110: ...equipment items 0 optional equipment items replacing required or standard items A optional equipment items which are in addition to required or standard items A reference drawing column provides the d...

Page 111: ...2 WHEEL ASSYt MCCAULEY tEACH BRAKE ASSY MCCAULfY tLEFT BRAKE ASSY MCCAULEY RIGHT TlRE 4 PL Y BLACKWALL EACHt TUBE EACH WHEEL TIRE ASSY 5 00X5 NOSE WHEEL ASSY MCCAULEY TIRE 4 PLY BLACKWALL CEACH TUBE E...

Page 112: ...INSTRUMENTS INDICATOR AIRSPEED INDICATOR TRUE AIRSPEED ALTIMETER SENSITIVE ALTIMETER SENSITIVE 20 FT MARKINGS FEET AND MILLIBARS ALTIMETER SENSITIVE 50 FT MARKINGS lFEET AND MILLIBARS ENCODING ALTIME...

Page 113: ...MMODATIONS SEAT AEROBATIC W CUSHION PILOT SEAT VERTICALLY ADJUSTABLE PILOT SEAT AEROBATIC W CUSHION tCO PILOT SEAT CUSHION BOTTOM RE OVABLE EACH SEAT CUSHION BACK tPEMOVABLE EACH SEAT VERTICALLY ADJUS...

Page 114: ...TALLED STOWED HOISTING RINGS AIRCRAFT CABIN TOP CORROSION PROOFING INTERNAL STATIC DISCHARGERS SET Of 10 STABILIZER ABRASION BOOTS TOW BAR AIRCRAFT NOSE WHEEL STOWED PAINT OVERALL EXTERIOR OVERALL WHI...

Page 115: ...0 TRANSPONDER TRANSCEIVER RT 359A ANTENNA A 1098 CESSNA 400 TRANSPONDER EXPORT USE TRANSCEIVER R T 459A ANTENNA tA 1098 CESSNA 300 VHF TRANSCEIVER lST UNIT TRANSCEIVER RT 524A NOT E I NS T Al LAT ION...

Page 116: ...LOC INDICATOR RECEIVER TRANSCEIVER RT 3281 VOR LOC INDICATOR IN 5148 lST UNIT INSTALLATION COMPONENTS ARE SIMILAR TO H22 S CESSNA 300 VHF NAV COM 720 CHANNEL COM lST UNIT WITH VOR ILS INOICATO RECEIVE...

Page 117: ...ME AS H25 A l MERGENCY LOCATOR TRANSMITTER TRANSCEIVER LEIGH SHARC 7K ANTENNA MERGENCY LOCATOR TRANSMITTER CANADIAN TRANSCEIVER LEIGH SHARC 7J ANTENNA REF DRAWING 2450 1114 1640 1000 470400 723 960111...

Page 118: ...F o r T r a i n i n g P u r p o s e s O n l y...

Page 119: ...bin Windows Control Locks Engine Engine Controls Engine Instruments New Engine Break in and Operation Engine Oil System Ignition Starter System Air Induction System Exhaust System Carburetor and Primi...

Page 120: ...atic System and Instruments Airspeed Indicator Rate of Climb Indicator Altimeter Vacuum System and Instruments Attitude Indicator Directional Indicator Suction Gage Accelerometer Stall Warning System...

Page 121: ...onventional hinged ailerons and single slot ted flaps are attached to the trailing edge of the wings The ailerons are constructed of a forward spar containing a balance weight formed sheet metal ribs...

Page 122: ...RPLANE SYSTEMS DESCRIPTIONS AILERON CONTROL SYSTEM CESSNA MODEL Al50M l _ 1 1 l v gk RUDDER CONTROL SYSTEM Figure 7 1 Flight Control and Trim Systems Sheet 1 of 2 7 4 F o r T r a i n i n g P u r p o s...

Page 123: ...L A150M SECTION 7 AIRPLANE SYSTEMS DESCRIPTIONS ELEVATOR CONTROL SYSTEM ELEVATOR TRIM CONTROL SYSTEM fl I Figure 7 1 Flight Control and Trim Systems Sheet 2 of 2 7 5 F o r T r a i n i n g P u r p o s...

Page 124: ...SECTION 7 AIRPLANE SYSTEMS DESCRIPTIONS Figure 7 2 Instrument Panel Sheet 1 of 2 7 6 CESSNA MODEL Al50M F o r T r a i n i n g P u r p o s e s O n l y...

Page 125: ...uretor Heat Control s 3 11 Omni Course Indicator 34 Electrical Switches 35 Oil Pressure Gage 4 s 12 Accelerometer 13 Rear View Mirror and Control 36 Oil Temperature Gage I d I d 14 Transponder 37 Ciga...

Page 126: ...urn coordinator and suction gage On the right side are the clock altimeter rate of climb indicator navigation instruments and accelerometer Avionics equipment is stacked approximately on the centerlin...

Page 127: ...plished by attaching a tow bar to the nose gear strut If a tow bar is not available or pushing is required use the wing struts as push points Do not use the vertical or horizontal surfaces to move the...

Page 128: ...air oil nose gear shock strut Each main gear wheel is equipped with a hydraulically actuated disc type brake on the in board side of each wheel When wheel fairings are installed an aerody namic fairi...

Page 129: ...nd should be adjusted prior to flight To r se or lower either seat pull forward on a T handle under the seat near the inb6ard corner force the seat down against spring tension or allow spring ten sion...

Page 130: ...o tighten FREE END OF SEAT BELT HALF Pull to tighten NARROW RELEASE STRAP Pull inboard when lengthening SEAT BELT LINK HALF SHOULDER HARNESS END LOOP SEAT BELT LATCH HALF NARROW RELEASE STRAP Pull out...

Page 131: ...row release straps Slip each harness end loop over the end of the seat belt link Rotate the hooked locking arm on the latch half of the seat belt to the open position connect the link to the latch and...

Page 132: ...ft cabin door and using the ignition key lock the door Emer gency exit is accomplished through the jettisonable cabin doors by releas ing the doors with the inside handles first then jerking sharply i...

Page 133: ...e also made for a full flow oil filter and an oil cooler ENGINE CONTROLS Engine power is controlled by a throttle located on the lower center portion of the instrument paneL The throttle operates in a...

Page 134: ...maximum allow able red line of 2750 RPM NEW ENGINE BREAK IN AND OPERATION The engine underwent a run in at the factory and is ready for the full range of use It is however suggested that cruising be a...

Page 135: ...on and re move the drain hose IGNITION STARTER SYSTEM Engine ignition is provided by two engine driven magnetos and two spark plugs in each cylinder The right magneto fires both left and right upper s...

Page 136: ...xture control Fuel is delivered to the carburetor by gravity flow from the fuel system In the carburetor fuel is atomized proportionally mixed with intake air and delivered to the cylinders through in...

Page 137: ...ndard fuel system or a long range system see figure 7 6 Both systems consist of two vented fuel tanks one in each wing a fuel shutoff valve fuel strainer manual primer and carburetor Refer to figure 7...

Page 138: ...NDERS CESSNA MODEL A150M VENTED FILLER CAP mmmmmmmmll llll l ll l l lll llll j 111v Liiiiiiiiiiii rmrnrnrnrn lllllllllllllllllll RIGHT FUEL TANK THROTTLE MIXTURE CONTROL KNOB Due to crossfeeding betwe...

Page 139: ...e first flight of every day and after each refueling by using the sampler cup provided to drain fuel from the wing tank sumps and by utilizing the fuel strainer drain under an access panel on the righ...

Page 140: ...split rocker type switch labeled MASTER and is ON in the up position and OFF in the down position The right half of the switch labeled BAT controls all electrical power to the airplane The left half l...

Page 141: ...DICATORS TO FLASHING BEACON TO PITOT HEAT TO STROBE LIGHTS TO CIGAR LIGHTER WITH FUSE TO LANDING AND TAXI LIGHTS TO IGNITION SWITCH TO WING FLAP SYSTEM TO INSTRUMENT RADIO AND COMPASS LIGHTS TO OIL TE...

Page 142: ...ircuits in the airplane are protected by push to reset circuit breakers mounted under the engine controls on the in strument panel Exceptions to this are the battery contactor closing ex ternal power...

Page 143: ...en flying through clouds or overcast the flashing light reflected from water droplets or particles in the atmosphere particularly at night can produce vertigo and loss of orientation The two high inte...

Page 144: ...eset it CABIN HEATING VENTILATING AND DEFROSTING SYSTEM The temperature and volume of airflow into the cabin can be regulated to any degree desired by manipulation of the push pull CABIN HT and CABIN...

Page 145: ...R DOOR CABIN HEAT CONTROL DEFROSTER _ c CABIN AIR CONTROL OUTLET ADJUSTABLE VENTILATOR CODE Q RAM AIR FLOW i 7 VENTILATING AIR HEATED AIR BLENDED AIR MECHANICAL CONNECTION _ __ ADJUSTABLE VENTILATOR F...

Page 146: ...ssure altitude should not be confused with indicated altitude To obtain pressure altitude momentarily set the barometric scale on the altimeter to 29 92 and read pressure altitude on the altimeter Be...

Page 147: ...UDE INDICATOR t DIRECTIONAL INDICATOR SECTION 7 AIRPLANE SYSTEMS DESCRIPTIONS OVERBOARD VENT LINE ll VACUUM PUMP VACUUM RELIEF VALVE 0 0 0 0 0 0 0 0 0 0 0 0 0 0 0 0 0 0 0 0 0 0 0 0 0 VACUUM SYSTEM AIR...

Page 148: ...cator will precess slightly over a period of time Therefore the compass card should be set in accordance with the magnetic compass just prior to takeoff and occasionally re adjusted on extended flight...

Page 149: ...checked during the preflight inspection by placing a clean handkerchief over the vent opening and applying suction A sound from the warning horn will confirm that the system is operative AVIONICS SUPP...

Page 150: ...f the re ceiver in use is fed to the headphones or through the audio amplifier to the speaker Place the switch for the desired receiving system either in the up position for speaker operation or in th...

Page 151: ...essna Customer Care Program Pilot Conducted Preventive Maintenance Alterations or Repairs Ground_ Handling Towing Parking Tie Down Jacking Leveling Flyable Storage Servicing Engine Oil Fuel Landing Ge...

Page 152: ...F o r T r a i n i n g P u r p o s e s O n l y...

Page 153: ...ocated on the cabin floor below the left rear cor ner of the pilot s seat The plate is accessible by sliding the seat for ward and lifting the carpet in this area Located adjacent to the Identifi cati...

Page 154: ...any of which he keeps on hand He will be happy to place an order for any item which is not in stock AIRPLANE FILE There are miscellaneous data information and licenses that are a part of the airplane...

Page 155: ...hours of operation The FAA may require other inspections by the issuance of airworthi ness directives applicable to the airplane engine propeller and compo nents It is the responsibility of the owner...

Page 156: ...uired FAA inspections and most of the manufacturer recommended inspections CESSNA CUSTOMER CARE PROGRAM Specific benefits and provisions of the CESSNA WARRANTY plus other important benefits for you ar...

Page 157: ...essential that the FAA be contacted prior to any alterations on the airplane to ensure that airworthiness of theairplane is not violated Alterations or repairs to the airplane must be accomplished by...

Page 158: ...n wing jack points are used in the jacking operation refer to the Service Manual for specific procedures and equipment required Individual main gear may be jacked by using the jack pad which is incorp...

Page 159: ...venth day during these periods the propeller should be rotated by hand through five revolu tions _This action limbers the oil and prevents any accumulation of cor rosion on engine cylinder walls IWARN...

Page 160: ...Avia tion Agency may require additional service inspections or tests For these regulatory requirements owners should check with local aviation officials where the airplane is being operated For quick...

Page 161: ...g the oil filter element is changed at 50 hour intervals Change engine oil at least every 6 months even though less than the recommended hours have accumulated Reduce intervals for pro longed operatio...

Page 162: ...ll finish the clean ing job A thin even coat of wax polished out by hand with clean soft flannel cloths will fill in minor scratches and help prevent further scratching Do not use a canvas cover on th...

Page 163: ...lades for nicks and wiping them occasionally with an oily cloth to clean off grass and bug stains will as sure long trouble free service Small nicks on the propeller particu larly near the tips and on...

Page 164: ...ed Never satu rate the fabric with a volatile solvent it may damage the padding and back ing materials Soiled upholstery and carpet may be cleaned with foam type detergent used according to the manufa...

Page 165: ...ansponder Type RT 359A and Optional Encoding Altimeter Type EA 401A Cessna 300 Transponder Type RT 359A and Optional Altitude Encoder Blind Cessna 400 Transponder Type RT 459A and Optional Encoding Al...

Page 166: ...in the airplane Each sup plement contains a brief description and when applicable operating lim itations emergency and normal procedures and performance Other routinely installed items of optional eq...

Page 167: ...itored by the military Following a crash landing the ELT will provide line of sight transmission up to 100 miles at 10 000 feet The duration of ELT transmissions is affected by ambient temperature At...

Page 168: ...ch receives 5g or more impact 3 ANTENNA RECEPTACLE Connection to antenna mounted on top of the tailcone Figure 1 ELT Control Panel SECTION 3 EMERGENCY PROCEDURES Immediately after a forced landing whe...

Page 169: ...NORMAL PROCEDURES As long as the function selector switch remains in the ARM position the ELT automatically activates following an impact of 5g or more over a short period of time Following a lightni...

Page 170: ...F o r T r a i n i n g P u r p o s e s O n l y...

Page 171: ...eceiver does not include the necessary circuits to interpret the signals for localizer indications However the audio portion of the localizer is audible so that flight information such as that broadca...

Page 172: ...ctivate communication receiver audio Clockwise rotation increases background noise decreases squelch action counterclockwise rotation decreases background noise 4 COMMUNICATION RECEIVER TRANSMITTER ME...

Page 173: ...AL MEGAHERTZ SELECTOR Selects navigation receiver frequency in 0 05 MHz steps between 0 00 and 0 95 MHz 10 COURSE DEVIATION POINTER Indicates deviation from selected omni bearing 11 OFF TO FROM OMNI I...

Page 174: ...counterclockwise to decrease background noise as required 6 Mike Button a To Transmit DEPRESS and SPEAK into microphone b To Receive RELEASE NAVIGATION RECEIVER OPERATION 1 COM OFF VOL Control TURN ON...

Page 175: ...ide slope receiver or both may be interconnected with the Cessna 300 Nav Com set for automatic selec tion of the associated DME or GS frequency When a VOR frequency is selected on the Nav Com the asso...

Page 176: ...NICATION RECEIVER TRANSMITTER MEGAHERTZ SELECTOR Selects communication receiver transmitter frequency in 1 MHz steps be tween 118 and 135 MHz 5 OFF ON VOLUME CONTROL Turns set on and controls volume o...

Page 177: ...station selected in ID position sta tion identifier is audible in center unmarked position identifier is off in T momentary on position tests VOR navigation circuits 12 COURSE DEVIATION POINTER Indic...

Page 178: ...c equipment is installed SECTION 4 NORMAL PROCEDURES COMMUNICATIONS TRANSCEIVER OPERATION 1 OFF VOL Control TURN ON and adjust to desired listening level 2 XMTR SEL Switch SET to desired transceiver 3...

Page 179: ...ing on bearing of signal OFF TO FROM indicator shows TO or FROM 4 ID T Switch PRESS to T and HOLD at T Cm pointer should center and OFF TO FROM indicator should show FROM 5 OBS Knob TURN to displace c...

Page 180: ...F o r T r a i n i n g P u r p o s e s O n l y...

Page 181: ...sna 300 ADF can be used for position plotting and homing procedures and for aural reception of amplitude modulated AM signals With the function selector knob at ADF the Cessna 300 ADF provides a visua...

Page 182: ...osition applies primary power to receiver further clockwise rotation increases audio level 2 FREQUENCY SELECTORS Knob A selects 100 kHz incre ments of receiver frequency knob B selects 10 kHz incre me...

Page 183: ...uring ADF operation to test bearing reliability When held in TEST position slews indicator pointer clockwise when released if bearing is reliable pointer returns to original bearing position 4 INDEX R...

Page 184: ...L Control ADJUST to desired listening level TO OPERATE AS AN AUTOMATIC DIRECTION FINDER 1 OFF VOL Control ON 2 Frequency Selector Knobs SELECT operating frequency 3 ADF SPEAKER PHONE Switch SELECT spe...

Page 185: ...trol ADJUST to desired listening level NOTE A 1000 Hz tone is heard in the audio output when a CW signal Morse Code is tuned in properly SECTION 5 PERFORMANCE There is no change to the airplane perfor...

Page 186: ...F o r T r a i n i n g P u r p o s e s O n l y...

Page 187: ...30 MHz and transmits coded pulse train reply signals on 1090 MHz It is capable of replying to Mode A aircraft identification and Mode C altitude reporting interrogations on a selective reply basis on...

Page 188: ...es ALT Turns set on and enables transponder to transmit either Mode A aircraft identification reply pulses or Mode C altitude reporting pulses se lected automatically by the interrogating signal 2 REP...

Page 189: ...foot increments between 1000 feet and 35 000 feet When altitude is below 10 000 feet a diagonally striped flag appears in the 10 000 foot window 9 OFF INDICATOR WARNING FLAG Flag appears across alti...

Page 190: ...NAL REPRESENTING LOSS OF ALL COMMUNICATIONS WHEN IN A CONTROLLED ENVIRONMENT 1 Function Switch ON 2 Reply Code Selector Knobs SELECT 7700 operating code for 1 minute then SELECT 7600 operating code fo...

Page 191: ...altimeter 2 Altitude Encoder Altimeter Setting Knob SET IN assigned local altimeter setting 3 Reply Code Selector Knobs SELECT assigned code 4 Function Switch ALT NOTE When directed by ground control...

Page 192: ...DIM control setting 4 TST Button Release for normal operation SECTION 5 PERFORMANCE There is no change to the airplane performance when this avionic equipment is installed However the installation of...

Page 193: ...Mode A aircraft identification and also Mode C altitude reporting when coupled to an op tional altitude encoder system The transponder is capable of replying on both modes of interrogation on a selec...

Page 194: ...reply pulses ALT Turns set on and enables transponder to transmit either Mode A aircraft identification reply pulses or Mode C altitude reporting pulses selected auto matically by the interrogating si...

Page 195: ...lliance of reply lamp 5 SELF TEST TST SWITCH When depressed causes trans ponder to generate a self interrogating signal to provide a check of transponder operation Reply lamp will glow steadily to ver...

Page 196: ...n of aircraft on ground controller s display TO TRANSMIT A SIGNAL REPRESENTING LOSS OF ALL COMMUNICATIONS WHEN IN A CONTROLLED ENVIRONMENT 1 Function Switch ON 2 Reply Code Selector Knobs SELECT 7700...

Page 197: ...When directed by grrund controller to stop altitude squawk turn Function Switch to ON for Mode A operation only NOTE Pressure altitude is transmitted by the transponder for altitude squawk and convers...

Page 198: ...PERFORMANCE There is no change to the airplane performance when this avionic equipment is installed However the installation of an externally mounted antenna or several related external antennas will...

Page 199: ...030 MHz and transmits coded pulse train reply signals on 1090 MHz It is capable of replying to Mode A aircraft identification and Mode C altitude reporting interrogations on a selective reply basis on...

Page 200: ...0 TRANSPONDER AND ENCODING ALTIMETER PILOT S OPERATING HANDBOOK SUPPLEMENT Figure 1 Cessna 400 Transponder and Encoding Altimeter Operating Controls Sheet 1 of 2 2 F o r T r a i n i n g P u r p o s e...

Page 201: ...ate a self interrogating signal to provide a check of transponder operation Reply Lamp will glow steadily to verify self test operation 6 REPLY CODE SELECTOR SWITCHES 4 Select assigned Mode A Reply Co...

Page 202: ...AL REPRESENTING LOSS OF ALL COMMUNICATIONS WHEN IN A CONTROLLED ENVffiONMENT 1 Function Switch ON 2 Reply Code Selector Switches SELECT 7700 operating code for 1 minute then SELECT 7600 operating code...

Page 203: ...ew on encoding altimeter 2 Altitude Encoder Altimeter Setting Knob SET IN assigned local altimeter setting 3 Reply Code Selector Switches SELECT assigned code 4 Function Switch ALT NOTE When directed...

Page 204: ...regardless of DIM control setting 4 TST Button Release for normal operation SECTION 5 PERFORMANCE There is no change to the airplane performance when this avionic equipment is installed However the i...

Page 205: ...identification and also to Mode C altitude reporting when coupled to an optional altitude encoder system The transponder is capable of re plying on both modes of interrogation on a selective reply ba...

Page 206: ...reply pulses ALT Turns set on and enables transponder to transmit either Mode A aircraft identification reply pulses or Mode C altitude reporting pulses selected auto matically by the interrogating si...

Page 207: ...iance of reply lamp 5 SELF TEST TST SWITCH When depressed causes transponder to generate a self interrogating signal to provide a check of trans ponder operation Reply lamp will glow steadily to verif...

Page 208: ...of aircraft on ground controller s display TO TRANSMIT A SIGNAL REPRESENTING LOSS OF ALL COMMUNICATIONS WHEN IN A CONTROLLED ENVIRONMENT 1 Function Switch ON 2 Reply Code Selector Switches SELECT 770...

Page 209: ...NOTE When directed by ground controller to stop altitude squawk turn Function Switch to ON for Mode A operation only NOTE Pressure altitude is transmitted by the transponder for altitude squawk and co...

Page 210: ...RFORMANCE There is no change to the airplane performance when this avionic equipment is installed However the installation of an externally mount ed antenna or several related external antennas will r...

Page 211: ...ies models a single three position switch is provided for HI LO sensitivity selection or test selection This system provides visual and aural indications of 75 MHz LS marker beacon signals as the mark...

Page 212: ...172 177 177RG 180 185 MODEL SERIES TYPICAL INSTALLATION ON ALL 337 MODEL SERIES PILOT S OPERATING HANDBOOK SUPPLEMENT TYPICAL INSTALLATION ON ALL 182 206 207 210 MODEL SERIES Figure 1 Cessna 400 Marke...

Page 213: ...ches In the HI position Down receiver sensitivity is positioned for airway flying 5 SPEAKER PHONE SWITCH Selects speaker or phone for aural reception 6 MARKER BEACON INDICATOJ1 LIGHTS Indicates passag...

Page 214: ...el 2 LO HI SENS Switch SELECT HI position for airway flying or LO position for ILS approaches 3 SPKR PHONE Switch SELECT speaker or phone audio 4 TEST Switch PRESS and ensure that marker beacon indica...

Page 215: ...through 335 0 MHz When a localizer frequency is selected on the NAV receiver the associated glide slope frequency is selected automati cally Operation of the Cessna 400 Glide Slope system is controlle...

Page 216: ...glide slope signal is being received CAUTIONi Spurious glide slope signals may exist in the area of the localizer back course approach which can cause the glide slope OFF flag to disappear and presen...

Page 217: ...T desired localizer frequency glide slope frequency is automatically selected 2 NAV COM ID T Switch SELECT ID position to disconnect filter from audio circuit 3 NAV VOL Control ADJUST to desired liste...

Page 218: ...F o r T r a i n i n g P u r p o s e s O n l y...

Page 219: ...F o r T r a i n i n g P u r p o s e s O n l y...

Page 220: ...F o r T r a i n i n g P u r p o s e s O n l y...

Reviews: