background image

AquaEfficiency 

Quick installation manual


1  General information 

This is a short guide to quickly get started with your AquaEfficiency. 

For more information please see the complete manual at 

https://www.cetetherm.com/en/products/tap-water-

systems/aquaefficiency.


1.1  Information about the document 

All pictures in this document are general images. 

AquaEfficiency is available in different models and levels of equipment. 


2  Electrical installation 

Power supply the control box with 230VAC 50 Hz.  


AquaEfficiency must be protected with an earth-fault breaker. 


The control box must be wired to ground.  
Check that Neutral and Phase are connected to the correct terminal. 

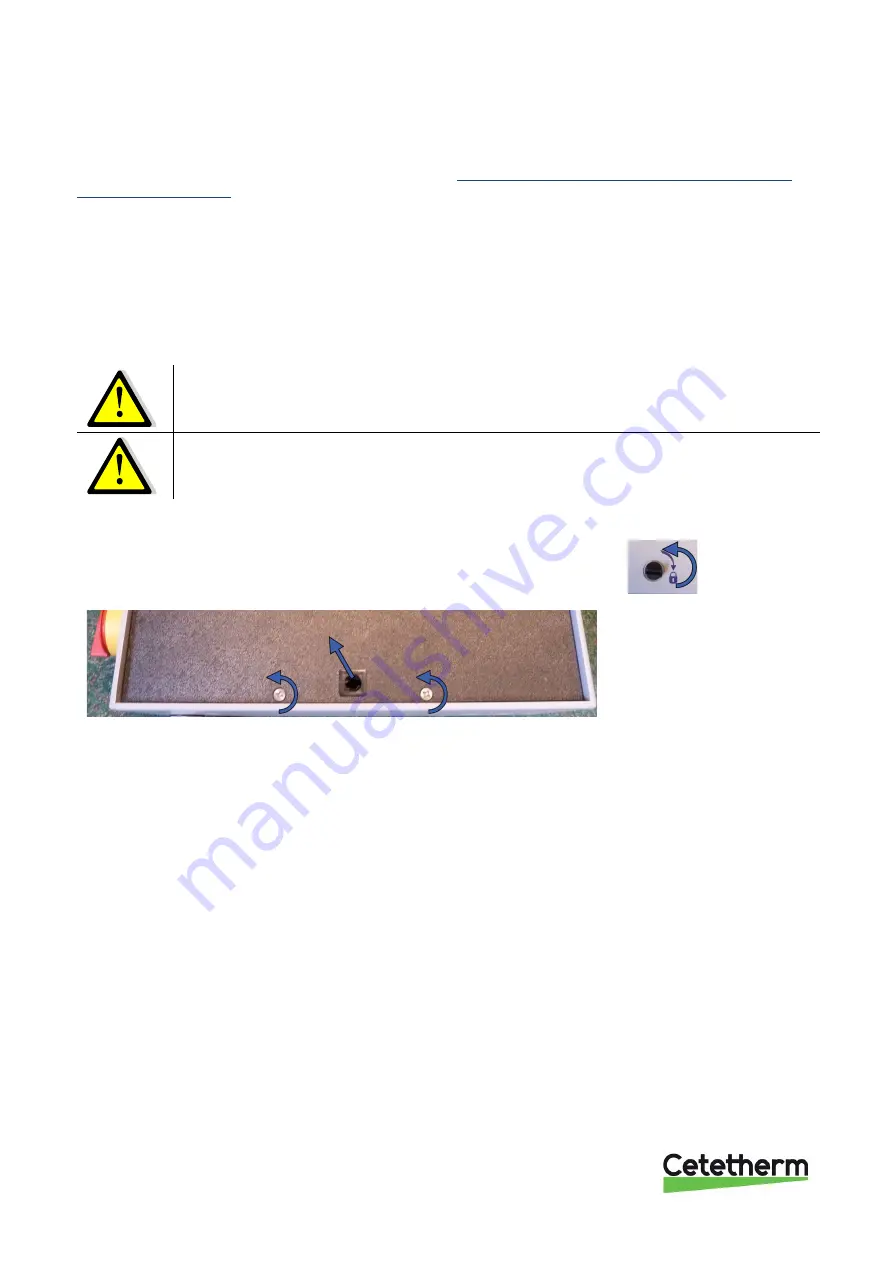
2.1  Open the control box 

Remove the front panel by turning the lock button counter clockwise and lift the 

cover. 


Unscrew the two screws in bottom and lift the panel. 


Summary of Contents for AquaEfficiency

Page 1: ...manual AquaEfficiency Quick installation guide Domestic hot water system Content 1 General information 2 1 1 Information about the document 2 2 Electrical installation 2 2 1 Open the control box 2 2...

Page 2: ...this document are general images AquaEfficiency is available in different models and levels of equipment 2 Electrical installation Power supply the control box with 230VAC 50 Hz AquaEfficiency must be...

Page 3: ...agram 1 ModBus terminal 2 ModBus terminal 3 I O terminal 2 2 1 Power terminal 230V output to pumps and valves 1 2 3 4 5 6 7 8 9 10 11 12 13 14 15 16 17 18 19 20 21 N Ph N Ph N Ph N Ph N Ph N Ph N DO9...

Page 4: ...nge a highlighted value simply press the wheel Works like an Enter key Press to exit a level and return to the previous menu parameter Works like an ESC key Press to access the maintenance monitoring...

Page 5: ...iable the year 3 When the year flashes increase or reduce the set value by rotating the wheel Once the right value is displayed press the wheel to confirm the setting Next parameter to change starts t...

Page 6: ...f the heat exchanger The DHW set point SP_T_Sec_Outlet is set to 55 C by default at any time all the days of the week Add extra temperature set points at different times of the day These changes will...

Page 7: ...ters can be reloaded 4 1 Spara inst llningar och parametrar 1 Press the key to open the Service menu select Login Installer press the wheel Enter the password 3333 press the wheel to confirm 2 Select...

Page 8: ...Select Show application press the wheel to see a list of all saved configurations saved with date and time 5 Factory reset 1 Press both and for 5 seconds 2 Rotate the wheel and select in the list the...

Reviews: