Chapter IV Operation Guidance
39
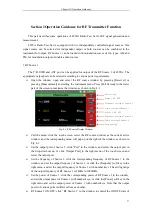
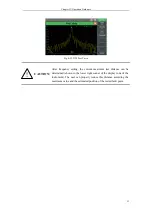
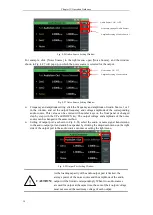
Cursor setting: click the [Cursor] soft key in the right menu to enter the menu of next
level. Here, at most four cursors can be opened by means of [ON OFF] control; the
normal or differential mode of the cursor can be controlled with the [Mode] soft key, in
which the difference between different signals can be displayed intuitively; and the
cursor can be positioned by sliding on the screen with the [Position] function. In
addition, the cursor can be directly set as the “Peak”, “Left Peak”, “Right Peak”,
“Maximum” and “Minimum”. After cursor setting, the center frequency can be changed
by “→Center Frequency” to facilitate observation of signal characteristics.
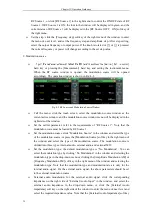
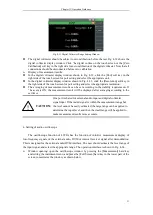
Advanced setting: click [Advanced] in the right menu to enter the menu of next level,
and set the bandwidth, SPAN/RBW and average. The averaging of measurement results
can be set according to the stability requirements. When “Average” is ON, the
measurement result will be displayed after averaging according to the set times.
Section 3 Operation Guidance for Cable Test Function
This part describes some operations for online cable testing with 4992A Radio Test Set.
1. Standing wave ratio/return loss
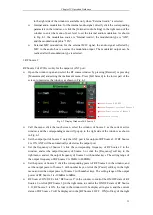
The return loss or standing wave ratio (hereinafter referred to SWR) is a kind of expression
of reflection characteristics. The return loss or SWR test can be done to single-port or double-port
devices in engineering applications, as shown in (1) and (2) in Fig. 4-12 respectively.
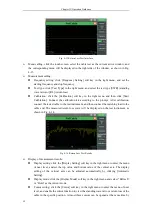
Window opening: open the cable test window by pressing the [Cable] hard key or pressing
the [Measurement] hard key and setting the instrument menu. Press the [Full Screen] hard
key in the lower part of the screen to maximize the window, as shown in Fig. 4-13.
Fig. 4-12 Connection for Return Loss/SWRMeasurement
Antenna and feeder system
Tested device
Load
(1)
(2)
Summary of Contents for 4992A
Page 1: ...I 4992A Radio Test Set User Manual China Electronics Technology Instruments Co Ltd...
Page 2: ......
Page 5: ......
Page 6: ......
Page 7: ......
Page 23: ...Article I Handling Instructions 11 Article I Handling Instructions...
Page 93: ...81 Article II Technical Specifications...
Page 132: ...Article III Maintenance Instructions 120 Article III Maintenance Instructions...


