background image

13 


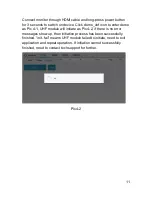
Pic.5-2 


Summary of Contents for URA8

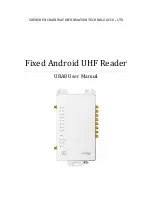
Page 1: ...SHENZHEN CHAINWAY INFORMATION TECHNOLOGY CO LTD Fixed Android UHF Reader URA8 User Manual...

Page 2: ...1...

Page 3: ...gned sublicensed or otherwise transferred by the user without prior written consent of Chainway No right to copy a licensed program in whole or in part is granted except as permitted under copyright l...

Page 4: ...F tag scanning 12 3 1 Auto Scanning 12 3 2 Single Scanning 14 3 3 Read UHF Tag 15 3 4 Write Tag 17 3 5 Lock Tag 18 3 6 Kill Tag 20 3 7 UHF Module Version 21 3 8 Module Temperature 22 Chapter 4 Config...

Page 5: ...4...

Page 6: ...xcellent anti electromagnetic interference capability and heat dissipation performance it meets the requirements for installation and application of various indoor and outdoor environments and can be...

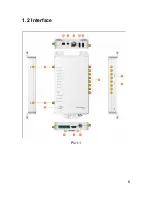
Page 7: ...6 1 2 Interface Pic 1 1...

Page 8: ...ouse and others touch screen function supported Dial 555666 to enter engineer mode 6 USB port used to connect mouse and others touch screen function supported 7 RJ45 EtherCAT port POE power supply sup...

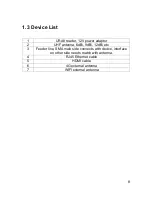
Page 9: ...12V power adaptor 2 UHF antenna 6dBi 9dBi 12dBi etc 3 Feeder line SMA male side connects with device interface on other side needs match with antenna 4 RJ45 Ethernet cable 5 HDMI cable 6 4G external...

Page 10: ...tem it can be connected with Internet through RJ45 WIFI and 4G etc And connect with monitor through HDMI cable Developer could use USB cable to connect device with PC for developing application device...

Page 11: ...10 Chapter 2 UHF demo 2 1 Operating Interface Pic 4 1...

Page 12: ...demo as Pic 4 1 UHF module will initiate as Pic 4 2 if there is no error messages show up then initiation process has been successfully finished init fail means UHF module failed to initiate need to e...

Page 13: ...o start tags scanning circularly the information such as EPC or TID Count RSSI and Ant number As Pic 5 1 filter button can be used to setup tag which has been filtered user could setup address data le...

Page 14: ...13 Pic 5 2...

Page 15: ...14 3 2 Single Scanning Select Single button and click Start to start scanning tag EPC or TID Count RSSI and Ant number will display on right side as Pic 5 3 Pic 5 3...

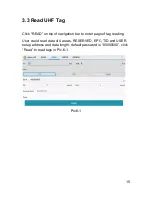
Page 16: ...ick READ on top of navigation bar to enter page of tag reading User could read data of 4 areas RESERVED EPC TID and USER setup address and data length default password is 00000000 click Read to read t...

Page 17: ...16 Comment user could filter tags by setup address data length and data in EPC TID and USER areas select Enable button to switch on filter function in Pic 6 2 Pic 6 2...

Page 18: ...in RESERVED EPC TID and USER areas setup start address and data length input access password and data hex click Write Data to write data in Pic 7 1 Comment user could filter tags by setup address dat...

Page 19: ...window for selecting different methods of locking click OK to generate lock code automatically then click Lock to lock tags in Pic 8 1 and Pic 8 2 Comment user could filter tags by setup address data...

Page 20: ...19 Pic 8 2...

Page 21: ...gation bar to enter operating page Input access password DONOT input default password click Kill button to destroy tags in Pic 9 1 Comment user could filter tag by setup address data length and data f...

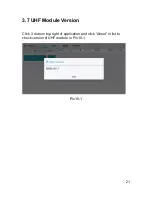
Page 22: ...21 3 7 UHF Module Version Click 3 dots on top right of application and click About in list to check version of UHF module in Pic 10 1 Pic 10 1...

Page 23: ...22 3 8 Module Temperature Click 3 dots on top right of application click Module temperature in list to check UHF module temperature in Pic 11 1 Pic 11 1...

Page 24: ...of navigation bar to enter setup page 4 1 Working mode User could setup different frequency band for different countries as Pic 12 1 click Set Frequency to confirm frequency band Click Get Frequency t...

Page 25: ...24 4 2 Output Power User could select different output power from 5 to 30dBm in Pic 12 2 click Set Power to confirm setup Click Get Power to get current output power Pic 12 2...

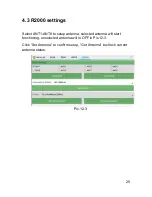
Page 26: ...settings Select ANT1 ANT8 to setup antenna selected antenna will start functioning unselected antenna will in OFF in Pic 12 3 Click Set Antenna to confirm setup Get Antenna to check current antenna st...

Page 27: ...26 4 4 Protocol There are two protocols can be selected in Pic 12 4 click Set Protocol to confirm Pic 12 4...

Page 28: ...27 4 5 RF link There are four parameters can be selected in this parameter as Pic 12 5 Click Set link parameter to confirm click Get link parameters to check current RF link parameters Pic 12 5...

Page 29: ...28 4 6 QT Tag Select Set QTPara to switch ON and OFF hidden areas of QT tag click Get QTPara to check current status Pic 12 6...

Page 30: ...29 4 7 Open tagFocus Select ON OFF of tagFocus in Pic 12 6 4 8 Open FastID Select ON OFF of Open the EPC and TID in Pic 12 6 4 9 Open EPC and TID Select ON OFF of Open the EPC and TID in Pic 12 6...

Reviews: