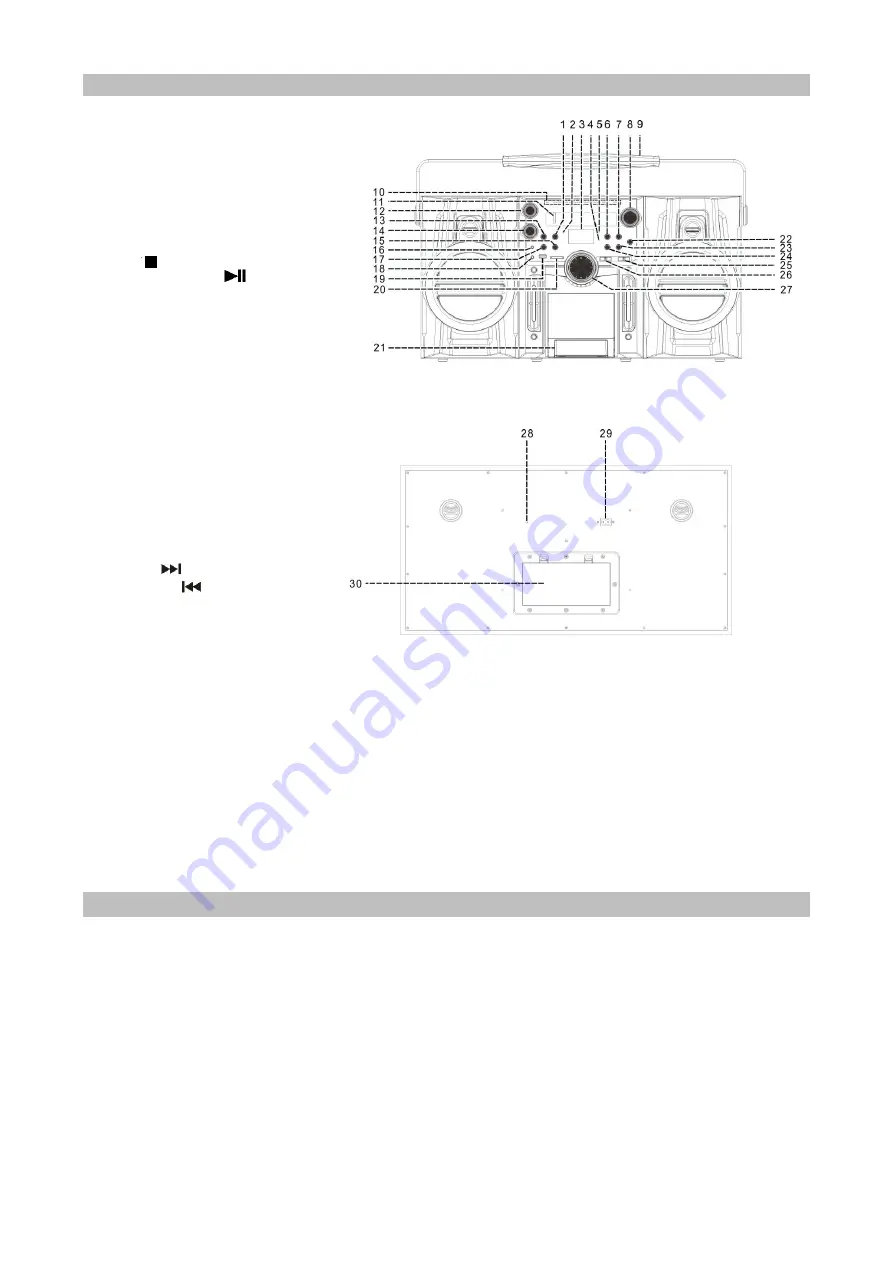
LOCATION OF CONTRALS
31)
Repeat button
32)
Power LED indicator
33)
LCD display
34)
Bluetooth indicator
35)
FM stereo LED indicator
36)
Stop button
37)
Play/pause/stop button
38)
Tuning knob
39)
Handle
40)
Level meter
41)
Dial scale
42)
Treble knob
43)
Random button
44)
Bass knob
45)
+10 button
46)
3.5 mm headphone jack
47)
-10 button
48)
Aux in jack
49)
USB socket
50)
SD/MMC card slot
51)
Mobile holder
52)
Source button
53)
Skip up
button
54)
Skip down
button
55)
Off/functions selector
56)
Band switch
57)
Volume button
58)
FM wire antenna
59)
AC socket
60)
Battery compartment
Caution:
Usage of controls or adjustments or performance of procedures other than those specified herein may result
in hazardous radiation exposure.
This unit should not be adjusted or repaired by anyone except qualified service personnel.
Precautions for use
Installation
Unpack all parts and remove protective material.
Do not connect the unit to the mains before checking the mains voltage and before all other connections
have been made.
Do not cover any vents and make sure that there is a space of several centimeters around the unit for
ventilation.
AC Connection
1.
Connect the one end of the detachable power cord to the ac socket (29) and the other end to the ac
outlet.
2.
When you first plug the unit into the mains, the unit will go into standby mode.


