6. 5
Privacy zone masking
1.
2.
【
PRIVACY
】
●
【
PRIVACY NUMBER
】
●
【
EDIT PRIVACY
】
●
【
ENABLE PRIVACY
】
●
【
CLEAR PRIVACY
】
3.
【
PRIVACY
】
【
】
.
【
】
【
】
【
】
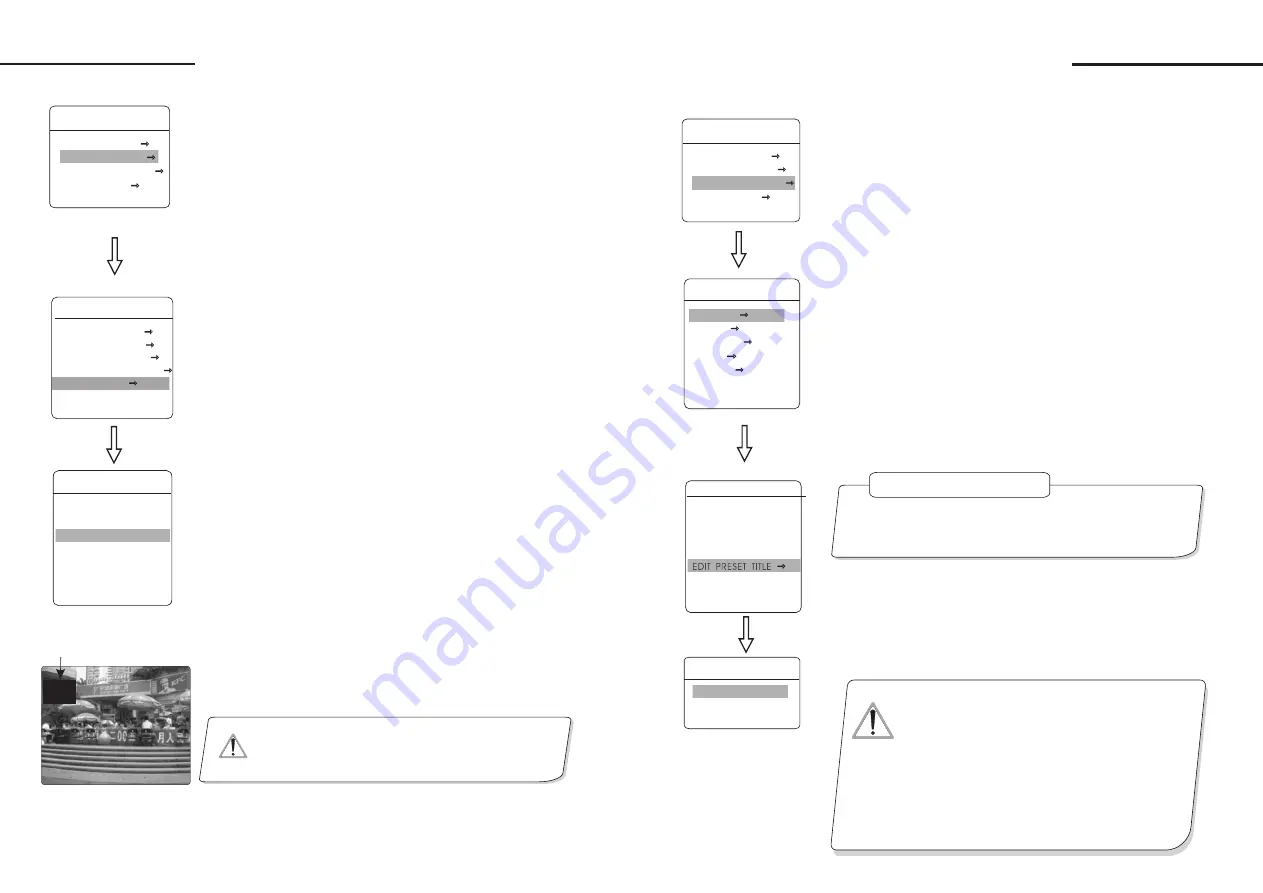
The system enters into the main menu by calling 95 preset or by
calling 9 preset twice within 3 seconds.
Operate joystick to
MASK
.
choose window number as current
privacy window, other choices in the menu just aim at current privacy
window
program current window
permit/prohibit current privacy
window, there are two choices: ON---permit current privacy window/
OFF---prohibit current privacy window
clear current privacy window, after
clearing it, the window will auto- change as OFF.
Program current privacy window: Firstly choose window number,
then do the following operations:
a. Operate joystick, move the cursor to
EDIT
, press
OPEN
to move the image that need privacy window to display
in the screen.
b Press
OPEN
, there will be a square displaying in the centre of
the screen, operate joystick, and move the square to the central place
that need to conceal.
c. Press
OPEN
, operate joystick to adjust the size of privacy zone:
joystick to up, the height is increased; joystick to down, the height
is reduced; joystick to right, the width is increased; joystick to left,
the width is reduced.
d. Press
OPEN
to save the current privacy zone setting, and the
window will auto-change as ON at the same time.
PRIVACY MASK
PRIVACY
EDIT
PRIVACY
ENABLE
PRIVACY
OFF
CLEAR
PRIVACY
BACK
EXIT
NUMBER 01
CAMERA SETTING
LENS PARAMETERS
AE MODE SETTING
AWB MODE SETTING
ADVANCE PARAMETERS
PRIVACY MASK
BACK
EXIT
Privacy function can show someone piece of regional shielding
while protecting. For example, protect the window of bedroom or
ATM of bank. Each dome can set up to 24 privacy windows.
(Masking setting function is relative with the model of camera
module. The masking numbers will be different according to the
different cameras.)
NOTICE
This function is decide by the parameter of built-in camera,
if the camera does not have this function, this option is invalid.
Privacy zone masking
305 45
305 45
01X
01X
032
032
PRESET 07
PRESET 07
25
MAIN MENU
SYSTEM SETTING
CAMERA SETTING
FUNCTION SETTING
DISPLAY SETUP
EXIT
Camera setting
7. 1
Preset
7. Function setting
1
Define
【
】
【
】
【
】
【
】
【
】
【
】
【
】
5
【
】
【
】
【
TITLE
】
【
】
【
】
. The system enters into the main menu by calling 95 preset or by
calling 9 preset twice within 3 seconds. Click each command to
enter "preset menu" according to the order of the left picture. As
follows:
preset and call preset function can be set by keyboard
operation, input preset number at first, then click the key "save /call
preset" to carry out.
2. Define current preset number: move the cursor to
PRESET NUM-
BER
, press
OPEN
to choose preset number, the range is 01-128
as the left picture shows, here chooses number 5 as current preset,
the following operations aim at the current preset.
3. Define current preset: move the cursor to
SET PRESET
,press
OPEN
, by operating joystick to adjust magnification, to choose
good objective image, press
OPEN
to save. If the image is very
near, the image is belong in digital zoom; when setting preset, the
image will jump to maximal optical zoom.
4.Display current preset: move the cursor to
SHOW PRESET
,
press
OPEN
, the screen will display the current preset.
.Clear current preset: move the cursor to
CLEAR PRESET
,
press
OPEN
, the current preset is cleared.
6.Edit current preset label: move the cursor to
EDIT PRESET
, press
OPEN
to enter into editing preset submenu,
system auto set title as PRESET-XX, press
OPEN
to revise title.
Preset function is that dome stores current pan/tilt angle, zoom
and other position parameters into the memory. When necessary dome
recalls these parameters and adjust camera to that position.
OPERATION KNACKS
1.When running to program, display, clear preset and edit label,
should choose preset number at first.
2. The label may set up to 16 characters, and doesn't need editing
characters. Press
OPEN
continuously to jump over and use
spacebar to replace the deleted characters. When you finish to
edit a character, press
OPEN
to enter into the next editing
character; when you finish to edit the last character, pressing
OPEN
to save. Press
CLOSE
to exit. Character of label
is suitable for choosing as follow: 0-9
、
A-Z
、
:<>-. , space.
3. As the submenu
STATE
in
AUTO TRACKING
is
set as OFF, it is valid to Call preset to set auto-tracking
ON/OFF. (Pls reference the Paragraph 6.7)
【
】
【
】
【
】
【
】
【
】
【
】
●
【
PRESET NUMBER
】
●
【
SET PRESET
】
●
【
SHOW PRESET
】
●
【
CLEAR CURRENT PRESET
】
●
【
EDIT PRESET TITLE
】
PRESET NUMBER 005
SET PRESET
SHOW PRESET
CLEAR CURRENT PRESET
EDIT PRESET TITLE
BACK
EXIT
PRESETS
EDIT PRESET TITLE
:
PRE005
BACK
EXIT
TITLE
FUNCTION SETTING
PRESETS
SCAN
PATTERNS
TOUR
ZONES
BACK
EXIT
NOTICE
26
Function setting
MAIN MENU
SYSTEM SETTING
CAMERA SETTING
FUNCTION SETTING
DISPLAY SETUP
EXIT
Summary of Contents for VKFCSD22IR Series
Page 1: ...Infrared Speed Dome Manual...


