background image

3

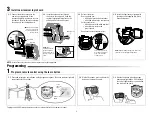
Program the travel

1

Without a properly installed safety reversal 
system, persons (particularly small 
children) could be SERIOUSLY INJURED or 
KILLED by a closing garage door.
•   Incorrect adjustment of garage door 

travel limits will interfere with proper 
operation of safety reversal system. 

•   After ANY adjustments are made, the 

safety reversal system MUST be tested. 
Door MUST reverse on contact with 
1-1/2" (3.8 cm) high object (or 2x4 laid 
fl at) on fl oor.

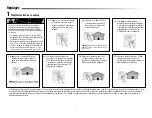
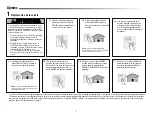
1.1

   Press and hold the Adjustment Button 

until the UP Button begins to fl ash and/
or a beep is heard.

1.2

   Press and hold the UP Button until the 

door is in the desired UP position. 

1.3

   Once the door is in the desired 

UP position press and release the 
Adjustment Button. The garage door 
opener lights will fl ash twice and the 
DOWN Button will begin to fl ash.

NOTE: 

The UP and DOWN Buttons can be used to 

move the door up and down as needed.

1.4

   Press and hold the DOWN Button 

until the door is in the desired DOWN 
position.

NOTE:

 The UP and DOWN Buttons can be used to 

move the door up and down as needed.

1.5

   Once the door is in the desired 

DOWN position press and release the 
Adjustment Button. The garage door 
opener lights will fl ash twice and the 
UP Button will begin to fl ash.

1.6

   Press and release the UP Button. 

When the door travels to the 
programmed UP position, the DOWN 
Button will begin to fl ash.

1.7

   Press and release the DOWN Button. 

The door will travel to the programmed 
DOWN position. Programming is 
complete.

*  If the garage door opener lights are fl ashing 5 times during the steps for Program the Travel, the programming has timed out. If the garage door opener lights are fl ashing 10 times during the steps for 

Program the Travel, the safety reversing sensors are misaligned or obstructed. When the sensors are aligned and unobstructed, cycle the door through a complete up and down cycle using the remote 
control or the UP and DOWN buttons. Programming is complete. If you are unable to operate the door up and down, repeat the steps for Programming the Travel.

Adjustment

Summary of Contents for 050ACTWFLK

Page 1: ...s ca gov To prevent damage to the receiver logic board DO NOT touch printed circuit board of replacement receiver logic board during installation ALWAYS wear protective gloves and eye protection when...

Page 2: ...installing the light lens ensure the antenna wires are hanging straight down To program the Wi Fi garage door opener to your network refer to your owner s manual 3 2 Insert the antenna wires through...

Page 3: ...Button until the door is in the desired DOWN position NOTE The UP and DOWN Buttons can be used to move the door up and down as needed 1 5 Once the door is in the desired DOWN position press and relea...

Page 4: ...or stops and does not reverse on the obstruction increase the down travel refer to Adjustment Step 1 Repeat the test When the door reverses upon contact with the 1 1 2 inch board remove the board and...

Page 5: ...n secteur AVANT TOUTE r paration ou maintenance ATTENTION AVERTISSEMENT AVERTISSEMENT AVERTISSEMENT Votre ouvre porte de garage a un portail interne localise sur la plaque de logique de r ception Apr...

Page 6: ...en l enclenchant en place Reconnectez l alimentation REMARQUE Lors de l installation de la lentille s assurer que les ls d antenne sont orient s vers le sol 3 2 Ins rez les ls d antenne travers les t...

Page 7: ...porte vers le haut et le bas au besoin REMARQUE On peut utiliser les boutons UP et DOWN pour d placer la porte vers le haut et le bas au besoin 1 4 Appuyer sur le bouton DOWN et le maintenir enfonc j...

Page 8: ...e n 1 R p ter l essai Lorsque la porte remonte au contact de la planche de 3 8 cm 1 1 2 po retirer la planche et ouvrir fermer la porte 3 ou 4 fois a n de v ri er le r glage Si l essai choue encore ap...

Page 9: ...tor NO toque la tarjeta de circuito impresa de la tarjeta l gica del receptor de reemplazo durante la instalaci n SIEMPRE uso los guantes protectores y protecci n ocular cuando cambiar la bater a o tr...

Page 10: ...4 Instale la lente de luz aline ndola con las bisagras y coloc ndola en su lugar Vuelva a conectar la energ a NOTA Al instalar la lente de luz aseg rese de que los cables de la antena cuelguen derecho...

Page 11: ...se encuentre en la posici n deseada 1 5 Una vez que la puerta est en la posici n deseada oprima y suelte el Bot n ajuste Las luces del abre puertas de garaje parpadear n dos veces y el bot n ARRIBA co...

Page 12: ...eba Cuando la puerta retroceda al entrar en contacto con la tabla de 3 8 cm 1 1 2 de pulg retire la tabla y abra cierre la puerta 3 4 veces para probar el ajuste Si la prueba sigue fallando llame a un...

Reviews: