3-en
MICRO SWITCHES
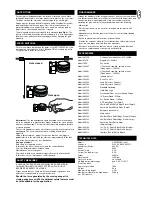
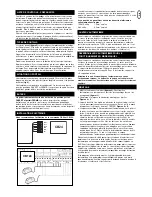
The micro switches installed on the inside of the ART300XXX (24V) are
not meant as limit switches, if the CB24 and CB124 controls are used.
They generate a pulse for the control.
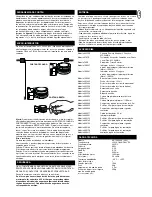
Adjustment:
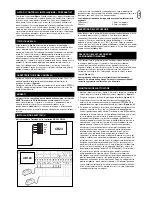
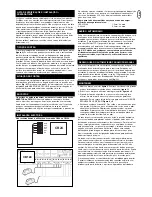
The two superposed cams activating the micro switches
are to be adjusted in a way that they trigger between the open position
and the closed position. The cams are not especially assigned for open
or closed position.
The correct adjustment can be checked very easily when the operator is
disengaged. The micro switches make a “clicking sound” when
triggered.
Using a flat screwdriver, adjust the cams so that one cam triggers
approximately in the first third, the other one approximately in the last
third of the gate movement. (see illustration)
Having a problem?
Both cams are triggered at once.
In this case the travel cannot be set and the control flashes.
Remedy: Enlarge distance between cams.
Operator does not accept travel.
Remedy: Are both micro switches triggered correctly as described?
In this case, check if motorcabel is interchanged.
SAFETY MEASURES
A WING GATE OPENER SHOULD ALWAYS BE OPERATED IN
CONJUNCTION WITH CONTACT STRIPS AND / OR LIGHT
BARRIERS AS SAFETY FEATURES.
Please ensure that you comply with the standards, regulations and
safety devices applicable to your particular case.
Should the force generated by the moving wing at its
closing edge exceed 400 N, additional safety features must
be fitted suitable for the application.
FINAL REMARKS
Arrange the handover of the wing gate opener with your customer Make
sure that persons will operate the gate are familiar with its functions and
can operate them without problems. Have your customer practice
operating the gate until he is fully acquainted with all the following:
• Main switch.
• Rules of operation (e.g. do not drive through while the gate is still
opening).
• Additional safety features (photoelectric barrier, contact strip, flashing
lights, etc.).
• Switch to manual operation in case of power failure.
• Provide the customer with a full set of instructions. Inform him to keep
them in a safe place and read them when possible.
• Reference a checklist, so that you have a record of which functions
have been explained and of any points not dealt with.
ACCESSORIES
Model 94335E
3-channel mini transmitter, 433.92MHz
Model 9747E
Keypad, 433.92MHz
Model 760E
Key switch
Model 100027
1-Function Keyswitch, surface mount
(Flush mount - 100010)
Model 100041
2-Function Keyswitch, surface mount
(Flush mount - 100034)
Model 100263
Infrared barrier
Model 203285
E-Lock 12 Volt
Model 203292
Loop Detector 1 Channel
Model 203308
Loop Detector 2 Channel
Model 203315
Standard Hardstop
Model 203322
Hard Stop High
Model 203339
Mechanical Floor Lock for Double Wings
Model 600008
IR Sensor Stand - 530mm
Model 600015
Key Switch Stand - 1100mm
Model 600046
2.5 Safety Edge Set (Small)
Model 600053
20m Bulk Pack Safety Edge Profile (Small)
Model 600060
Assembly Pack Safety Edge (Small)
Model 600077
Bulk pack (not shown)
Model 600091
Main switch
Model 600138
20m Bulk Pack Safety Edge Profile (Medium)
Model 600145
20m Bulk Pack Safety Edge Profile (Large)
Model 600152
Assembly Pack Safety Edge
(Medium/Large)
Model 600169
1m (3.2 ft.) Safety Edge Profile (Medium)
Model 600176
1m (3.2 ft.) Safety Edge Profile (Large)
Model 600213
Interface Box for Safety Edges
TECHNICAL DATA
Modell
ART300XXX (24V)
Voltage in
230V AC/24AC/24VDC
Voltage out (Motor)
24VDC
Power
60W
Current (max)
2,5A
Current (no load current)
0,3A
Torque
280Nm
Motor speed
1800rpm
Duty cycle (max)
50 cycles/h
Working temperature range
deg C -20°C/+55°C
Protection class
I
Degree of protection
IP44
Weight
9Kg
Max. gate wing lenght
2,5m
Max. gate weight at max. wing lenght
300Kg
incl. 20% reserve
GATE FITTING
For steel gates, fixings should be welded on or through bolted. When
through bolting the gate, use large washers or a plate on the other side.
The drive mechanism exerts an extremely high force on this joint.
Fixings must be through bolted for wooden gates. Wood deflects under
load and the bolt will become loose. Due to movement caused by
repeated loading, the wood deflects more and more until the gate no
longer closes correctly and has to be repaired.
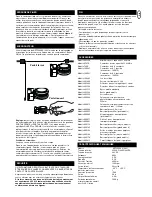
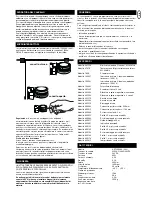
The arm should not be mounted while fully extended
(see Fig. 4).
The
drive is self-locking. Mount the drive provisionally (e.g. with finger-tight
thumb-screws), and check the mounting position by opening the gate
manually.
Closed position
Open position
Gate closed
Gate open
Summary of Contents for ART300 series
Page 23: ...ART 1 ART 2 ART 3 ART 6 ART 7 115 o 90 o 90 o 90 o 115 o 115 o 115 o 90 o 1 A B 2 3 A...
Page 25: ...6 7 8 9 A B 10 11 A B C D...
Page 26: ...ART 6 ART 7 41ABSC 5 41ASWG 454 41AART 63 ART 3AL 41AART 1022SA 41AART 1026SA 13 12...
Page 27: ......
Page 28: ...709446D 2010...
Page 234: ......
Page 235: ......

