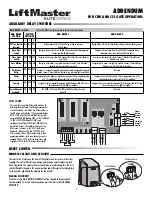
2
WIRING
TROUBLESHOOTING
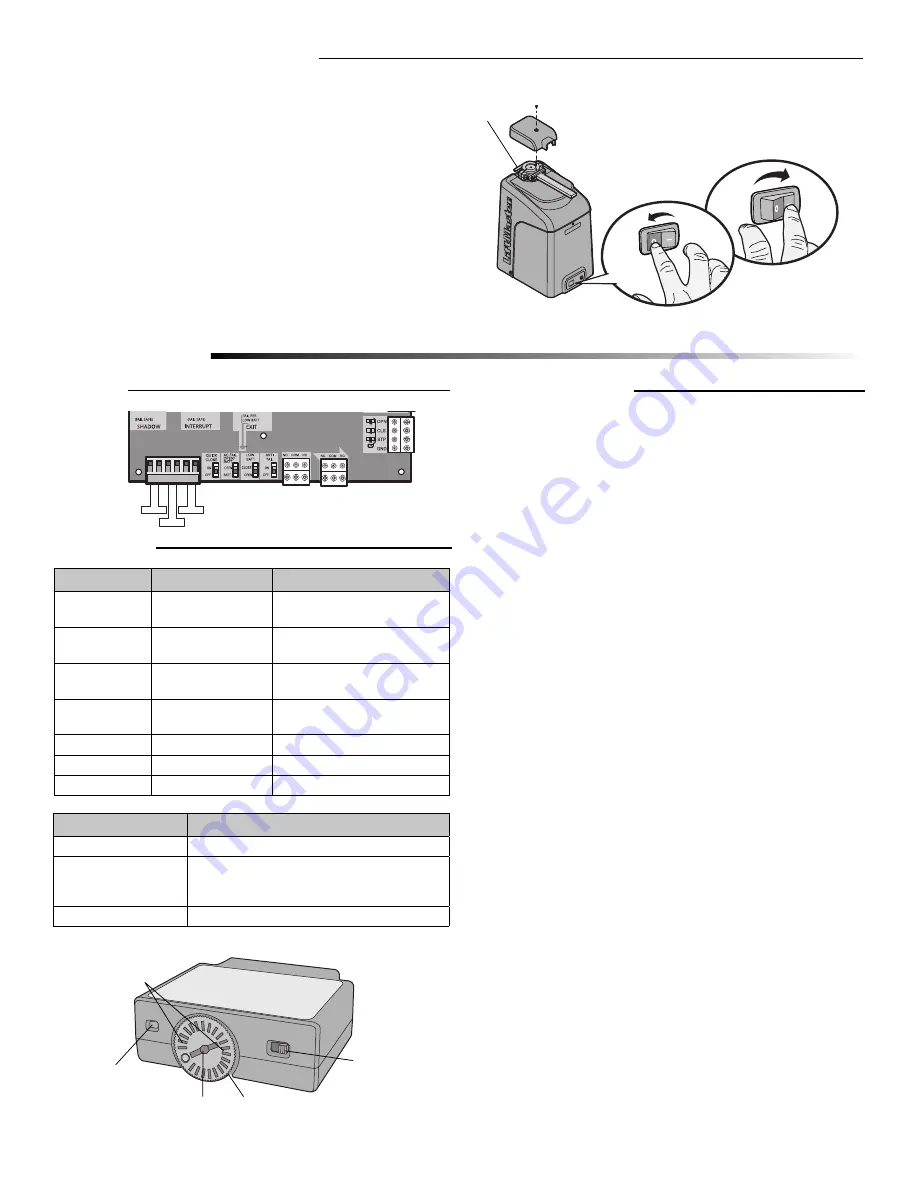
Blue LED
(located under dial)
Dial
Boost Switch
Frequency Button
OPERATION
White LEDs
(located under dial)
Exit Loop
Interrupt Loop
Shadow Loop
EXPANSION BOARD
LOOP DETECTOR
MANUAL DISCONNECT
Press the reset switch to RESET/DISCONNECT. Release the handle on the operator arm
to allow the gate to be opened and closed manually. On a dual gate application the
handle must be released on both operators. To resume normal function tighten the
handle by pushing it down.
RESET SWITCH
The reset switch is located on the front of the operator and serves several functions.
Toggling the reset switch will stop a moving gate during a normal open/close cycle,
like a stop button. The operator does not need to be reset after doing this. The reset
switch will disable the gate in the present position and will energize the solenoid lock
for two minutes and disable the maglock for two minutes.
Manual Disconnect
Handle
RESET/DISCONNECT
NORMAL OPERATION
MODELS CSW24V AND CSW24VH
1
Turn the dial to TEST. The loop detector will send a signal to the main board
simulating a vehicle over the loop.
Exit:
If the gate is closed, it will open or if the gate is already open it will
remain open.
Shadow:
Active ONLY when the gate is in the open position. If the gate is
open, it will remain open.
Interrupt:
If the gate is closing, it will open.
Turn the dial back to the desired sensitivity setting.
BLUE LED
WHITE LED
EXPLANATION
1 Blink (every 10
seconds)
OFF
Normal Operation
2 Blinks
Rapid Blinks (active fault)
or OFF
Open Loop (see TROUBLESHOOTING)
3 Blinks
Rapid Blinks (active fault)
or OFF
Shorted Loop (see TROUBLESHOOTING)
4 Blinks
Rapid Blinks (active fault)
Failed Authentication (see
TROUBLESHOOTING)
OFF
2 Blinks
Successful Reset
OFF
Slow Blinks
Loop detector is in TEST or PROG mode
Solid
Solid
Active Loop
DIAL SETTINGS
EXPLANATION
TEST Mode
Used to test the loop detector
1-8
Determines the sensitivity setting for the loop detector:
1 is the lowest sensitivity (large vehicle) setting and 8 is the
highest sensitivity (small vehicle). Default setting is 4.
PROG Mode
Used to change the frequency of the loop detector
2
Open or Shorted Loop (2 and 3 Blink errors):
Test the loop detector (refer to TEST THE LOOP DETECTOR section). If the loop
detector passes the test, this indicates the loop detector is working properly and there
is an issue with the loop wiring.
Failed Authentication (4 Blink error):
• Check the wire connecting the expansion board to the main board
or
• Unplug the loop detector then plug it back into the same slot (clears all faults and
keeps the current frequency settings, authenticates)
or
• Unplug the loop detector. Then unplug the J15 plug on the operator’s control
board and plug it back in after 2-3 seconds. This allows the loop detector to be
plugged into a different slot (clears all faults and keeps the current frequency
settings, authenticates).
To clear a fault:
• Press the reset button on the operator (clears all faults)
or
• Unplug the loop detector then plug it back into the same slot.
The loop is making false detections:
• There is crosstalk between the LOOPDETLM and the alternate loop detector
or
• Change the frequency or lower the sensitivity setting of the loop detector.
The loop will not activate when a vehicle passes over it:
• Turn the boost switch ON or increase the sensitivity of the loop detector
or
• If the blue and white LEDs are solid, indicating an Active Loop, and the operator
does not activate, there could be a fault. Once the loop is inactive, check the LED
codes for a fault (refer to LED table above).
TEST THE LOOP DETECTOR

