background image

12

Installation

Doc 01-G0665
Rev C

Installation

In order for the gate operator to function correctly it is important that the gate be level and swing
smoothly and freely.  If it does not, damage to the operator may result and the life expectancy will be
greatly reduced.

SW470 gate operators have provisions for both post and pad mounting.  However, because of the high
torque involved in most swing gate installations, pad mounting is the recommended method.

NOTE: 

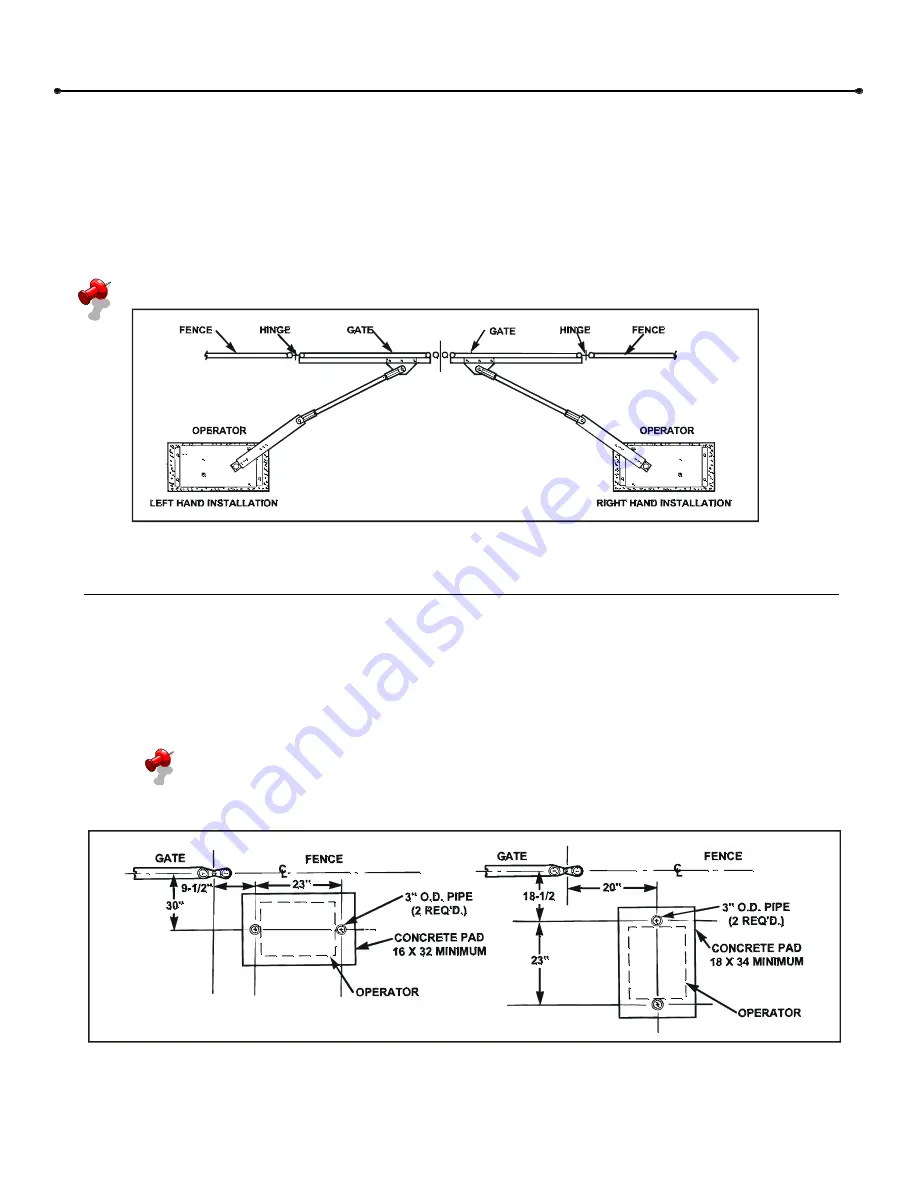
Instructions are for right hand operator installation.  Left hand is opposite.

0 1 -G 0 6 6 5 F1

Figure 4

Post Mount for SW470 Operator Only

Locate mounting post and electrical conduit locations.  The operator cabinet may be installed
either parallel or perpendicular to the fence.

Excavate required areas for conduit installation and mounting posts.

Set mounting post and electrical conduit in place.  Knockouts for 3” pipe clamps (not supplied)
are provided in the operator.

NOTE: 

Distance between mounting posts and the relative location to gate is very

important.

Pour cement to secure mounting posts and allow to set for two days before installing power
unit.

01-G0665F16

Figure 5

Summary of Contents for LiftMaster Professional SW470

Page 1: ...Doc 01 G0665 Rev C Installation and Maintenance Instructions Medium Heavy Duty Swing Gate Operators Models SW470 SW490...

Page 2: ...__ 12 Pad Mount Installation _______________________________________________________________ 13 Control Arm Assembly _______________________________________________________________ 14 Gate Bracket Ins...

Page 3: ...__________________________________________ 27 SW490 Parts List____________________________________________________________________ 28 Warranty Policy___________________________________________________...

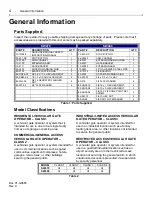
Page 4: ...AD BOLT 2 82 NH38 06 3 8 16 X 3 8 CONE POINT SET SCREW 4 84 RH 75 3 4 10 HEX NUT 2 85 LS 38 3 8 SPLIT LOCKWASHER 2 Table 1 Parts Supplied Model Classifications RESIDENTAL VEHICULAR GATE OPERATOR CLASS...

Page 5: ...eneral Information 5 Doc 01 G0665 Rev C Specifications Model HP Max Wt Lbs Max Gate Width SW470 50 500 12 FT SW490 33 1 3 600 12 FT SW490 50 750 16 FT SW490 75 900 19 FT SW490 100 1 1000 22 FT Table 3...

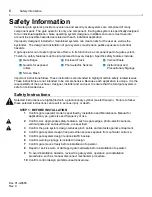
Page 6: ...ot intended to be comprehensive Because each application is unique it is the responsibility of the purchaser designer installer and end user to ensure that the total gate system is safe for its intend...

Page 7: ...3 Leave Installation and Maintenance Manual and Safety Information with end user FOR GATE OPERATORS USING NON CONTACT SENSOR S See instruction supplied with sensor for proper placement Precautions mus...

Page 8: ...to the swing gate system to assist in the protection of people who may come near the gate operating system Also injuries can occur when people put their hands and arms through openings in a grill type...

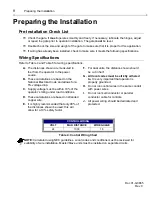
Page 9: ...allows for a 5 voltage drop C Supply voltage must be within 10 of the operator s rating under load conditions D These calculations are based on stranded copper wire E It is highly recommended that on...

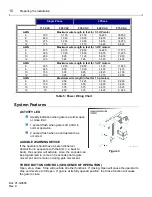
Page 10: ...425 5 700 8 900 8 150 600 900 3 600 5 625 10 100 375 575 2 275 3 525 12 75 250 375 1 425 2 225 Table 5 Power Wiring Chart System Features ACTIVITY LED Steady indication when gate is at either open or...

Page 11: ...uired by the class of operator both an open and close protection device must be used SPECIAL NOTE ABOUT OBSTRUCTION SENSING FROM EITHER INTERNAL OR EXTERNAL SYSTEMS The operator will stop if it senses...

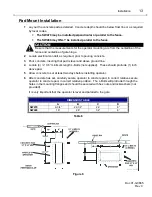
Page 12: ...ions are for right hand operator installation Left hand is opposite 01 G 0665F1 Figure 4 Post Mount for SW470 Operator Only 1 Locate mounting post and electrical conduit locations The operator cabinet...

Page 13: ...ncrete 3 Pour concrete insuring that pad is level and above ground line 4 Locate 4 X 6 minimum length L Bolts not supplied These should protrude 1 inch above pad 5 Allow concrete to set at least two d...

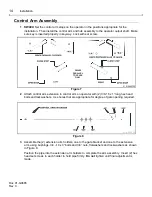
Page 14: ...ol arm extension to control arm on operator with 2 3 8 16 x 1 long hex head bolts and lockwashers Use holes that are appropriate for degree of gate opening required 01 G 0665F3 Figure 8 3 Assemble the...

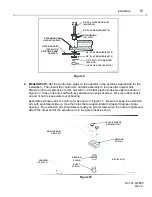
Page 15: ...control arm extension to arm hub with 20 black plastic knobs provided as shown in Figure 10 Place hub onto shaft with key and secure using set screw Be sure rubber seal is on end of hub to keep water...

Page 16: ...tension 01 G 0665F6 Figure 12 2 Adjust the eccentric stop as shown so that the wide area of the eccentric is against the arm Be sure that the control arm and actuator are in a straight line Install th...

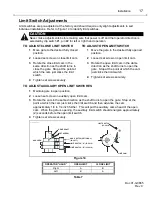
Page 17: ...on 2 Loosed set screw on open limit cam 3 Rotate the open limit cam in the dame direction as the shaft turns to open the gate Stop at the point at which the cam just clicks the limit switch 4 Tighten...

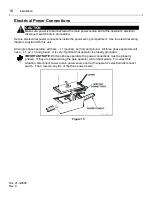
Page 18: ...th this unit All single phase operators will have L1 neutral L2 hot and ground All three phase operators will have L1 L2 L3 and ground It is very important that operator is properly grounded IMPORTANT...

Page 19: ...ocked out at the factory to activate the timer to close move timer disable jumper from bottom two pins show illustration to top two pins Then set time per the chart on page 20 To lock the timer to clo...

Page 20: ...N OFF 141 SEC 144 SEC ON ON OFF OFF 155 SEC 158 SEC OFF ON OFF OFF 167 SEC 170 SEC ON OFF OFF OFF 180 SEC 183 SEC OFF OFF OFF OFF 194 SEC 197 SEC Table 8 Switch 2 Timer to Close Timer to close is lock...

Page 21: ...y These are constant pressure inputs that bypass the processor and may be used only in an emergency if the processor fails Note left right switch does not effect direction STOP BUTTON REQUIRED This is...

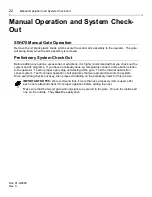
Page 22: ...not already done so temporarily connect a three button station to the operator Test for proper open stop and closing of the gate Test the internal obstruction sensor system Test for proper operation...

Page 23: ...require more frequent maintenance checks C Inspection and service should always be performed anytime a malfunction is observed or suspected D Limit switches may have to be reset after any major drive...

Page 24: ...otor does not run when OPEN or CLOSE button is pressed Building fuse blown or circuit breaker tripped Replace fuses or reset breaker and check for cause Overload protector tripped Reset and check for...

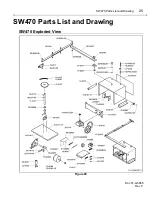
Page 25: ...SW470 Parts List and Drawing 25 Doc 01 G0665 Rev C SW470 Parts List and Drawing SW470 Exploded View Figure 20...

Page 26: ...1 S3 BOARD 10 2101 1 T 1 WRAPPER HOUSING 75 G0089 3 ACTUATOR COLLAR ASSEMBLY 10 2101 2 T 1 BASE PLATE 76 G0597 1 ALARM ASSEMBLY 10 2103 T 1 REDUCER BRACKET 76 G0541 1 HALL EFFECT ASSEMBLY 10 2104 T 1...

Page 27: ...SW490 Parts List and Drawing 27 Doc 01 G0665 Rev C SW490 Parts List and Drawing SW490 Exploded View Figure 21...

Page 28: ...LAR 10 G0539 1 SENSOR SUPPORT BRACKET 76 G0541 1 HALL EFFECT ASSEMBLY 10 G0614 1 ELECTRICAL PANEL 76 G0564 1 ALARM ASSEMBLY 10 G0671 1 CONTROL BOARD BRACKET 80 1003 1 TINNERMAN NUT 11 2002 1 MAIN SHAF...

Page 29: ...C 30 60hz SW490 33 53 SW49000 50 53 20 3100M 5T MOTOR 3 4 HP 575VAC 30 60hz SW490 33 53 SW490 50 53 21 XXXX 21 3260 TRANSFORMER 24V 50VA ALL 115 208 230 460VAC 1PH 3PH 21 10298 TRANSFORMER 575V 3PH AL...

Page 30: ...PLIED INCLUDING ANY IMPLIED WARRANTY OF MERCHANTABILITY OR FITNESS FOR A PARTICULAR PURPOSE OR OTHERWISE AND OF ANY OTHER OBLIGATIONS OR LIABILITY ON SELLER S PART THIS LIMITED WARRANTY DOES NOT COVER...

Page 31: ...aster The software and firmware included in the LiftMaster product as they relate to this documentation are also protected by copyright and contain information proprietary to LiftMaster FOR TECHNICAL...

Reviews: