19
MAINTENANCE SCHEDULE
*
*
Use SAE 30 Oil (Never use grease or silicone spray).
P
P
Repeat ALL procedures.
n
n
Do not lubricate motor. Motor bearings are rated for continuous operation.
n
n
Inspect and service whenever a malfunction is observed or suspected.
n
n
CAUTION: BEFORE SERVICING, ALWAYS DISCONNECT OPERATOR FROM POWER SUPPLY.
Check at the intervals listed in the following chart.
EVERY
EVERY
EVERY
EVERY
ITEM
PROCEDURE
MONTH 3 MONTHS
6 MONTHS
12 MONTHS
Drive Chain
Check for excessive slack.
Check & adjust as required.
Lubricate.*
l
P
P
Sprockets
Check set screw tightness
l
l
P
P
Fasteners
Check & tighten as required
l
l
P
P
Manual Disconnect
Check & Operate
l
l
P
P
Bearings & Shafts
Check for wear & lubricate
l
l
P
P
Safety Reverse
Check for proper operation
l
l
P
P
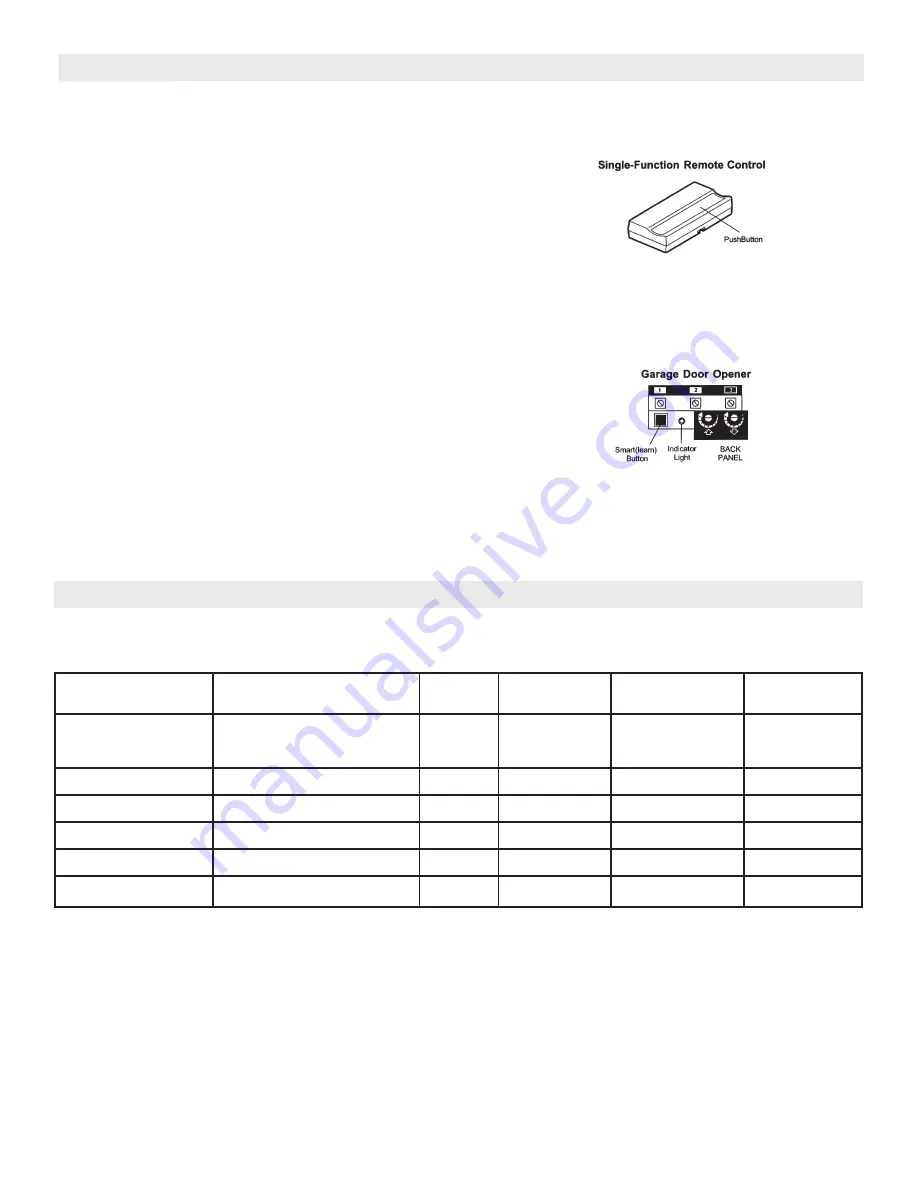
FIGURE 14
FIGURE 15
TO ADD A REMOTE CONTROL:
1. Press and
hold the remote control push button. See
Figure 14.
2. Then press and release the “Smart” (learn) button on
the back panel of the opener in Figure 15. The
indicator light on the panel will begin to blink and the
opener light will
flash once.
3. Release the remote control push button.
Now the opener will operate when that remote control
button is pressed. Test it by pressing the remote button
to see that the door goes up and down.
If you release the remote control push button before
the opener light flashes, the opener will not accept
the code.
TO ERASE ALL REMOTE CONTROL CODES:
Press and hold the “Smart” button the opener panel until
the indicator light turns off (about 6 seconds). All
transmitter codes are now erased. Then follow the
steps above to re-program each remote control.
Code programming instructions are also located on
the opener panel.
RECEIVER AND REMOTE CONTROL PROGRAMMING (CON’T)


