background image

5

RT10010


ENGLISH

EN

safety rules

Projectile Hazard

Pieces of debris may be ejected from the chipper-
shredder while operating. 

Be alert.

WARNING

Always wear proper clothing and safety gear.

DANGER

Close fitting clothing and safety approved eye 
protection must be wore at all times around the 
chipper-shredder. Wear boots or sturdy shoes that 
will improve footing around slippery surfaces. 

Keep Operator Work Zone Clear

Keep work zone clear of debris while working to 
ensure safe footing.

WARNING

Rapid retraction of the starter cord will pull hand and 
arm towards the engine faster than you can let go. 
Unintentional startup can result in entanglement, 
traumatic amputation or laceration. 
Broken bones, fractures, bruises or sprains could 
result.

When starting engine, pull the starter cord slowly 
until resistance is felt and then pull rapidly to avoid 
kickback.

WARNING

Improper treatment or use of the chipper-shredder 
can damage it, shorten its life and void your 
warranty.

Use the chipper-shredder only for intended uses. 
Operate only on level surfaces. DO NOT expose 
chipper-shredder to excessive moisture, dust, or 
dirt. DO NOT allow any material to block the cooling 
slots. 
DO NOT use the engine if:


– Equipment sparks, smokes or emits flames


– Equipment vibrates excessively


– Equipment makes unusual sounds


– Equipment is damaged

CAUTION

Fuel and fuel vapors are highly flammable and 
extremely explosive. 
Fire or explosion can cause severe burns or death.  
Unintentional startup can result in entanglement, 
traumatic amputation or laceration. 

When adding or removing fuel:

Turn the engine off and let it cool for at least two 
minutes before removing the fuel cap. Loosen the 
cap slowly to relieve pressure in the tank.
Only fill or drain fuel outdoors in a well-ventilated area.
DO NOT pump gas directly into the chipper-
shredder at the gas station. Use an approved 
container to transfer the fuel to the chipper-
shredder.
DO NOT overfill the fuel tank.
Always keep fuel away from sparks, open flames, 
pilot lights, heat and other sources of ignition.
DO NOT light or smoke cigarettes.

When starting the engine:

DO NOT attempt to start a damaged engine. 
Make certain that the gas cap, air filter, spark plug, 
fuel lines and exhaust system are properly in place.
Allow spilled fuel to evaporate fully before 
attempting to start the engine.
Make certain that the chipper-shredder is resting 
firmly on level ground.

When operating the chipper-shredder:

DO NOT move or tip the chipper-shredder during 
operation.
DO NOT tip the chipper-shredder or allow fuel or oil 
to spill.

When transporting or servicing the chipper-shredder:

Make certain that the fuel shutoff valve is in the off 
position and the fuel tank is empty.
Disconnect the spark plug wire.

When storing the chipper-shredder:

Store away from sparks, open flames, pilot lights, 
heat and other sources of ignition.

DANGER

Summary of Contents for RT10010

Page 1: ... SOLUTIONS LTD Unit 17 18 Bradley Trading Estate Standish WN6 0XQ UK 44 1942 715 407 WWW CHAMPIONPOWEREQUIPMENT CO UK SAVE THESE INSTRUCTIONS Important Safety Instructions are included in this manual MADE IN CHINA RT10010 MODEL NUMBER ENGLISH SVENSKA ...

Page 2: ... Champion Power Equipment Support AN IMPORTANT MESSAGE ABOUT TEMPERATURE Your Champion Power Equipment product is designed and rated for continuous operation at ambient temperatures up to 40 C 104 F When your product is needed your product may be operated at temperatures ranging from 15 C 5 F to 50 C 122 F for short periods If the product is exposed to temperatures outside this range during storag...

Page 3: ...ferent kinds of information The safety symbol is used with a key word to alert you to potential hazards in operating and owning power equipment Follow all safety messages to avoid or reduce the risk of serious injury or death DANGER indicates an imminently hazardous situation which if not avoided will result in death or serious injury DANGER WARNING indicates a potentially hazardous situation whic...

Page 4: ...moved Use only approved spark plug testers Running engines produce heat Severe burns can occur on contact Combustible material can catch fire on contact DO NOT touch hot surfaces Avoid contact with hot exhaust gases Allow equipment to cool before touching Maintain at least 3 ft 91 4 cm of clearance on all sides to ensure adequate cooling Maintain at least 5 ft 1 5 m of clearance from combustible m...

Page 5: ...CAUTION Fuel and fuel vapors are highly flammable and extremely explosive Fire or explosion can cause severe burns or death Unintentional startup can result in entanglement traumatic amputation or laceration When adding or removing fuel Turn the engine off and let it cool for at least two minutes before removing the fuel cap Loosen the cap slowly to relieve pressure in the tank Only fill or drain ...

Page 6: ...branches Do not use for other purposes 11 Always make sure the spark plug wire is disconnected from the engine when not in use and before cleaning or maintenance Preparation 1 Be thoroughly familiar with all controls and with proper use of the equipment 2 Make sure the spark plug wire is disconnected until operation 3 Safety Gear a Always wear safety shoes or heavy boots when operating the machine...

Page 7: ...der the influence of alcohol drugs or medication 5 The machine owner should instruct all operators in safe chipper shredder operation 6 Always operate the chipper shredder with all safety equipment in place and all controls properly adjusted for safe operation 7 Always operate the chipper shredder at manufacturer s recommended speed 8 Always keep hands and feet clear of moving parts 9 When loading...

Page 8: ... x 2 13 Air filter 14 Blade shaft cover 15 Discharge chute 16 Axle 17 Hex key 18 Spanner x 2 19 Spark plug tool 20 M10 Handle assembly fasteners x 2 21 M8 Foot mounting bracket fasteners x 2 Chipper shredder Controls and Features Read this owner s manual before operating your chipper shredder Familiarize yourself with the location and function of the controls and features Save this manual for futu...

Page 9: ...9 RT10010 ENGLISH EN Controls and Features Parts Included Your RT10010 gasoline powered chipper shredder ships with the following parts Oil Funnel 1 PPE Helmet 1 Spark Plug Socket 1 ...

Page 10: ...eel 12 with valve stem facing out onto the axle 16 fig 1 Slide the first wheel on the circlip side of the axle 16 The circlip on the axle 16 will prevent the wheel 12 touching the base frame 9 By tightening the wing bolt on the axle frame fig 4 the axle 16 will be held in position and allow the wheel nuts to be tightened fully Slide the first wheel on the circlip side of the axle 16 NOTE NOTE NOTE...

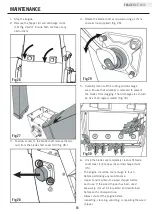
Page 11: ...acket 8 with those in the base frame 9 and secure in place using the two bolts and nuts from the foot mounting bracket fasteners 21 Using a 12mm spanner securely tighten both nuts fig 7 Hopper 1 Place the hopper 4 in position on the base frame 9 above the cutting blades and slide it across so that the pins of the frame engage the hinges on the hopper 4 fig 8 Fig 5 Fig 6 Fig 7 Fig 8 DO NOT place ha...

Page 12: ...in position on the rear of the base frame 9 and slide it across so that the pins of the frame engage the hinges on the discharge chute 15 fig 11 2 Check the lower side of discharge chute 15 so that the two holes are aligned with the holes in the frame fig 12 3 Tighten the two bolts safely with the 13mm wrench clockwise fig 13 It is necessary to ensure that the bolts of the fixed funnel 4 and the u...

Page 13: ... without oil and must be filled before starting Engine sump capacity JRE 1005 600ml JRE 1007 1100ml Use SAE30 or 10W30 oil Only use unleaded 91 RON Research Octane Number petrol Purchase fuel in quantities that can be used every 30 days to prevent gum or foaming inside the container and or fuel tank NOTE NOTE 3 If the oil level is below the end of the dipstick refill use a funnel do not tip wood c...

Page 14: ...in good condition and operate under proper tension To remove install and inspect the drive belt refer to the maintenance section of this instruction manual Spark plug Use only the spark plug that is recommended for this wood chipper Make sure that the electrode is clean and the air gap is correct refer to the specs of the spark plug manufacturer To remove install and inspect the spark plug refer t...

Page 15: ...ty glasses and earmuffs when the wood chipper is in use WARNING Ensure the hopper 4 and discharge chute 15 are fitted and secured with T bolts 20 otherwise the safety interlock will prevent the motor from starting IMPORTANT 4 THROTTLE Move the throttle lever slightly left towards the symbol 5 STARTER Grip the recoil starter and slowly pull until resistance is felt then pull the recoil starter rapi...

Page 16: ... to start the engine Fig 20 Fig 23 Fig 21 Fig 22 The following types of material can be used in the wood chipper Trees including roots Branches Waste from cut branches Waste from hedge trimming Bamboo Chipping Shredding The wood chipper is not suitable for materials including glass metal plastic bags stones fabric vines soft leafy material and waste without firm consistency eg kitchen waste WARNIN...

Page 17: ...TION Blades are sharp handle with care It is recommended to use gardening or safety gloves when handling or cleaning the blades CAUTION 2 Once the material makes contact with the blades it will be pulled into the machine no need to push it in 1 When finished stop the engine as described in Stop the engine section of this manual Fig 24 Fig 25 The wood chipper may clog if too much fine material is f...

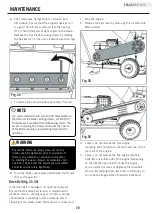
Page 18: ... removed to prevent the blades from clogging The discharge area should be free of all organic matter fig 30 6 Once the blades are completely clean refit blade shaft cover 14 hopper 4 and discharge chute 15 The engine should be cool enough to touch before performing any maintenance Inspect and maintain the wood chipper before each use If the wood chipper has been used previously it must be inspecte...

Page 19: ...orrect clearance is maintained Remove debris from the engine muffler and moving parts Debris on a hot engine can be a fire hazard Clean debris and chaff from the engine cylinder head cylinder head fins blower housing rotating screen and muffler areas After the first 25 hours of use the engine oil requires to be replaced and then every 50 hours after that Refer provided engine manual for further en...

Page 20: ...ly tightened WARNING It is recommended to add Loctite 222 Threadlocker to the thread of the blade securing screws Loctite 222 Threadlocker is available from all Bunnings stores This assists in securing the screw and reduces the chance of the blade securing screw vibrating loose whilst in operation NOTE Drive Belt fig 35 39 If the drive belt is damaged it should be replaced Ensure that the drive be...

Page 21: ...drive belt it should deflect approximately one belt thickness Belt replacement Adjust the engine position so that the engine can be moved sufficiently allowing the drive belt to be removed installed over the drive pulleys Adjust the belt tension as described in Belt tension adjustment 5 When you have the belt tensioned correctly firmly tighten the four engine mounting bolts and refit the belt cove...

Page 22: ...tion Check the tyres to ensure they are at the recommended tyre pressure 20 psi Never operate the wood chipper on the back of a vehicle or on a trailer Before Storage Follow the instructions below for storing your log splitter between uses Allow the wood chipper to cool before storage Clear debris from hopper and discharge chute Use a damp cloth to clear exterior surfaces of the engine and wood ch...

Page 23: ...thanol content of less than 10 by volume Maintenance Valve Clearance Intake 0 13 0 17 mm 0 005 0 007 in Exhaust 0 18 0 22 mm 0 007 0 009 in Note Tech bulletin regarding the valve adjustment procedure is on www championpowerequipment com An Important Message About Temperature Your Champion Power Equipment product is designed and rated for continuous operation at ambient temperatures up to 40 C 104 ...

Page 24: ...e to ON position Fuel tank empty Fill fuel tank with fuel Spark plug disconnected Connect spark plug Faulty spark plug Replace spark plug Choke lever in wrong position Adjust choke lever position Emergency stop button in OFF position Reset the button by rotating it right until it pops up Faulty engine Contact customer service The material to be shredded is not pulling through the unit Blades jamme...

Page 25: ...speed Fast Maximum engine speed Warning Regulator compliance mark Wear a breathing mask Beware of cutting fingers Keep children and bystanders a safe distance from working machine Read these instructions carefully Wear hearing protection No smoking sparks or flames Unleaded Petrol Do not touch parts that are hot from operation Serious burns may result Be sure the engine s switch is off before tran...

Page 26: ... bör den föras tillbaka till detta intervall före drift Under alla omständigheter måste produkten alltid användas utomhus i ett välventilerat område och borta från dörrar fönster och andra ventiler Notera modell och serienummer samt datum och inköpsställe för framtida behov Ha denna information tillgänglig vid beställning av reservdelar och vid tekniska eller garanti förfrågningar Champion Power E...

Page 27: ... måttliga personskador OBS VARNING utan symbolen för säkerhetsvarning anger en potentiellt farlig situation som om den inte undviks kan leda till skador på egendom OBS FARA anger en omedelbart farlig situation som om den inte undviks kommer att leda till död eller allvarlig personskada DANGER FARA anger en potentiellt farlig situation som om den inte undviks kan leda till död eller allvarlig perso...

Page 28: ...a säkerheten instruktioner och bekanta sig med produktens drift kan leda till allvarlig egendomskada skada eller död FARA Koppla alltid bort tändstiftsledningen under tiderav inaktivitet rengöring och underhåll Det förhindrar oavsiktlig start som kan orsaka skada på egendom eller person FARA Gnistor kan resultera i brand eller elektriska stötar Vid underhåll av generatorn Koppla ifrån sladden till...

Page 29: ...tigt den ger konstiga ljud den är trasig eller skadad OBS Bränslen och bränsleångor är mycket brandfarliga och extremt explosiva Brand eller explosion kan orsaka svåra brännskador eller dödsfall Oavsiktlig start kan resultera i intrassling traumatisk amputation eller laceration Vid tankning Stäng av motorn och låt den svalna i minst två minuter innan du tar bort bränslelocket Lossa locket långsamt...

Page 30: ...tändstiftskabeln är frånkopplad från motorn när den inte används och före rengöring eller underhåll Förberedelser 1 Var bekant med alla kontroller och med korrekt användning av utrustningen 2 Se till att tändstiftskabeln är bortkopplad tills enheten skall användas 3 Säkerhetsutrustning a Bär alltid skyddsskor eller tunga stövlar när maskinen används b Bär alltid skyddsglasögon när maskinen används...

Page 31: ...ering 5 Maskinägaren ska instruera alla operatörer i säker användning 6 Använd alltid flistuggen med säkerhetsutrustning på plats och alla kontroller korrekt utförda för säker drift 7 Använd alltid flistuggen med tillverkarens rekommenderade hastighet 8 Håll alltid händer och fötter borta från rörliga delar 9 Placera aldrig dina händer inuti maskinen när du laddar flistuggen Lägg aldrig händerna e...

Page 32: ...a manual för framtida referens 1 Kåpa för utkast 2 Trattinlopp 3 Ljuddämpare 4 Kvisttratt 5 Bensintank 6 Lock för oljetank 7 Transporthandtag 8 Benstöd 9 Bottenram 10 Nödstopp 11 PÅ AV knapp 12 Hjul x 2 13 Luftfilter 14 Kåpa för knivaxel 15 Utkast 16 Axel 17 Insexnyckel 18 Skruvmejsel x 2 19 Tändstiftsnyckel 20 Monteringskit för handtag M10 x 2 21 Monteringskit för fotstöd M8 x 2 ...

Page 33: ...33 RT10010 SVENSKA SV MONTERING Medföljande tillbehör Din RT10010 bensindrivna flistugg kommer med följande tillbehör Oljetratt 1 Skyddshjälm 1 Tändstiftnyckel 1 ...

Page 34: ... bottenramen på maskinen i avsett hål fig 3 4 Montera det andra hjulet på den utskjutande änden av axeln på andra sidan och fäst det med bricka och mutter 5 Däcken skall hålla ett tryck av 20 PSI 1 37 Bar Fig 1 Fig 2 Fig 3 Fig 4 Din flismaskin kräver lite montering Den här enheten levereras från vår fabrik utan olja Maskinen måste fyllas med bränsle och olja före drift Om du har några frågor angåe...

Page 35: ...d hålen i bottenramen Fäst stödet med följande bultar och mutter Använd en 12mm nyckel för att dra åt muttrarna Fig 7 Hopper 1 Placera inmatningen i rätt läge på bottenramen ovanpå knivbladen och skjut på den så att piggarna i ramen krokar tag i fästena på inmatningen fig 8 Fig 5 Fig 6 Fig 7 Fig 8 Ha inte händer eller andra kroppsdelar inuti maskinen Ta INTE i knivbladen med händer eller andra kro...

Page 36: ...ig 10 Utkastet 1 Placera utkastaren 15 i rätt läge i bakkant på bottenramen och dra den rätt så att piggarna på ramen låser i fästena på utkastaren fig 11 2 Kolla nederkant på utkastaren så att hålen linjerar med hålen i ramen fig 12 3 Fäst bultarna med 13mm nyckel Fig 13 Det är viktigt att bultar är åtdragna och monteringen korrekt för att undvika onödiga faror VARNING MONTERING ...

Page 37: ...1100ml Använd SAE30 eller 10W30 olja Använd endast blyfri bensin eller ännu hellre alkylatbensin Bensinen måste vara inköpt de senaste 30 dagarna för att förhindra att den klumpar sig i motorn eller i tanken NOTERA NOTERA 3 Om oljenivån inte syns på stickan måste mer olja fyllas på Använd oljetratten luta INTE maskinen Oljenivå är tillräcklig när halvvägs upp på oljestickan Använd premium 4 takts ...

Page 38: ...rka bort spill Drivrem För att din flistugg ska fungera optimalt måste drivremmen vara i bra kondition och vara korrekt spänd För att ta bort montera och inspektera drivremmen se Underhåll Tändstift Använd endast rekommenderat tändstift Kontrollera att elektroden är ren och att gapet är korrekt Se mer om Tändstift i sektionen om Underhåll Det är stora skillnader mellan olika tändstift OBS Fig 16 I...

Page 39: ...matningstratten är tom innan du startar maskinen Du bör använda handskar skyddglasögon och hörselkåpor när flistuggen är igång VARNING Säkerställ att inmatningstratten och utkastaren är ordentligt monterad för annars kommer säkerhetssystemet att förhindra start av motorn OBS hare 5 START Ta tag i dragsnöret och dra det långsamt tills motstånd känns Drag sedan hårt och bestämt Låt repet vindas upp ...

Page 40: ... poppar upp igen Nödstoppet måste återställas för att maskinen skall kunna startas igen Fig 20 Fig 23 Fig 21 Fig 22 Följande material kan gå igenom din flistugg Träd inkl rötter Grenar Material från trädklippning Material från häckklippning Bambu Tugga och strimla Du bör inte låta material som innehåller glas metall plast inkl plastpåsar stenar tyg stavar eller annat material som inte kan ska tugg...

Page 41: ...kommer göra knivbladen slöa Vid större grenar bör du tugga en i taget Mata in material med den grövre änden först Utkastets kåpa 1 Mata in materialet i inmatningstratten Stå inte ivägen för utkastet fig 24 OBS Knivbladen är vassa var försiktig Använd handskar när du arbetar runt knivbladen OBS 2 När det kommer i kontakt med knivarna kommer det att dras in i maskinen du behöver inte putta på 1 När ...

Page 42: ...al är borttaget som kan få knivarna att fastna Området runt utkastet skall vara helt fritt från organsikt material fig 30 6 När knivarna är helt fria återmonteras allt i omvänd ordning Motorn skall vara tillräckligt sval för att du skall kunna röra den Inspektera och underhåll din flistugg inför och efter varje användning Stäng alltid av motorn innan du genomför något underhåll t ex inspektion ren...

Page 43: ...n att bli slöa Nya knivblad kan köpas som tillbehör Byt alltid båda bladen samtidigt Säkerställ att knivbladen tas omhand och att korrekt avstånd mellan dem efterlevs Fig 31 Fig 32 Fig 33 4 Rotera axeln efter behov med en 17mm nyckel 5 Det finns två knivblad och de är båda fästa i en roterande trumma med fyra bultar Ta först bort skräp och material från området runt knivarna och bultarna Rotera ax...

Page 44: ...r Loctite 222 gänglim på skruvarna som håller fast knivbladen Detta minskar risken för att skruvarna lossnar och knivbladen kommer ur sitt läge vilket kan orsaka skador NOTERA Drivremmen fig 35 39 Om drivremmen är skadad ska den bytas Säkerställ att drivremmen alltid är korrekt spänd Om den är sliten kan den tappa greppet detta hörs ofta genom ett högt skrikande ljud vilket medför att knivarna går...

Page 45: ...ing så att drivremmen rör sig motsvarande en tjocklek när du pressar hårt på drivremmens mitt Byte av drivrem Flytta motorn så att drivremmen blir tillräckligt slak Detta gör att de kan ta bort och installera en drivrem För att justera se ovan 5 När du spänt drivremmen korrekt drar du åt de fyra motorfästena hårt och monterar allt annat i omvänd ordning UNDERHÅLL ...

Page 46: ...ck 1 37 Bar Använd aldrig flistuggen när den står på ett flak eller en vagn Innan förvaring Följ dessa anvisningar inför förvaring och mellan användande Stäng av motorn genom att stänga bränslekranen och låta motorn gå torr Rensa skräp och smuts från inmatningstratt och utkastet Använd en fuktig trasa för att rengöra ytor runt motor och maskin Om nödvändigt kan du använda en mindre kompressor för ...

Page 47: ...sintanken är tom Fyll på bensin Tändstiftet är inte anslutet Anslut tändstiftet Dåligt tändstift Byt tändstiftet Choken är i fel läge Justera choken till rätt läge Nödstoppet är i läge OFF Återställ nödstoppet genom att vrida på det Fel på motorn Kontakta kundservcie Materialet som skall tuggas går ej igenom maskinen Knivarna är blockerade Rensa material som orsakat blockeringen Igentäppt Ta bort ...

Page 48: ...rån roterande delar Sakta Minimum gaspåslag Snabb Max gaspåslag Varning Regulator compliance mark Använd andningsmask Risk för handskador Håll barn och åskådare på säkert avstånd från maskinen Läs detta noga Använd hörselskydd Förbud mot rökning gnistor och lågor Blyfri bensin Rör inte delar som är varma Risk för brännskador Säkerställ att motorn är avstängd inför transport eller underhållsarbeten...

Page 49: ...ndre än 10 volymprocent Alkylatbensin går väldigt bra att använda Ventiljustering Intag 0 13 0 17 mm 0 005 0 007 tum Avgas 0 18 0 22 mm 0 007 0 009 tum Obs Teknisk bulletin beträffande ventiljusteringen proceduren finns på www championpowerequipment com Ett viktigt meddelande om temperatur Din Champion Power Equipment produkt är designad och utvecklad för kontinuerlig drift vid omgivningstemperatu...

Page 50: ...50 ENGLISH RT10010 SPECIFICATIONS ENGLISH RT10010 Parts Diagram SPECIFICATIONS 23 ...

Page 51: ... 013 Rubber block 2 57 TR10010 039 External spherical bearing with square seat UCF206 2 19 100379 016 Flat Washer Ø8 4 58 TR10010 040 Blade 2 20 TR10010 014 Screw M8 x 30 4 59 TR10010 041 2 Cutter assembly 1 21 TR10010 015 Round Head Square Neck Ccrew M8 x 50 4 60 TR10010 042 2 Bucket holder 1 22 TR10010 016 Locknut M10 4 61 TR10010 043 Flange Bolt M10 x 16 5 23 100380 017 Flange Bolt M8 x 20 13 6...

Page 52: ...3 4 46 3 5 3 6 3 7 3 8 3 9 42 4 0 4 1 49 5 3 9 0 8 9 8 8 45 2 7 2 8 2 9 43 48 44 72 8 5 8 6 8 7 9 7 6 7 6 8 7 0 3 7 1 0 1 1 00 36 47 50 5 1 5 2 5 4 5 5 5 6 5 7 6 5 6 6 6 9 71 73 74 75 76 77 78 79 9 1 9 2 9 3 9 4 9 5 96 9 7 9 6 98 99 1 0 2 1 0 4 1 0 5 6 7 8 9 10 12 15 23 24 25 28 29 74 63 8 2 8 3 9 4 1 0 2 1 0 2 102 Engine Parts Diagram SPECIFICATIONS ENGLISH RT10010 25 ...

Page 53: ...00 Z101910 00A0 Muffler Assembly 1 27 90502 1220 00A0 Pin 12 x 20 2 80 16072 Z010110 00A0 Governor Support Bolt M6 x 21 Blue White Zinc 1 28 12121 Z190110 0000 Exhaust Valve 1 81 16070 Z100120 00A0 Governor Support Assembly Blue White Zinc 1 29 12111 Z100110 0000 Inlet Valve 1 82 16062 Z100110 00A0 Governeor Rod Blue White Zinc 1 30 13111 Z190310 00A9 Piston 1 83 16012 Z080110 00A0 Throttle Valve ...

Reviews: