background image

CPG4000DHY-DF-UK - 3500W DUAL FUEL OPEN FRAME INVERTER GENERATOR

OPERATION

19

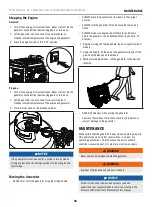
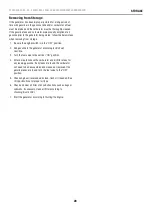
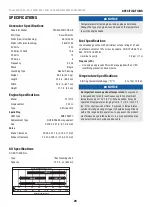
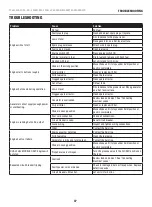
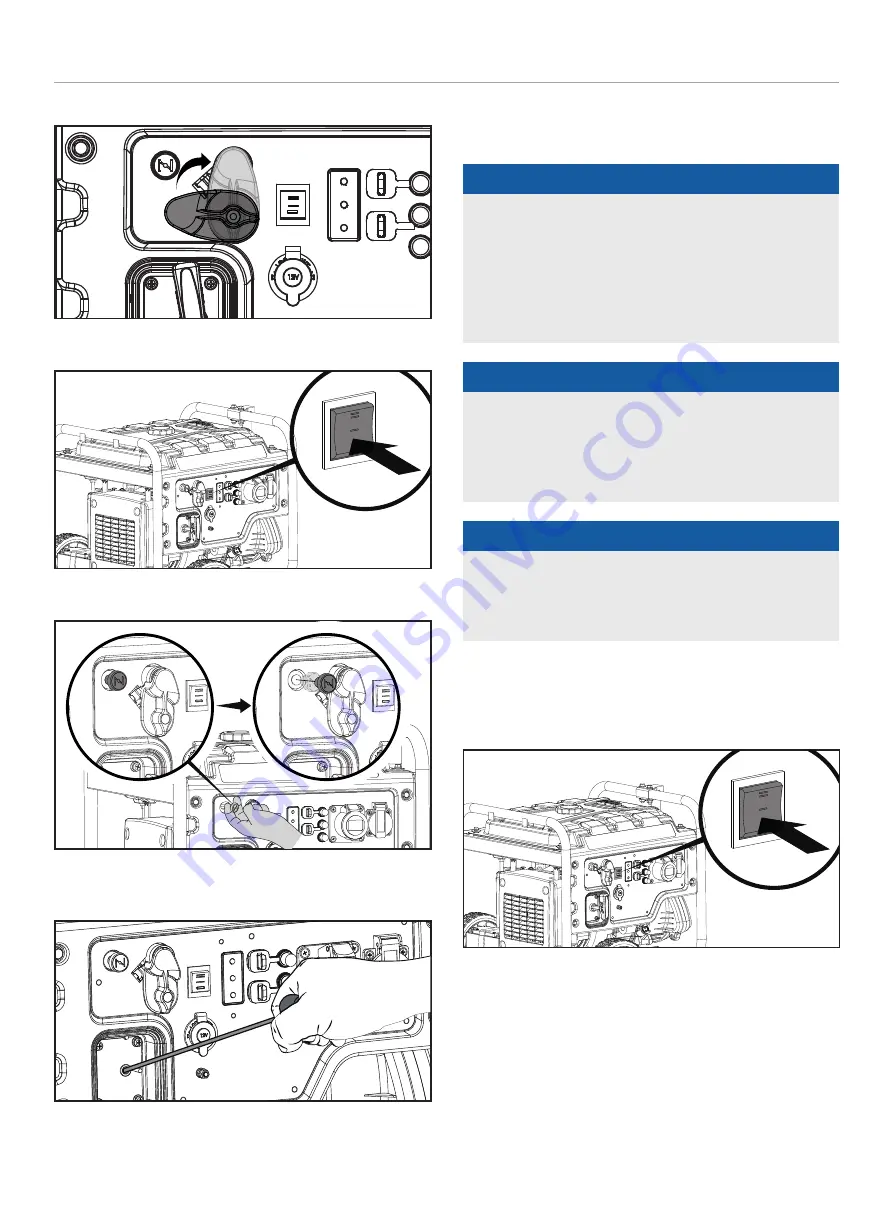
3.  Make sure the fuel selector is set to gasoline operation.

4.  Push the engine switch to the “ON” position.

ECO

ECO

5.  Pull the choke out to the full “CHOKE” position.

6.  Pull the recoil cord slowly until resistance is felt and then pull 

rapidly.

7.  DO NOT OVER– CHOKE. Allow the engine to warm up several 

seconds before gradually pushing the choke to the “RUN” 
position.


NOTICE

For gasoline restarts with hot engine in hot ambient > 
86°F (30°C):

 Keep the choke in 75% of the “CHOKE” position 

for 1-2 pulls of the recoil cord. After first pulls, push choke to 
the “RUN” position for up to 3 more pulls of the recoil cord. 
Too much choke leads to spark plug fouling/engine flooding 
due to the lack of incoming air. This will cause the engine not 
to start.


NOTICE

For gas starting in cold ambient < 59°F (15°C): 

The choke 

must be in 100% of the “CHOKE” position for manual start 
procedures. Do not over-choke. As soon as engine starts, 
allow the engine to warm up for 20 seconds and push the 
choke knob in the “RUN” position.


NOTICE

If the engine starts but does not continue to run make certain 
that the generator is on a flat, level surface. The engine is 
equipped with a low oil sensor that will prevent the engine 
from running when the oil level falls below a critical threshold.

Electric Start

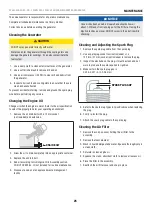
1.  Make certain the generator is on a flat, level surface.

2.  Push the engine switch to the “ON” position.

ECO

ECO

3.  Pull the choke out to the full “CHOKE” position.

Summary of Contents for CPG4000DHY-DF-UK

Page 1: ...s which should be read and understood before operating the product Failure to do so could result in serious injury This manual should remain with the product Specifications descriptions and illustrati...

Page 2: ...rting the Engine Propane LPG 20 Connecting Electrical Loads 22 Do Not Overload Generator 22 Eco Economy Mode 23 12V DC Automotive Style Outlet 23 Parallel Operation 23 Stopping the Engine 24 Moving th...

Page 3: ...service Every effort has been made to ensure the accuracy and completeness of the information in this manual at the time of publication and we reserve the right to change alter and or improve the pro...

Page 4: ...angle hands feet hair clothing and or accessories Traumatic amputation or severe laceration can result Keep hands and feet away from rotating parts Tie up long hair and remove jewelry DO NOT wear loos...

Page 5: ...r sprains could result When starting engine pull the recoil cord slowly until resistance is felt and then pull rapidly to avoid kickback DO NOT start or stop the engine with electrical devices plugged...

Page 6: ...ition LPG will burn skin if it comes in contact with it Keep any and all LPG away from skin at all times When adding or removing gasoline DO NOT light or smoke cigarettes Turn the generator off and le...

Page 7: ...ound dry vegetation A spark arrestor may be required The operator should contact local fire agencies for laws and regulations relating to fire prevention requirements If installed clean every 100 hour...

Page 8: ...requirements before operation Electric Shock Failure to use in dry conditions and to observe safe practices can result in electric shock Improper connections to a building can allow current to backfee...

Page 9: ...allow you to more safely operate the product SYMBOL MEANING Start ON STOP or OFF Gasoline Valve ON Propane Valve ON Choke Knob Choke Pull choke knob to CHOKE position Run Push choke knob to RUN posit...

Page 10: ...e DANGER Move generator outside and far away from windows doors and intake ventilation covers 1 Check oil level Recommended oil is 10W 30 2 Add fuel When adding gasoline use a minimum octane rating of...

Page 11: ...uture reference Generator 1 Fuel Cap Remove to add fuel 2 Gasoline Tank 2 9 gal 11 L 3 Air Filter Protects the engine by filtering dust and debris from the intake air 4 Recoil Starter Used to manually...

Page 12: ...run Check oil level 7 AC Overload Reset Button Used to re energize receptacles after overload fault 8 Parallel Outlets Used for parallel operation parallel kit sold separately 9 Ground Terminal Consul...

Page 13: ...ug Socket 1 Smart Charger 1 LPG Hose With Regulator 1 Assembly Parts Wheels 8 in 20 3 cm Never Flat Wheel A 2 Wheel hub cap B 2 Roll Pin C 2 Large R clip D 2 Engine Vibration Mounts Support Leg with V...

Page 14: ...emove wheel hub cap B from wheel by inserting a small screwdriver into the slot provided and pry upward 3 Slide the roll pin C through the wheel A from the outside 4 Slide the roll pin through the mou...

Page 15: ...K NOTICE Once oil has been added a visual check should show oil about 1 2 threads from running out of the fill hole When using the dipstick to check oil level DO NOT screw in the dipstick while checki...

Page 16: ...e engine is running or hot WARNING Pouring gasoline too fast through the fuel screen may result in gasoline splashing over the generator and operator while filling NOTICE The generator engine works we...

Page 17: ...and disconnect the cylinder Plug the outlet usually by a plastic protective cap if one is available Keep cylinders away from heat and ventilated when in a vehicle WARNING If there is a strong smell of...

Page 18: ...ands are wet could result in electrocution WARNING During operation the muffler and exhaust fumes will become hot If adequate cooling and breathing space are not supplied or if the generator is blocke...

Page 19: ...re pulls of the recoil cord Too much choke leads to spark plug fouling engine flooding due to the lack of incoming air This will cause the engine not to start NOTICE For gas starting in cold ambient 5...

Page 20: ...position longer than 5 seconds it could damage the starter Starting the Engine Propane LPG Manual Start 1 Make certain the generator is on a flat level surface 2 Disconnect all electrical loads from...

Page 21: ...seconds release the switch and wait at least ten seconds before attempting to start the engine again 8 DO NOT OVER CHOKE Allow the engine to warm up several seconds before gradually pushing the choke...

Page 22: ...your electric utility company s power lines or to another power source may be against the law In addition this action if done incorrectly could damage your generator and appliances and could cause se...

Page 23: ...nnecting the battery charging cable included to a battery that is installed in a vehicle disconnect the vehicle battery ground cable from the negative battery terminal 2 Plug the battery charging cabl...

Page 24: ...r on its wheels in the upright position ALWAYS turn the generator off and ensure the fuel valve is closed ALWAYS make sure engine and muffler are cooled down before the generator can be handled safely...

Page 25: ...ontainer 3 Replace the oil drain bolt 4 Add oil according to Add Engine Oil in Assembly section DO NOT OVERFILL Oil not included for routine maintenance 5 Dispose of used oil at an approved waste mana...

Page 26: ...be used on any forest covered land brush covered land or grass covered land unless the engine is equipped with a spark arrestor Adjusting the Governor WARNING Tampering with the factory set governor w...

Page 27: ...l valve to the horizontal OFF position 5c Use the drain bolt on the carburetor to empty any excess gasoline from the carburetor into an appropriate container Use a funnel and appropriate hose if neces...

Page 28: ...s in the OFF position 2 Add gasoline to the generator according to Add Fuel Gasoline 3 Turn the fuel valve to the vertical ON position 4 After 5 minutes check the carburetor and air filter areas for a...

Page 29: ...8 6 7 4 4 15 6 26 7 37 8 48 9 10W 30 5W 30 Full Synthetic 10W 40 5W 30 NOTICE Temperature will affect engine oil and engine performance Change the type of engine oil used based on the temperature to...

Page 30: ...logged spark arrestor Clean spark arrestor Generator cannot supply enough power or overheating Generator is overloaded Review load and adjust See Connecting Electrical Loads Dirty air filter Clean or...

Reviews: