11
EVERY 90 DAYS OR 500 HOURS MAINTENANCE
1.
Change crankcase oil. Use type and grade oil as specified in the section on "Compressor Oil
Specifications".
2.
Check entire system for air leakage around fittings, connections, and gaskets, using soap solution and
brush.
3.
Tighten nuts and capscrews as required.
4.
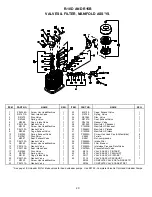
Check and clean compressor valves, replace springs, discs and seats when worn or damaged.
CAUTION
Valves must be reinstalled in original position. Valve gaskets should be replaced each time valves are
serviced.
5.
Pull ring on all pressure relief valves to assure proper operation.
GENERAL MAINTENANCE NOTES
PRESSURE RELIEF VALVE:
The pressure relief valve is an automatic pop valve. Each valve is properly
adjusted for the maximum pressure permitted by tank specifications and working pressure of the unit on
which it is installed. If it should pop, it will be necessary to drain all the air out of the tank in order to reseat
properly. Do not readjust.
TANK DRAIN VALVE:
Drain valve is located at bottom of tank. Open drain valve daily to drain condensation.
Do not open drain valve if tank pressure exceeds 25 PSIG. The automatic tank drain equipped
compressor requires draining manually once a week.
PRESSURE SWITCH:
The pressure switch is automatic and will start compressor at low pressure and stop
when the maximum pressure is reached. It is adjusted to start and stop compressor at the proper pressure
for the unit on which it is installed. Do not readjust.
BELTS:
Drive belts must be kept tight enough to prevent slipping. If belts slip or squeak, see V-belt
maintenance in preceding section.
CAUTION
If belts are too tight, overload will be put on motor and motor bearings.
COMPRESSOR VALVES:
If compressor fails to pump air or seems slow in filling up tank, disconnect unit from
power source and remove valves and clean thoroughly, using compressed air and a soft wire brush. After
cleaning exceptional care must be taken that all parts are replaced in exactly the same position and all
joints must be tight or the compressor will not function properly. When all valves are replaced and
connections tight, close hand valve at tank outlet for final test. Valve gaskets should be replaced each time
valves are removed from pump.
Summary of Contents for HR3-6
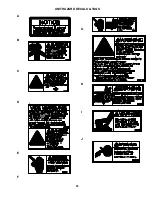
Page 25: ...25 UNIT HAZARD DECALS TAGS A B C D E F G H I J ...
Page 26: ...26 K L M N O P Q R S T U V W 140 175 PSIG ...
Page 27: ...27 PUMP HAZARD DECALS TAGS 1 2 3 4 5 6 ...
Page 31: ......


